Just because I am capable of fixing something does not mean I want to fix it!
But sometimes we have to do things we don’t really want to do.
We’ve been in our house for 4 weeks (can you believe it’s been 4 weeks already?!)!
When we moved in 4 weeks ago our backyard looked this green.

Well, after 4 weeks of watering 3x a week with our sprinkler system, the grass kept getting yellower and deader in a few areas.
I put it off for a few weeks, but finally decided I better go out and deal with the sprinkler system. Something was obviously wrong with it.
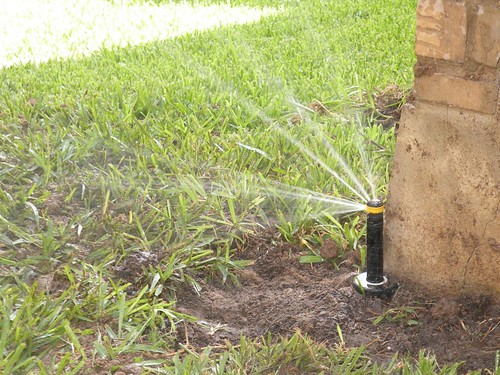
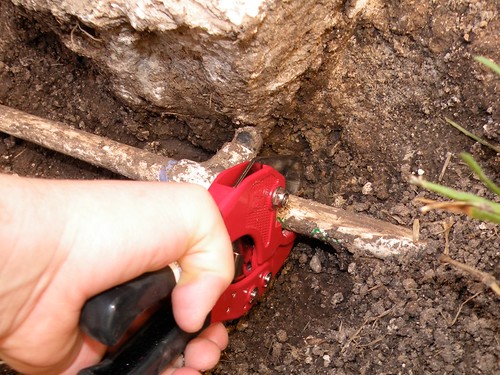
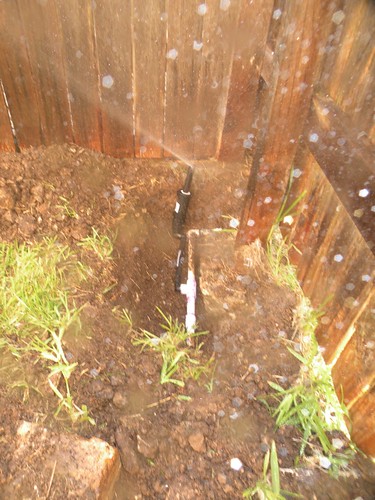
What I found were TWO broken sprinkler heads – and two HUGE sloppy puddles where those heads are located.
Now, at this point I was ready to just call a sprinkler guy to come fix it. But hubbs gently reminded me that we are on a limited budget and if we spend a few hundred dollars to fix the sprinkler system then we won’t be able to spend a few hundred dollars elsewhere – like, say, new furniture or paint for our walls.
Gah! Why does he always have to be so logical? Crap. Now I’m in a predicament. My yearning for paint won out and I very begrudgingly agreed to fix the system myself. Yes, I did just say “myself”. Or, I should rather say, I agreed that I would try to fix the system myself. “Try” being the key word here.
I shut the sprinkler system off, let the area dry out for 2 days, and then dug two holes to survey the situation. (All the while reminding myself that several gallons of paint for my Living Room will be worth this torture.)
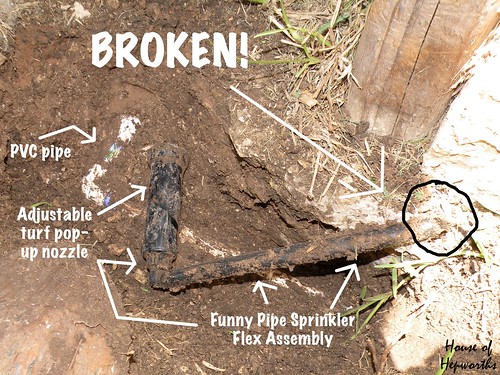
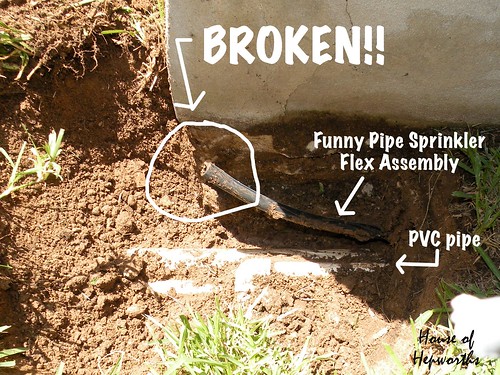
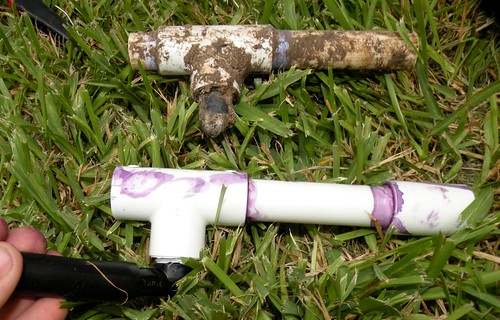
Two broken Funny Pipe Flex Assembly arms. Great. This is just great. {{New Living Room Paint. New Living Room Paint…}}
Ok, so let me be honest here. Before I went to our local hardware store today I didn’t even know what those black tube-y arm things were even called.
I honest to God had NO CLUE what I was doing today. I’ve never done sprinkler systems. NEVER. I literally just learned as I went along – so you can too! (Trust yourself!).
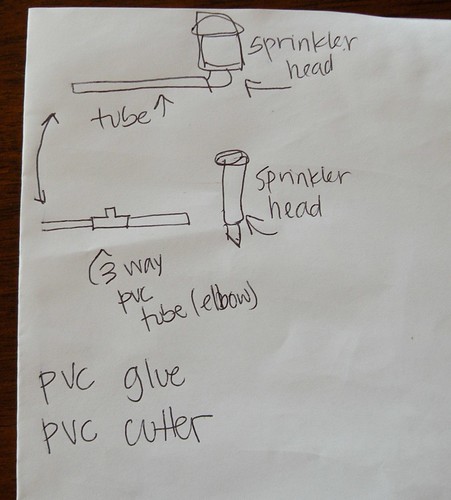
I figured out that the tube that connects the PVC water line pipe to the actual sprinkler head was broken on both.
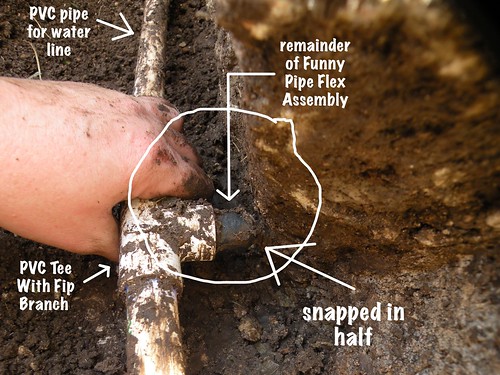
In order to fix the leak, I was going to have to replace the Funny Pipe Flex Assembly arms, but they were attached to the PVC Tee, which meant it had to come out as well.
I made my grocery list and headed to our local hardware store.
(Believe it or not, this actually makes total sense to me. Haha!)
I also took my camera so I could look back at the pictures I snapped while I was at the house in case I needed a visual while figuring out what parts I needed to buy.
As I show you how I replaced the old heads with new ones, I’ll give you a run-down on what items I purchased in case you need to do this same project at home (hopefully not!).
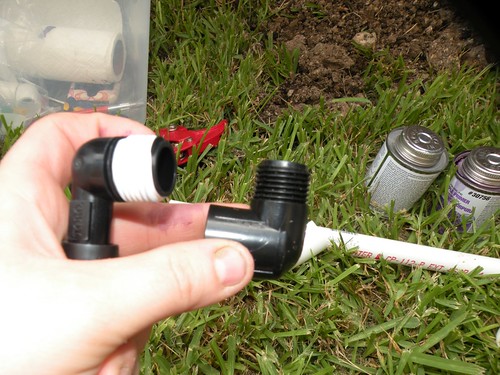
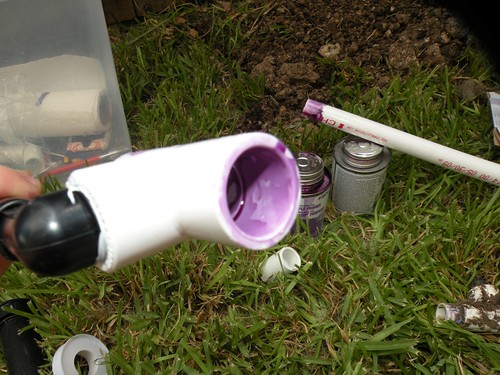
Take your Funny Pipe Flex Assembly and wrap Thread Seal Tape around all the male threaded parts.
The Thread Seal Tape is ALWAYS needed when you are doing any type of plumbing work. It forms a water-tight seal. The tape isn’t sticky at all but just wrap it around a few times tightly like you would with regular tape.
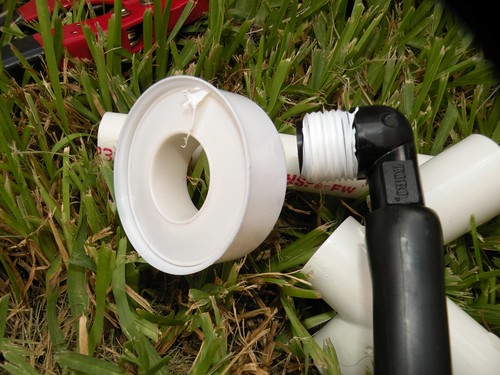
Now it should look like this:
Next, you need a PVC Tee with Fip Branch (No clue what that means). This T shaped PVC pipe will attach the water line to the Funny Pipe Flex Assembly. Make sure you buy a Tee that is smooth through the main part and female-threaded at the top.
*For those that don’t know what male and female threading looks like, a male threaded part is threaded on the outside, while a female threaded part is threaded on the inside. The male threaded part goes inside the female threaded part.*
Once the tape is in place, simply screw on the Tee.
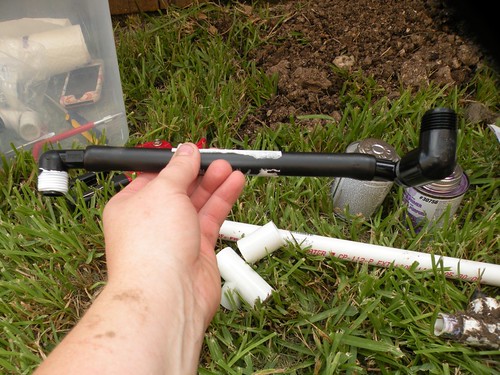
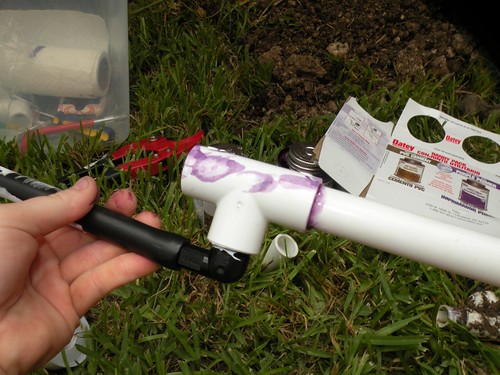
Now take the other end of the Funny Pipe apart, add the Thread Seal Tape, and then put it back together. This is the end the sprinkler head will attach to.
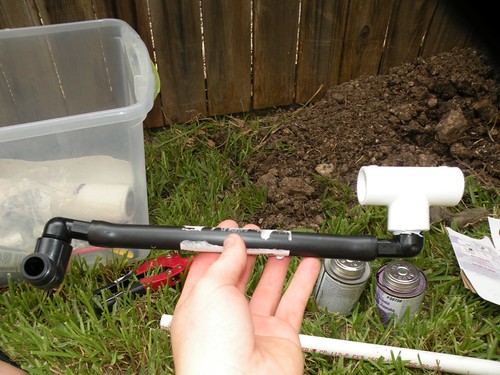
Now you are ready to start gluing PVC pipe!
I can’t just cut out the old pipe from the ground and add the same exact piece. Because I cut the pipe out they are now too short, so I have to extend the pipe using additional pipe and a coupling. I’ll explain this more as I go along.
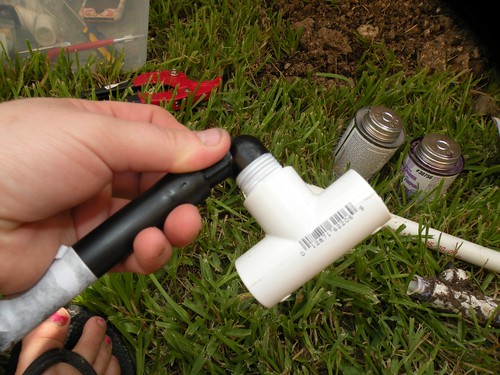
For starters we need to glue the Tee piece to the extra piece of PVC I purchased. Here’s how to glue PVC pipe together.
I bought this package:
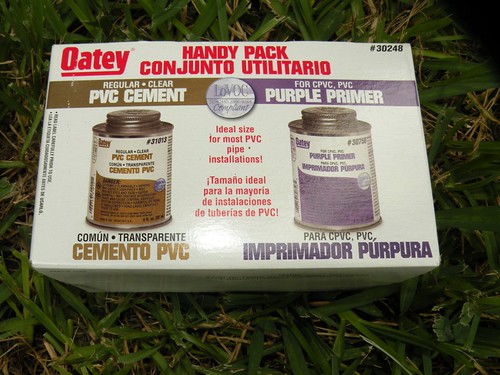
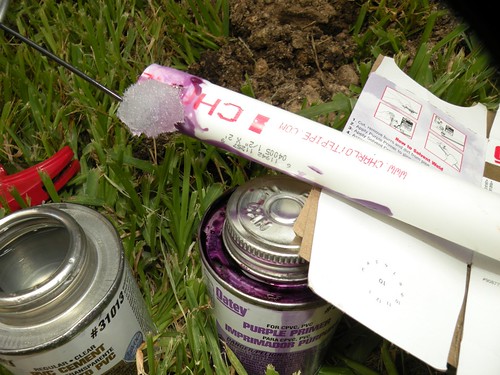
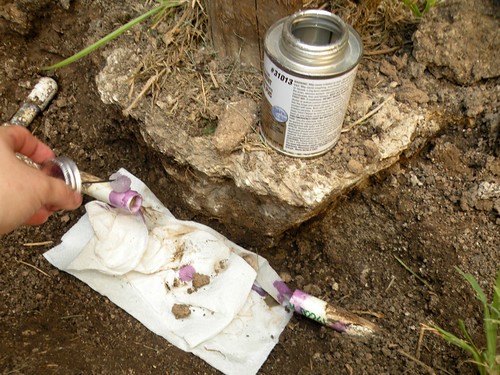
I don’t know WHY you have to prime the pipes with purple primer. All I know is that you have to, so do it.
Using the brush attached inside the lid (like rubber cement), paint around any part of PVC that will be glued together.
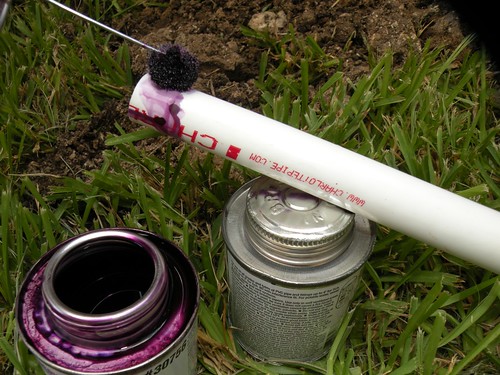
When the primer is dry (in about 10 seconds) take the cement and paint around the same part.
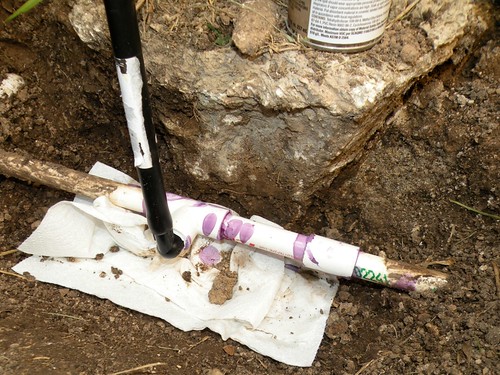
Quickly insert both pieces together, then twist 1/4 a turn. Let dry for about 30 seconds or so.
Take your piece, cut the long pipe the length you need, and then glue the coupling.
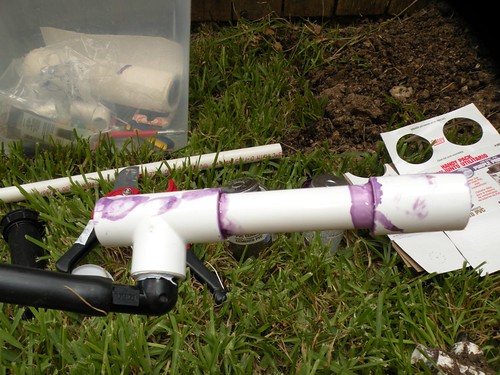
Now it’s time to attach your new pipe segment to the existing pipe in the ground!
You’ll need to use a PVC cutting tool and cut the old segment out before you can glue the new one in.
Old and new:
Clean your pipe in the ground (I used a Lysol wipe and a paper towel), prime it with the purple primer, then add the glue.
Insert your new pipe and let it all dry for a few minutes.
We are almost done, I swear! (Try doing this when it’s 100 degrees outside!)
Now it’s time to attach the new sprinkler head to your brand new pipe! (Don’t forget the thread tape).
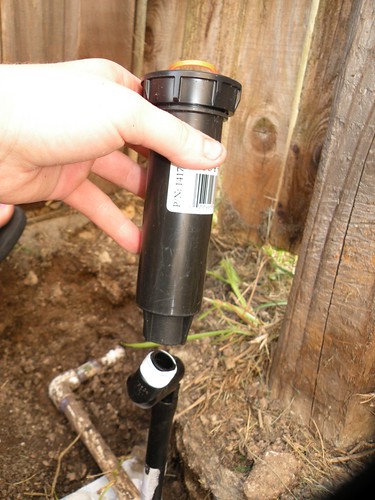
Once it’s screwed on you’ll need to pull up on the orange tab. That will raise the water arm. Remove the orange top, but be careful not to let the tube pop back into the sprinkler head. Hold it tightly!
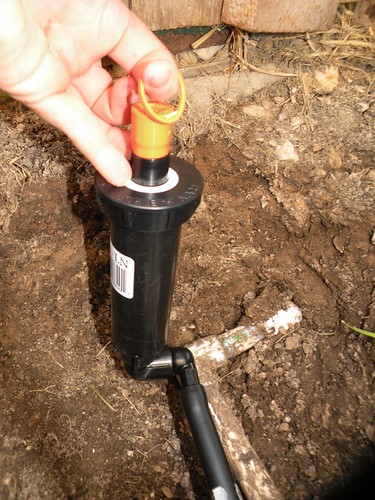
Attach your new nozzle (this is purchased separately, so don’t forget it!).
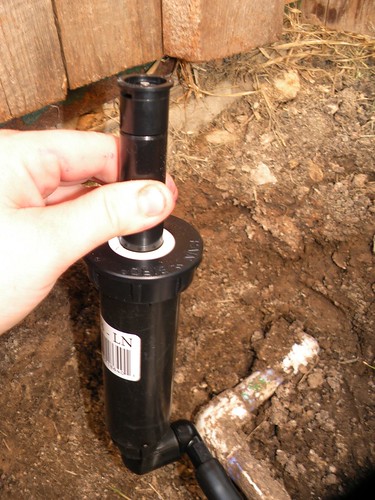
And now you are DONE with the installation of a brand new sprinkler head and Funny Pipe Flex Assembly.
Stand back and admire your work. Pray it doesn’t leak.
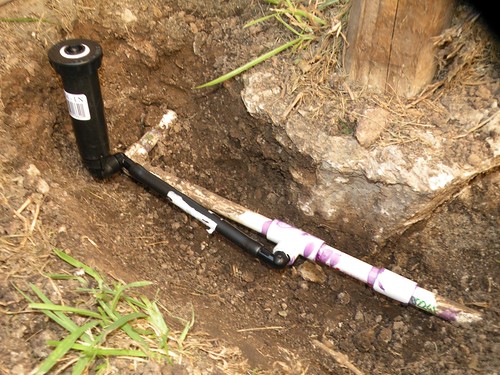
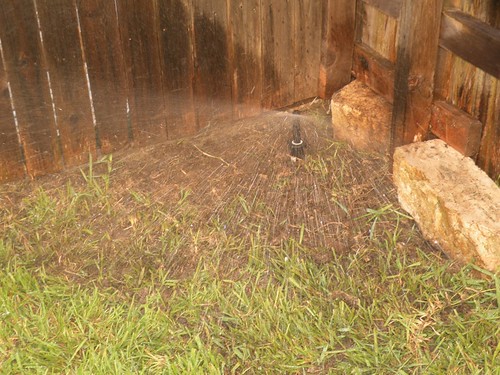
Time to test it out before I bury it again. (It seems like such a shame to bury such amazing work.)
By golly, it works! And on the very first try no less!!
Finally, bury that sucker back in the ground. Turn on the water one more time for a final photo-op and to admire your handy work!
I learned all.of.this. TODAY. It’s amazing what a few hundred dollars will do to motivate someone! 😉
Oh, also, I spent about $40 total on all the parts and tools I needed for this project!
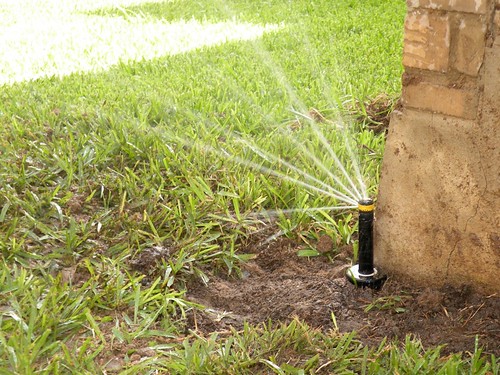
And because I said I had to replace TWO sprinkler heads today, here is the completed 2nd one. Beautiful, isn’t it?!
I’ll never look at another sprinkler head the same way ever again!
Oh, and in case you are wondering why I’m out here doing this and not my wonderful hubbs…
He works. A.LOT. Plus, I’m the handy one in this family. He can do computer “stuff” like no other, and he’s great at lots of things, but when it comes to home repairs, that’s my job. My dad forced taught his daughters how to do all sorts of Do-It-Yourself stuff. I hated it at the time, but now I’m eternally grateful! I can replace a toilet, build a shed, install a new car engine, change a flat, tile, install doors. I’m just one of the guys. But with boobs. 😉
If I could give one bit of advice, I’d say no matter what you are doing, stop. Take a step back. Survey the situation. Study it. Figure out how it works. If you understand how it works, then you can usually figure out how to take it apart, fix it, and put it back together. I always learn how something works before I tackle it. A project may seem totally overwhelming at first, but if you just step back and study it for a few minutes and understand how the entire thing works, it will become much less overwhelming! At that point you can determine if you think you can take it apart yourself and fix it, or if it’s just too complicated and a repair person needs to be called.
* Install or fix your sprinkler system AT YOUR OWN RISK. This tutorial is based on my own personal opinion. What works for me may not work for someone else. If you try to fix your system and end up making a bigger mess than when you started, don’t panic. Back away and call a professional.
Yahoo! Nice work, Allison! You should do more home improvement tutes. Very empowering!
Great job! I bet you are so proud of yourself, I know I would be!
Ok this was way too good, you should have been paid for it…good entertainment too I was laughing my *&% off! Don’t take for granted your talent, thought processes like you have are rare! I was under the sink this a.m. and by 7:00pm I finally called my handyman…we’re hoping the carpets will dry in our hot weather this week…
You are frickin’ (can I say that on here?!) awesome. Seriously!!!
Nice work!
I’m the repair(wo)man in our house too. My dad taught me everything and what he didn’t teach me I learn through books. My husband loves it!
I loved your comment about being one of the guys with boobs. 😛 😀 You did an awesome tutorial. Thanks for sharing! 😛
Congrats!! You did good girl!! (Guy with boobs!!) You make me laugh. But this was a great tutorial. I have a similar project that I am currently looking at. I am studying as you said to do!!
Thanks
Hugs
SueAnn
Good for you! A few years ago when we moved into this house I wss the one with a job and hubby was home with the girls and taking care of the house. I would give him a to-do list and he would do it or his mother not sure. well he didn’t blow out the sprinkler system in the fall like I told him too. Every single pipe burst when it froze over the winter with water still in it! I wish we had had your tutorial.
OH MY! You have just reached a whole new level of awesomeness. Way to go!! I am so impressed at your sprinkler fixing abilities!!!
Okay, I have done a lot of sprinkler repairs in my day, but I have never in my life seen a funny sprinkler attachment. And the fact that THAT is what it is called makes me laugh!
Awesome! I am so impressed that you did this. I don’t know that I could ever have figured this out. I admit it happened to us one time and I had the landscaper fix it!
Allison, this is why I like you. My house is the exact same way, with me being the fearless repair person, and most of the stuff I’ve done on my blog has been a first attempt. Bravo on the sprinkler repair!
With Superman working overseas, the kids and I have taken over many of the formerly “his” tasks and I can say that nothing feels better than competence. You need to keep posting these tutes, too, because stuff breaks in addition to stuff looking ugly!
you are my hero
This is such a timely post! We have two we need to replace, too. (And by we,I mean my husband!) Great job!
smiles!
Im standing in awe! You are amazing — and I bet your dad is standing back sooo proud of his GIRL!
Your hubby is lucky he has you for many things I suppose but the money you saved that boy!!! wow… remind him often. 🙂
great post!
Great work! My guy is a “computer guy” too…Thanks for linking up to Mad Skills Monday!
Woot! I am just beginning to learn home repairs, so your blog supports my theory of HAVE NO FEAR!
Fantastic article!!!!!! I’ve been wanting to do this for my site but didn’t have the chance to take awesome photos like these.
Can I feature this article on my website: http://www.ecolandscapegroup.com?
Great work.
Wells
Good job!
Just have a few comments-
1) You should also flush out the sprinkler lines before you put the new top (nozzle) on the sprinkler. When you have a leak like this it will have dirt in the line and it will clog the new nozzle if not washed out.
2) FIP stands for Female Iron Pipe thread, also seen as FIPT. There is also FHT or Female Hose Thread. There is also MIPT and MHT.
3) A good sprinkler repair guy would be able to do this job in under an hour. At my rate, with parts, about $110 + tax. And if anything goes wrong with the repair all you have to do is make a phone call!
amazing photos you got there! wooo . maintaining and checking repair is a good idea to prevent any break or leak. good article