So the other day I made this jute ball out of a basketball and a floor mat. Remember? So I…
Read More
Helping you DIY your home one awesome project at a time
So the other day I made this jute ball out of a basketball and a floor mat. Remember? So I…
Read More
Since living in this apartment, I don’t have a good place to store the kids coloring books. For two months…
Read More
I bought this sign for my Easter Decor: After I popped the flowers off the sign I didn’t want to…
Read More
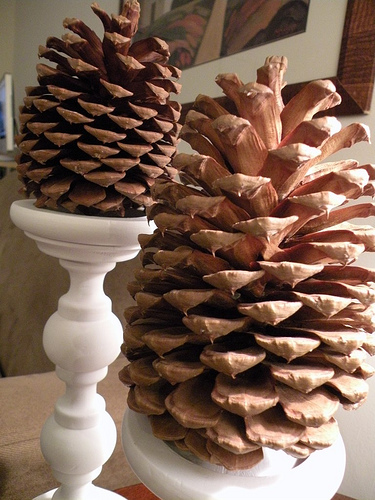
Aren’t these the most awesome pine cones ever? They are HUGE! I can’t wait to do all sorts of awesome…
Read More
Do you remember yesterday when I showed you this: I still can’t believe I found it at Goodwill for only…
Read More
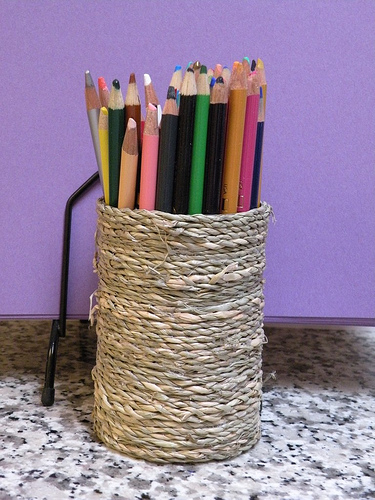
My kids LOVE to draw. As Thrifty Decor Chick would say, they luuuurve it! What they love even more than…
Read More
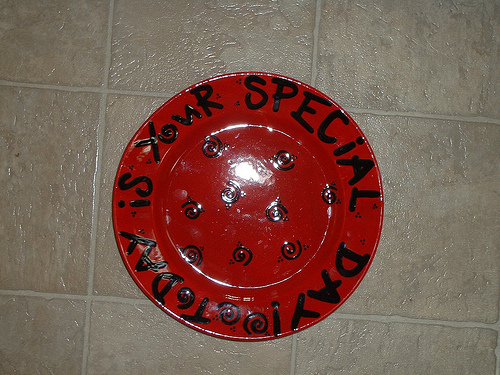
Today for Flashback Friday is the “You Are Special” plate. I’ve seen this plate around for years and wanted to…
Read More
These are so easy! It’s a pretty simple, kinda lame thing to post, but my kids just love them so…
Read More
Making playdough is so much more fun than buying it. Making it is half the fun in playing with it!…
Read More
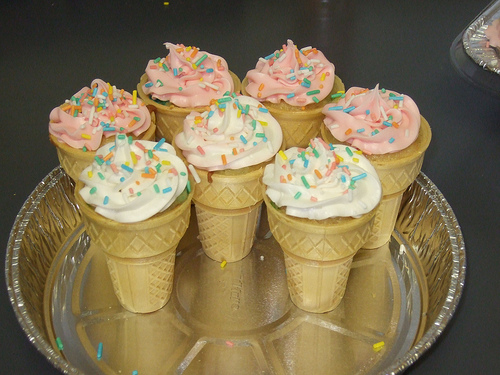
These cupcakes are so cute and so easy to make! Seriously, aren’t they adorable? They are cake baked inside an…
Read More