Posts Tagged ‘pillows
Hibiscus pillow from a bedsheet
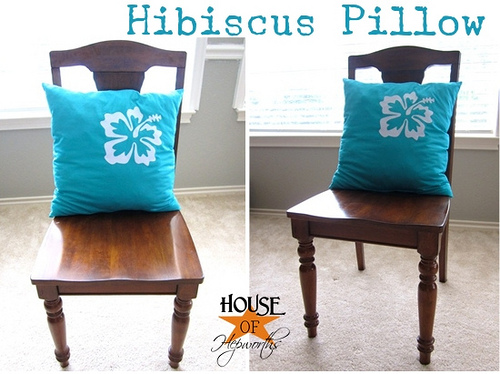
A few months back I scored several decorative pillows from my neighbor’s garage sale, all for $1 each.
A dollar for a pillow is cheaper than buying a bag of pillow stuffing!
If you need a pillow, like, right this very second, or you just aren’t lucky enough to find a garage sale 3 doors down with dollar pillows, Goodwill always has a plethora of crappy pillows to choose from.
Then I found this purdy teal flat sheet at Walmart for only five bucks.
Yes, I went to Walmart. {sigh} I try to avoid it at all costs (you guys know how much I love Target!}, but sometimes I head over there just to check out the decor. Walmart has some pretty good decor, believe it or not. (Shocking, I know!)
Anyway, I washed the sheet, just in case you didn’t figure it out from the photo above labeled “washed sheet”.
Making your own pillows is so easy. It’s probably the easiest thing to sew.
Okay, so the making of the pillow… It’s so easy, if you blink you may miss the tutorial, so pay close attention!
Cut two equal squares. Make sure they are square. Make sure they are the same size. I folded my sheet in half and cut both at once. I *think* they were 18″ squares. Just measure the size you want your pillow and add like 2 inches. This will allow for a nice thick 1 inch seam allowance that should hold up to fraying.
{See, I’m so lazy I don’t even finish the edges.)
Now, bust out the sewing machine and sew the fabric together around the edges. Make sure to put the right sides facing each other and to leave a big gap on one side to stuff the filling in.
I could NOT for the life of me figure out which was the right or wrong side of this sheet, so I just picked one. Made my job a whole heck of a lot easier.
Now is where I tell you to fold your pillow right side out, then iron on the big fuzzy hibiscus flower you printed from your Silhouette. But I suck majorly and didn’t take any photos of that.
Also, Target, Walmart, Michael’s, and the like have loads of iron-ons that are ready to go and so ca-ute, so if you don’t have a Silhouette, don’t go drown your sorrows and end up with alcohol poisoning. Just go pick out an equally cute (or cuter) iron-on. They even have blingy ones!
Okay, so once your pillow case is all ironed and your iron-on is stuck and beautiful, grab a pair of scissors and cut your crappy pillow open. Feel free to take out your frustration for not owning a Silhouette on the crappy pillow.
Ah! Glorious pillow filler. Loads and loads of glorious pillow filler. It’s just sitting there begging me to stuff it into a new beautiful pillow.
Okay, so this is the hardest part. Are you ready for it? Seriously. Pay.Attention.
Are you paying attention?
Pull the stuffing out of the crappy pillow. Shove the stuffing into the new pillow.
Eek. That was so friggin’ hard. Srsly. Almost killed me.
I’m not sure why I keep on talking and talking since my photos are already labeled with the directions. I just think this tutorial is so nice, I’m repeating it twice.
So this part really is the most tricky part. Honest. I’m not joking this time. {shocking, I know}.
Pin your gaping hole in the side of your awesome new pillow closed. Using a zipper foot on your sewing machine (the foot that lets you sew right up next to the edge), slowly stitch the hole closed.
If you and sewing machines just don’t mix, hand sew it instead. Or you can just do what Beth does and hot glue it closed. Whatever floats your boat.
And that, my friends is all there is to it.
And in case you are thinking I’m crazy for coming home and sewing a pillow, I didn’t. I made it before the vacay. I just never had a chance to post it before we hit the road, Jack.
Cost breakdown:
$1 for crappy pillow
$5 for flat sheet, but I have tons left for other projects
GRAND TOTAL: $6, but probably more like $2 if you subtract the extra leftover fabric.
Oh, almost totally forgot… I made the pillow for my daughter Kinsey’s bedroom.
Here are a few more pillows I’ve made recently (okay, fine, here are all the pillows I’ve made; all two of them.)
Cloth Napkin Pillows (with hidden zippers):
Can it get any more random and DIY than napkins from placemats, cloth napkins, and bed sheets? I’m on a laundry roll.
Have you made any pillows recently? Do you have any totally random things you’ve made lately from linens around your house?

How to make a pillow from a placemat; the easiest DIY sewing project ever
Alrighty kids, I’ve had one too many Diet Dr Peppers today and I’m feeling jittery!
I guess I need to go lay down on my… BRAND.NEW….
Pillow!
Yuppers, I made a Placemat Pillow. I know what you are thinking, “Another blogger made yet another pillow from a placemat…”
It’s true. No excuses here. I’m going where no man too many men women have gone before. I’m about the 10 thousandth person to make a placemat pillow.
Hopefully my plethora of pictures and my awesome tutorial writing skills will make my Placemat Pillow more awesomespice than the rest of them.
For starters, I found this linen placemat at Target on clearance (do I ever buy anything at Target not on clearance?
First thing I did with this placemat was wash it, hung it out to dry, and ironed it.
I’d say {obviously} you can only make these pillows with fabric placemats that are double thick, but sometimes it’s not so {obvious} to others, so please, don’t buy a stack of plastic placemats. It is impossible to stuff with polyfill anything that is only one layer thick.
So, next up, after my placemat is all wershtd and ironed is to take a seam ripper and carefully rip out the seam on the bottom of the placemat. Don’t rip too big a hole though – just enough to stuff with polyfill.
See, the hole really isn’t that big.
Now take a bunch of this stuff and stuff it inside the pillow {I bought my polyfil at HobLob}.
I tried to fluff and pull apart each handful of polyfil before I stuffed it in the pillow.
Once you have a very fluffy pillow, take a needle and matching thread and carefully stitch your hole back up.
Easy Peasy.
Now you are done. OMG, this pillow was seriously the EASIEST pillow I’ve ever made. I’m not even sure I can say I “made” it because it was so easy and I hardly did anything to create this masterpiece.
I’m finally starting to get a small collection of pillows for my couch. I want a whole bunch of fun mismatched ones, but holy-camoly, pillows are NOT CHEAP! But my placemat one was! I think I spent about $4 total for the placemat (clearance) and polyfil (I still have half a bag left).
And that, my friends, is the 12,458th tutorial online teaching you how to create a placemat pillow.
I love original ideas here at HoH. I would love to be creative and have every single post I make be a brand-new original idea. But like I was telling Beth the other day, I’m decorating my house for me. And if I see something online that I love and want to copy, I’m gonna copy it! Because a) it’s my house, and b) most people that come to my house will be seeing the idea for the first time anyway and will assume I made it up myself! Ha!
Now go make yourself a placemat pillow and post your link in my comments section so we can all enjoy your pillow too!
Toodles.

pillows & candles & tables, oh my!
The family room is s-l-o-w-l-y coming together.
Can you believe I found that candle holder @ GW in LA before I moved? Can you double believe I was actually going to paint it??
I’m totally diggin’ the green now!
Last time I showed you my family room it looked like this:
Ack, I can’t even look at it. It’s blinding me. Except my baby girl. She’s cute.
So I’m strollin’ through el Tar-jay-o and I come across these adorable little pillows on clearance for $6.97 each.
Score baby!
Adorable, right? I was a puddle right there in the store. Good thing it was payday!
So I scooped those puppies up and took them home.
And then I broke about 20 laws and might go to jail for even admitting this ONLINE, but…
I tore the tags off.
Gasp. Shhh, don’t tell anyone.
And, on a side note. Yikes! Look at that thumb nail. I seriously need to stop biting my nails (such a disgusting habit) and get myself a mani STAT.
So back to the pillows…
Don’t they look great?!
I’m just loving how this room is coming together!
I swapped the ottoman for a black round coffee table I had upstairs. I LOVE the way it looks with this couch!
And for an exact side-by-side, or rather a top-to-bottom comparison…
Here’s the living room a month ago and now. And please TRY to imagine that all the walls are painted lovely colors and I’ve got moulding everywhere.
Now here’s where we play one of those games that’s always in the back of People magazine. Circle the differences you see….
Fine. I’ll just tell you.
So, let’s see… in addition to removing the huge dryer and most of the CRAP from the background, I changed out the candles on my candle holders on the wall behind the couch, I moved the cute little girl to the left of the couch
, I swapped the ottoman for the round black coffee table and added some stuff to the table, and I added the pillows.
I threw this little ensemble together from My personal Goodwill I’ve got set up in the dining room (which is rapidly becoming depleted. How come no one donates to my GW store?).
I’m thinking the stark-white pot needs to be painted, but I like everything else.
Except that ca-ute clock from Ikea? Ya, that damn thing tick-tocks and it’s so LOUD. I feel like the Capin’ on Peter Pan whenever he hears the tick-tock of the croc coming his way. So I am now boycotting winding it up every day. It’s just a cute little thing that doesn’t really tell time.
For some reason I’m really diggin’ the red candle and green holder together. I didn’t plan for them to be together. It just happened. Like destiny. I needed a candle for the holder, and it was the only one I had in my stash. True love.
And just to keep it real here…
This is what my beautiful family room looked like LESS THAN ONE HOUR after I took the above photos…
Oh, yes, my friends. My little minions err, I mean munchkins, can mess up a room in a New York minute.
{sigh}
I was tempted to get mad and irritated. Maybe I did a little at first. Okay, fine, who am I kidding? I was pretty ticked. (“Keep your toys upstairs in the game room!!”)
But when I took the picture of the mess I realized that one day these little babies of mine won’t even play with these little kid toys anymore. And then one day after that they won’t even live in my home anymore.
And that made me sad. And then I smiled at their toys and tried to enjoy them because one day my babies will be all grown up and I’ll be sad that there aren’t any build-a-bears or pillow pets or baby doll bottles or blanket forts laying around my family room.
One day my room will stay clean.
And I’ll miss them.
But, seriously. Aren’t these pillows adorable?!


Hey! I'm Allison Hepworth. Welcome to my blog. I love showing tutorials for cool crafts, DIY projects, renovations, and decorating. My family and I live in Austin, Texas. To find out more or to contact me click 


