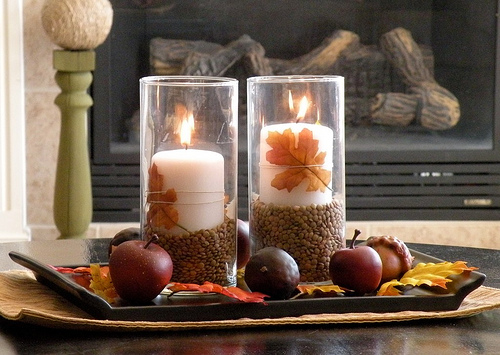
As much as I liked the centerpiece on my coffee table, it really needed a Fall makeover. My new centerpiece…
Read More
Helping you DIY your home one awesome project at a time
As much as I liked the centerpiece on my coffee table, it really needed a Fall makeover. My new centerpiece…
Read More
I picked a cabinet for all my spices and cooking stuff… It sat like this for exactly 5 days before…
Read More
When you see something like this: Don’t pass it up! I got this cute little worn out flower pot at…
Read More
~**~**~ Dollar Store Frame ~**~**~ (Can I get any more unoriginal than that?!) Call me Captain Obvious, but just in…
Read More
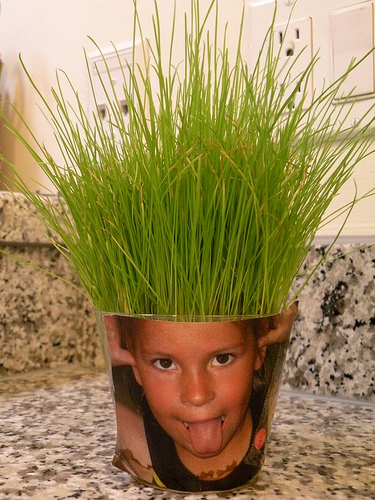
What do you get when you combine a goofy picture of your kid with a bunch of Wheatgrass seeds? Best.Homemade.Gift.Eveh….
Read More
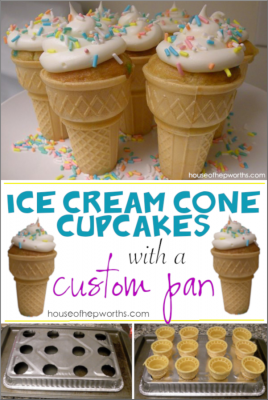
Today I’m sharing how to make Ice Cream Cone Cupcakes with a custom baking pan. Ice Cream Cone Cupcakes are…
Read More
Today (June 1) was my birthday. 30th birthday to be exact. 🙂 After a FUN day at the Santa Monica…
Read More
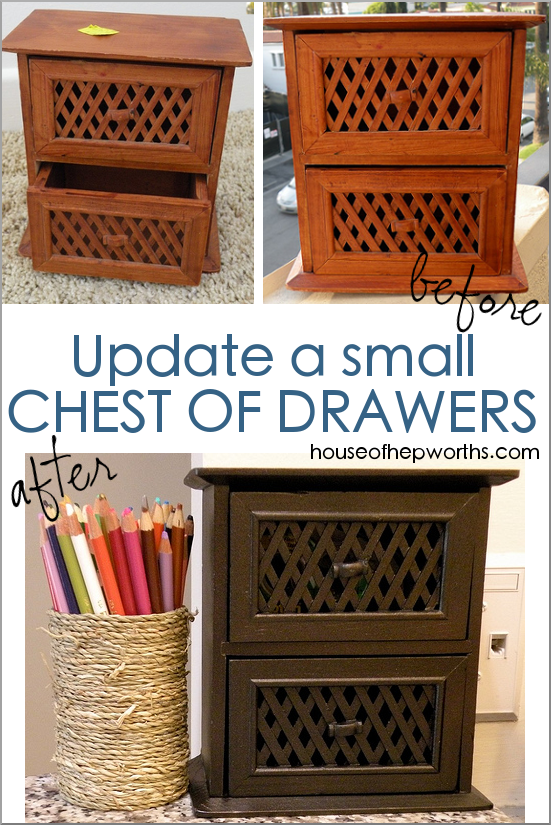
You guys. I found the cutest little, tiny, itty bity, mini chest of drawers at the thrift store. Eek! It…
Read More

Last week I had the privilege of doing a guest post at Blue Cricket Design. Here is a rendition of…
Read More
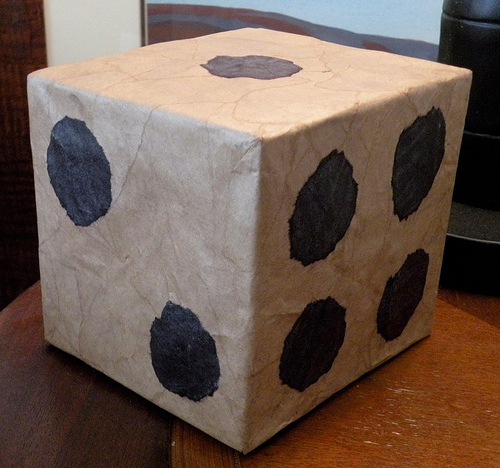
Who doesn’t love extra super duper large DICE decor? Today I’m going to show you how to make your own…
Read More