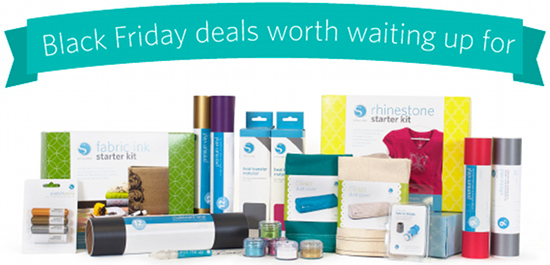
Here are all the Black Friday Silhouette deals. These awesome promotions end Friday, November 30th at the stroke of midnight,…
Read More
Helping you DIY your home one awesome project at a time
Here are all the Black Friday Silhouette deals. These awesome promotions end Friday, November 30th at the stroke of midnight,…
Read More

I know it’s terrible to even mention Christmas before Thanksgiving, but I want to share this craft with you guys…
Read More

Did you know my family are all Texans? In fact, I’m a native Austinite, which is hard to come by…
Read More

Well hello hello! Things have been cray-cray around here! I have been doing stuff around the ol’ hood, but mostly…
Read More
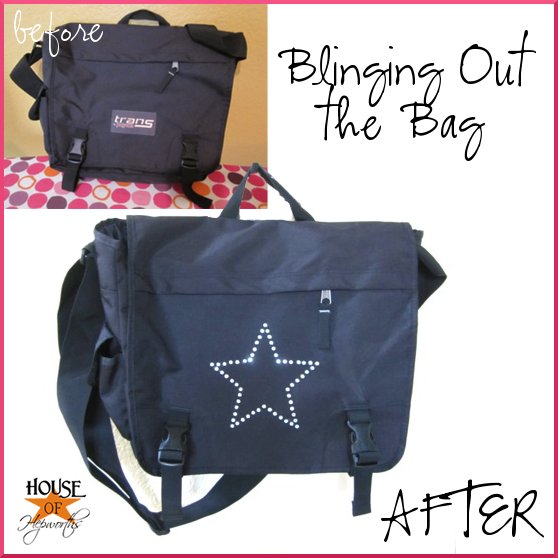
Nothing is safe from bling at my house. N.O.T.H.I.N.G. My daughter’s favorite dress got some sparkly bling: Even my super…
Read More
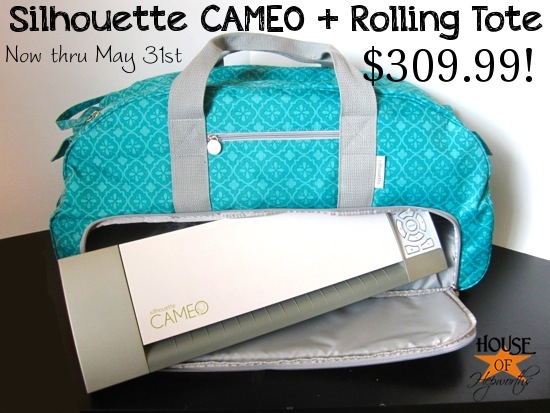
{The weekly Hookin’ Up with HoH #101 is still going strong.} Silhouette is having a killer deal this week. I’ve…
Read More
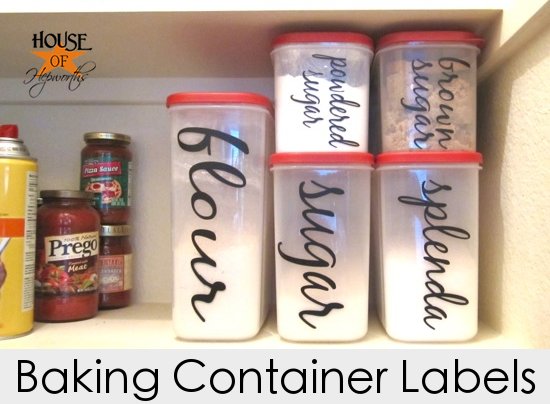
I made some cute baking labels for my pantry with my Silhouette CAMEO: I bought these ho-hum plastic containers for…
Read More

Check out these fun heat transfer projects I made this weekend. I ended up making 4 projects because I couldn’t…
Read More
** This Giveaway is now Closed. The winner is announced HERE.** I have to show you the CUTEST thing I…
Read More

So. How’s it going?! First off, a huge thanks for all the well-wishes. I’ll keep you posted. 🙂 Okay, so…
Read More