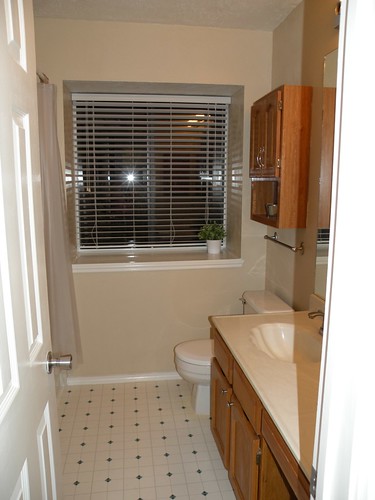
AFTER:
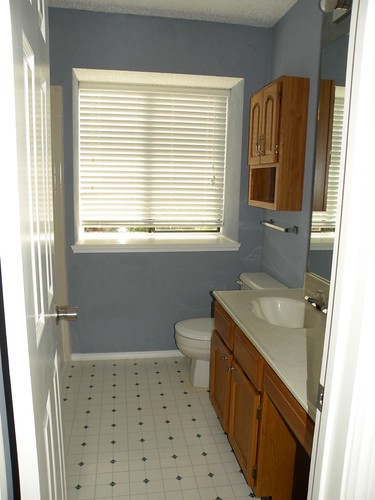
Before:
AFTER:

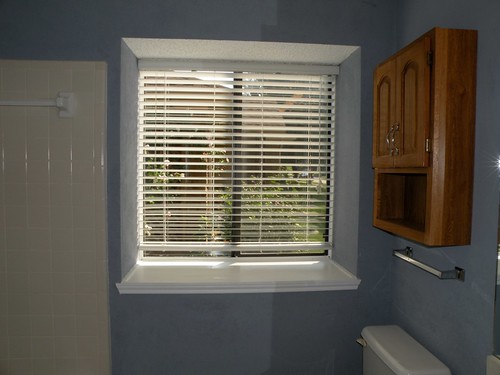
Before:
I know, I know it doesn’t look like much. But just trust me, it was a lot of work! The blue walls were textured by some texture-in-a-can garbage and had the consistency of sand paper. I cut my pinkie knuckle on the wall once and it actually bled!
I used my electric hand sander and sanded all the walls (huge mess!). Then I scraped all the popcorn off the ceiling. I gave the ceiling a fresh coat of white and then I painted the walls Kilim Beige from Sherwin Williams. I also painted all the molding white and changed out the hardware and the sink fixture as well.
Next on the list is to replace the floor, hang a curtain, and add a thick white molding around the mirror so it looks framed.
I’m also going to paint the linen cabinet and the cabinets white.
I love that huge window seal! Jami
I had that same texture on my guest bath wall when we moved in. Who ever thought that stuff was a good idea? Looks wonderful.
I know! That stuff is so gross! It sanded off pretty easily, but sanding an entire bathroom with a small hand sander is still a total pain!
I think that looks great and painting the cabinets will make it look brand new. I just did something similar to my parents bath, check it out on my blog. It is alot of work but worth it. Yours looks great.
Brooke
I’ve debated about following your blog on and off over the last 7 months or so – it seams I’m always clicking over on your links at the parties I look at. I clicked today from the lettered cottage and decided I should just follow already. Then, after looking at your post, I realized it was YOUR blog that gave me the inspiration to do my biggest craziest hardest project this year. I also sanded down a horrid texture, but in a slightly bigger room, with a bit more of a dramatic change. Thank you, thank you, THANK YOU for the idea!
I blogged the full redo here: http://eulessnotuseless.blogspot.com/2010/08/living-room-before-and-after-finally.html
And just the horrific sanding portion here: http://eulessnotuseless.blogspot.com/2010/04/now-i-am-so-happy.html
which I’ve now given you credit for the inspiration!