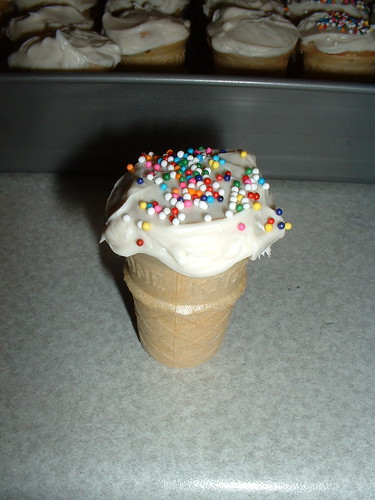
These cupcakes are so cute and so easy to make!
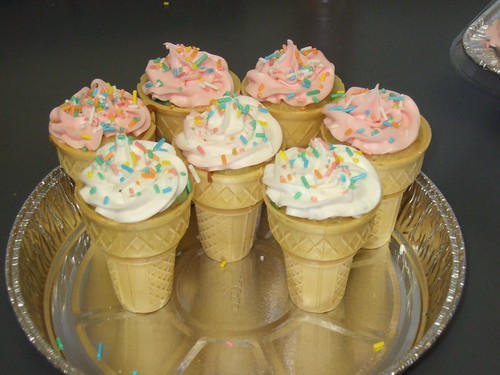
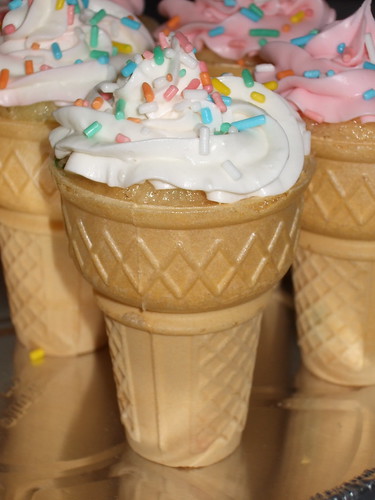
Seriously, aren’t they adorable? They are cake baked inside an ice cream cone with icing on top!


Why have messy cake or cupcakes with liners to throw out when you can have yummy cake cones instead?

You can even make them in cute mini sizes!

Despite what other websites might tell you to do, I’ve tried making these several ways and this way is by far the easiest and best.
So here’s how to make them:
Cake mix
Ingredients listed on back of cake mix box
sugar cones
icing
sprinkles or whatever toppings you want
Buy a box of either regular sized or mini cones. The mini are harder to find, but I love them because they are bite-sized! You can get plain ol’ tan cones or the colored ones – either work. Don’t get waffle cones though. I’ve actually never tried it with waffle cones, so it may work, but bake at your own risk!
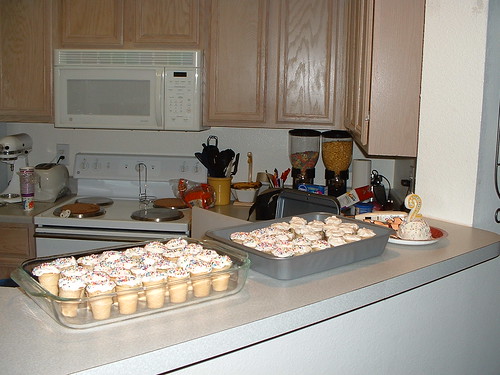
Mix up cake mix according to the directions on the back of the box. Pre-heat the oven based on the directions on the back of the box as well. Line ice cream cones in a baking pan, be careful they tip easily. Using a spoon or scoop add raw cake mix to each cone until about 3/4 full. Carefully place baking dish in oven. If any cones tip over quickly pick them back up. (I need to invent a baking dish solely for the purpose of making these cones!) Bake according to the cake mix box for cupcakes – usually around 15-20 minutes. When they are looking brownish on top use a cake tester to make sure they are done in the middle. If they are done (tester does not come out wet) remove the pan from the oven and carefully remove cones onto a cooling rack keeping them upright.
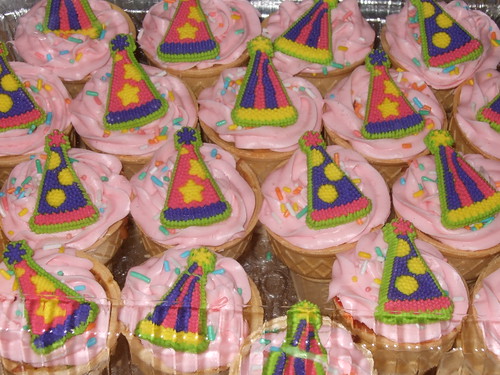
When they are cool ice them with the icing. I just add the pre-mixed icing (for these I bought vanilla and strawberry) to icing bags and pipe it right on the top. Then add sprinkles or whatever you want to add. Enjoy!
When the cone is baked with the cake mix the cone softens a tad so when you bite into them they are more of a cake consistency. You can literally eat the whole thing! But beware, if you are a cake lover, these will become your favorite and you may eat a few half the pan.
The TV people use muffin pans to set them in — one cone per “hole” in the muffin pan. It probably works about the same.
I’ve tried cupcake pans, but the cones tip just as much if not more than if you use just a baking dish. Thanks for the tip though!
I have always wanted to make these, they are so cute!
What a fantastic idea!
These are SOOO adorable! I am such a dessert freak, I would eat these up. I can imagine what a hit they’d be with kids, too!
You really will not believe how delicious they are. If I make them I will eat so many. They are dangerous.
We use the muffin tins, but stick a little bit of rolled aluminum foil (kind of like a little snake) around the base as filler to keep them from tipping. 😉
These all turned out adorable! I love the idea of taking cake on an outing without the mess and inconvenience of a piece of cake:)
Love these! What a great idea for a birthday party!
I’m featuring this at somedaycrafts.blogspot.com
I’ve never tried these myself but I think I’m going to have to! I love how there is no mess because they bake directly in the pan!
Great job and thanks for linking up today.
Kim
seven thirty three – – – a creative blog
What a cute idea!!! And you’re right, less waste that way. Plus less messy than actual ice cream – the best of both worlds!
Thanks for sharing @ Talented Tuesday!
Such a GREAT idea 🙂
check out my Easter wreath here…
http://bethouaknight.blogspot.com/2010/03/easter-wreath.html
i’ve never heard of anything like this!
how fun!
i love cones! when visiting my grandma when i was little she always always had the old fashioned cones for ice cream. love seeing these in a cake version.
i’m book marking!
happy spring!
kellie
Hi,
Thank you so much for linking up to my party! 🙂
These look adorably yummy! And so easy to make! love it! Can be adapted to any party too!
Please don’t forget to put my party button on your post, so that others can come join the party too, ok?!
Thanks and good job!
Bird
Thanks for linking on 30days. Love these!!! Can’t wait to make some. xoxo Mique
Love love love this idea. No liners…perfect. Thanks for sharing with Made it Monday! Jules
Please stop by Life As Lori I featured your Cake cones!
That looks like tons of fun. Thanks for linking up all those links for check me out saturday hope to see you again soon
These are just adorable! I haven’t seen them in the mini size!
I’d love for you to join in the fun at Cupcake Tuesday, we are also having a Spring Blog Hop Party! And a giveaway!
http://hoosierhomemade.com/cupcake-tuesdayeaster-egg-cupcakesspring-hop-party/
~Liz
What a cute idea! Love this! I will have to do this for the grands. Thanks for sharing this wonderful idea! Be blessed. Cindy
those are really cute!
I love the icing on the top ones! They LOOK like icecream! I have only done these once & I actually baked the cupcakes like you normally would…put the liner in, fill them up & then stuck the cones in upside down right into the batter. This works REALLY well because they don’t tip. Once they are baked, you can pull them out & pull the liner off & frost. BUT…this wouldn’t work with mini cones I guess, unless you had mini muffin tins. I agree they need to make a pan to specifically hold cones in the oven!
Those are so fun! I HAVE to make some. Thank you for the great tutorial 🙂
I’m over from Just-a-Girl’s Link Party.
I just has to comment since I made these ‘conecakes’ the first time for my Son’s 5th birthday party at his pre-school… he is now 22 this year! 😀
Probably the only thing I do different is make the cake from scratch because I hate the chemical taste of cake mix. (Plus, it’s a bloody fortune to buy cake mix here where I live.)
I made a ‘contraption’ out of several pizza boxes that fit into my baking pans and hold the cake cones upright. I’ve also done the same thing with kitchen string stretched across a roasting tin in a criss-cross pattern, that works as well, but it’s fiddly.
I ‘frost’ mine using seven-minute icing since that looks most like whippy ice cream to me.
Really fun and good to see other people doing it as well!
Warm regards from Central Brittany, France.
Popover pans have worked for me…
These are too cute! My son would think this is the coolest cake ever! Thanks for the great tip!
What a fun idea! This would be perfect for having cake on the go (like at a bday party!). They look so yummy too! Thanks for sharing at Spring has Sprung at Fun to Craft!
CUTE! And yummy looking too!
Such a fabulous idea!!!
Aw, I bet those would be a hit at any kid party! So cute.
Thanks for linking up all these great ideas!
I still love these..
Thanks for joining Get Your Craft on Thursday. Please join me next week for another great party. Don’t forget to stop by and enter my giveaway. I’ll announce the winner at next weeks party!
Those are so fun! I always wondered if they’d be hard to get in the oven ~ I was always afraid they’d tip all over.
Thanks for linking up this great idea to Make it Yours Day at My Backyard Eden!
I’ve never seen these before. oooooo…they are trouble, no doubt about it!!!! They look delicious. What a good idea!!!!
Love those! Your blog is awesome!
XOXO
Jen
We did a party once where we had cupcakes in cones and then scoops of ice cream in silver cup cake liners.
Cheri
Wonderful creation! I believe I’ve seen you at SNS at least twice with these. Do you have any new creations you could share next week? 🙂
Thanks for linking up to SNS!
FJ Donna
I wish I’d seen these two weeks ago. They would have been perfect for my daughter’s second birthday party!
When I was little one of my neighbors gave these out at halloween and I always wanted to learn how to make them. Thank you so much, let me know when you have that tin invented!!
What a great idea.
I’m def doing this for both birthdays this year, and I’m going to start practicing ASAP.
These are my kids’ favorite kind of cake! And, great news, there IS a pan made for baking “ice cream cone cupcakes,” as we call them in our house. On the side of some Joy ice cream cone boxes, there is an order form. Unfortunately, each pan costs $20, but it also comes with a handy case – perfect for storing the ice cream cone cupcakes. 🙂 Also, the pans only hold 14 cones. 🙁 I got one for a gift and just haven’t felt like spending the money to buy another one. Seriously, reading this post makes me want to whip out the cake batter and ice cream cones!
I have featured your cakes in a cup for my Top 5 picks. This week I picked food and recipes. Please come by and pick up your feature button. http://veronicas-korner.blogspot.com/
Sorry if this is a repeat. Internet explorer said it didn’t work the first time.
wow, very wow. My week is going to end with a fun baking sessions with my two girls. Thank you. 😛
So cute! My daughter’s birthday is today and after seeing these, I’m going to make them for her instead of a cake. She’s already had a birthday party with her friends so this should be a nice surprise waiting for her when she gets home.
Thanks for posting the instructions!
The best baking pan/holder/carrier site for ice cream cone cupcakes that I have found is: http://www.kupcakekonz.com.
Check it out! You won’t be disappointed and there are a bunch of different sizes to choose from. IMO, the prices are far better than the mail-in offer found on Joy cone boxes.
It can be a little time consuming but when I make these I buy a large aluminum roasting pan…the kind you can throw away…turn it upside down and use a straight edge or exacto knife to cut holes in the bottom…then you can drop the cones right into the holes and don’t have to worry about them tipping while filling or baking. Hope this helps!
Hey, just wanted to let you know that they do make a silicone baking pan in the shape of the cones that you can bake them in so they dont fall over. Im making these for my daughters birthday this weekend and using the silicone cone shaped pan to bake them in. So much easier! Its my moms so im not sure where she got it but im sure you could google it and find one! Thanks!
Hi,
I haven’t tried making these yet because I’m afraid to. haha! I keep reading that there are different ways to make them since one way ends up with soggy or stale cones. I have 3 kids (including a 1-month old), so I need to plan my time wisely. I’m allowed to bring cupcakes as a snack for my son’s bday (which is in 2 days), and REALLY want to make these. I’m just worried about making them the night before. Have you tried doing that? Do the cones survive overnight? I’ve heard they get soggy and start to lean/fall over. I am too exhausted in the morning to get up any earlier than I already do. (I still have to nurse my baby every 2 hours.) Do you have any tips or tricks to avoid a soggy cone if I make it overnight?
I always make them the day before and never have any issues. I’ve eaten them days later, and they are a tad softer, but IDK, I think they last awhile.