Who doesn’t love extra super duper large DICE decor?
Today I’m going to show you how to make your own large dice!
(Lucky you!…)

I’ve seen large dice all over blog-land, but the first time I actually felt motivated to make my own was when I saw one at Lemon Tree Creations.
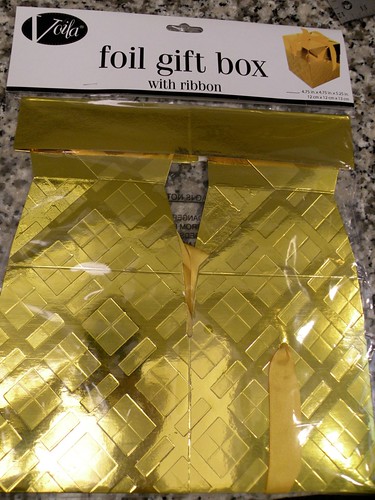
The first thing I did was hit the dollar store in search of something cube shaped to make my dice from.
This should work nicely…
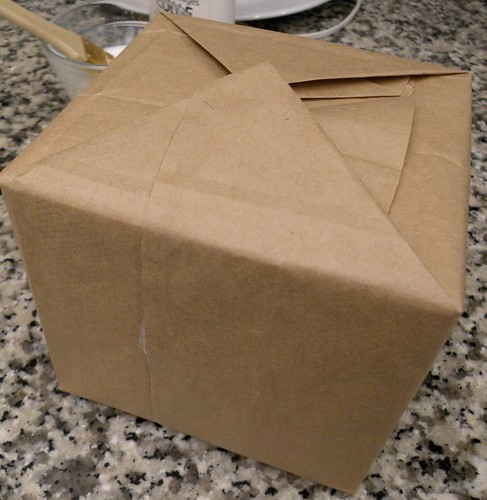
I put the box together and stuffed it full of plastic grocery sacks. Then I taped it closed really well.

The following technique I learned from my mom’s friend when I was about 15. She did this in a much larger scale on her wall using wallpaper glue. I’ve modified it to work with basic school glue. I’m sure it has a name – don’t know what it’s called – but I absolutely LOVE the end result!
Now you’re going to need a bottle of white school glue and a package of brown paper lunch sacks.
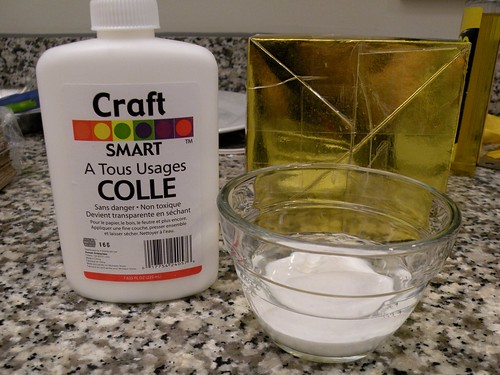
Put a big blob of glue into a dish. Add some water (maybe about 2 parts glue, one part water.)
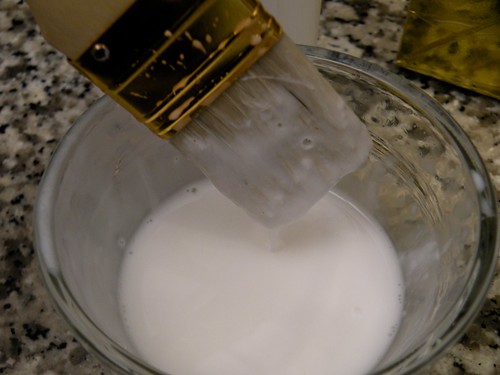
Mix it up really well with a paint brush. It should be pretty watery.
Next get your paper bags ready.
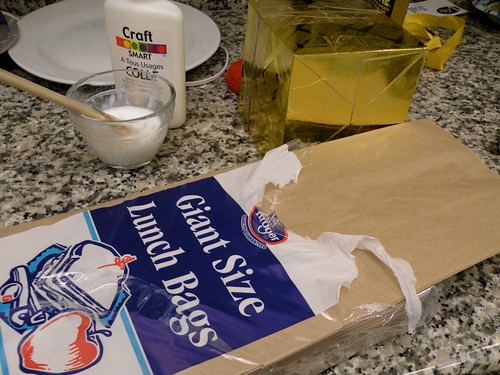
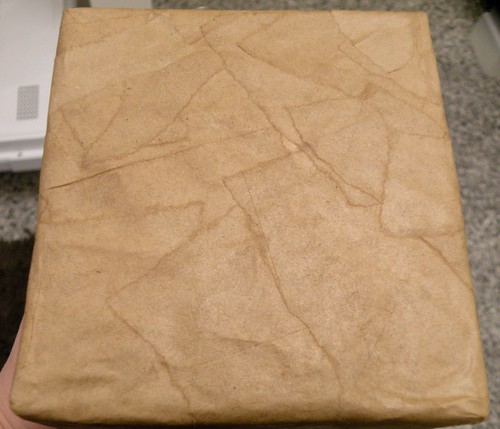
Set the glue aside for a second and wrap your box like a gift in a brown paper lunch sack. I used 2-sided tape to keep it shut.
Now get a couple bags and tear them up into little pieces.
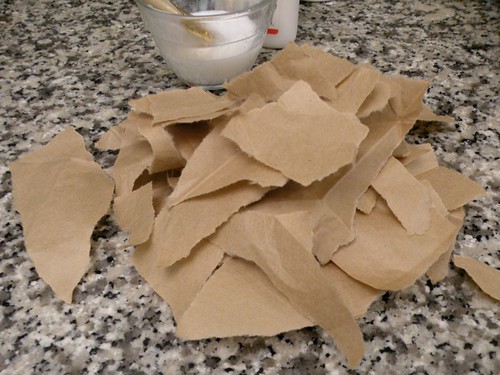
The more torn the edges the better.
Grab your watery glue and paint it on one side of the cube.
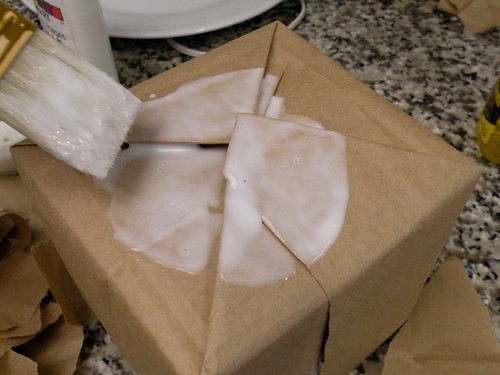
And now just start sticking the torn paper all over the box.
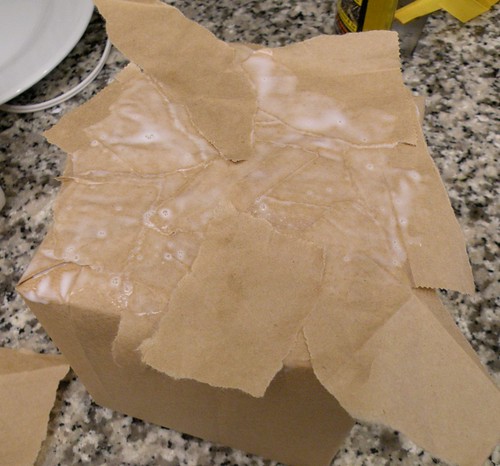
Glue several layers of torn paper. Make sure to wrap the paper around the edges. When you are done adding paper, add a final coat of glue.
HINT: Do 3-4 sides, and let dry. Once dry, do the remaining sides.
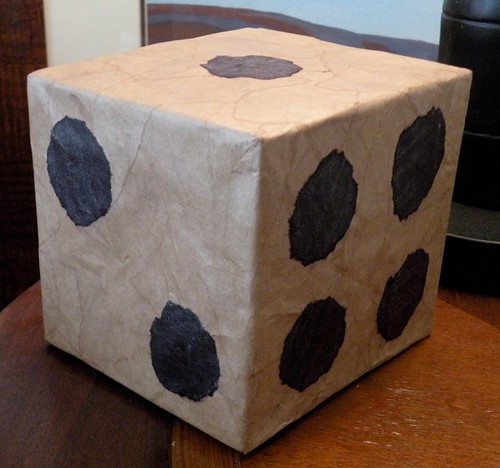
Here’s what it looks like finished:
Now for the dots:
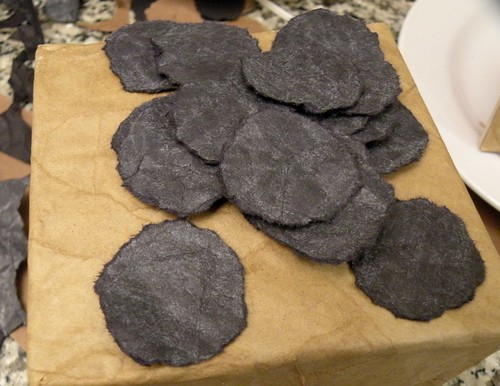
I used a piece of black construction paper and rubbed a grey crayon all over it. Then I buffed it out with a paper towel. After that I tore all my circles out.
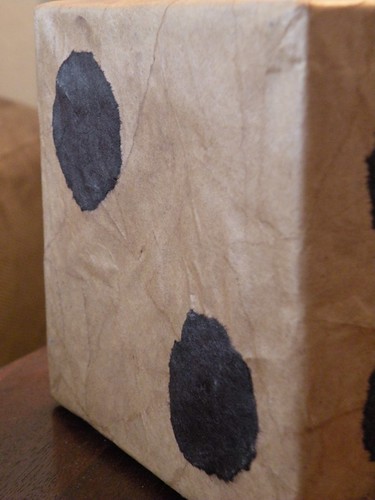
Using the same watery glue technique, I glued all my dots on and then covered it with one final coat of watery glue.
I am totally diggin’ my new dice! And it cost a total of one dollar (for the cube). The other supplies I already had!
Isn’t the paper bag technique beautiful?

I Rolled the Dice, and I scored!
This has made a great addition to my side table. Once I move in a few months I can’t wait to have it sitting out in my game room! I may even make a sister for it.
*If you are too cheap to purchase a square box, or you can’t find a square box, just cut 6 squares out of cardboard (cereal boxes work great!) and tape them together for your cube structure.
I hope you’ve enjoyed this tutorial!
love these! I plan on making one for my sister for Christmas. I love this variation, so much cheaper than the wood one I was planning on making, thank you!
Another great accessory!
Thanks for linking up with Sugar & Spice.
Great idea! This is great!
Thanks for joining Get Your Craft on Thursday. Please join me next week for another great party!
wow love this! thanks for sharing! you don’t sleep do you?? hehe.
Very inventive and clever! Love the look of the torn bag and paper dots! So neat and texturized! Love it! Thanks for linking to my big dice. That was one of my most favorite and fun projects! So glad it inspired to make your awesome dice! Great job!
Great idea for the dice, and hope you get lots of people in your first linky party! I joined!
Jill
so cute! i have a bare shelf and i can’t decide what to do with it. i’m totally making a pair of these to put on it. [[i think the paper-glue-ish technique is like paper mache right?]]
Super! Love the look!! The torn paper really adds to it’s charm. Thanks so much for sharing the “how to”!
Hugs
SueAnn
This is awesome!!! I love it. I’ll be making one for sure! Thanks!
What a great idea for this! Usually I’ve just seen the wood blocks from Michaels to do this but your technique is fab!
Jeanine
I will be making some for my gameroom! I’ve seen lots of variations, but this one doesn’t require use of any power tools. Love it!
Great way to make these on the cheap if you’re not a woodworker.. love it. I agree it needs a sister.
Very cool! I love that you used a gift box under it! I would have never guessed!
it turned out FABULOUS! 🙂
Allison!!!
That is adorable!!!!!!! Thank you so much for joining in the Tales from Bloggeritaville Thrifty Thursday! I appreciate you joining in the party!
Leigh
Tales from Bloggeritaville
http://www.lbratina.blogspot.com
Fun! They would be cute in many settings!
Very cute! I need to make a couple of these for my brother!
What a super creative take on large dice! You were definitely thinking outside the box on this one!
Chelsea
This is so cool! THanks so much for linking to Favorite Things Friday!
These are super cute – and Frugal! Thanks for linking up with us this week & I LOVE your list of weekly linky parties – very helpful! -diane
Great idea!!! Love your blog you crack me up!!!
Love this Allison! Would love for you to link this up tonight {hint, hint ;)} The brown paper bag technique is awesome! Great job! ~ Stephanie Lynn
Love it, it looks awesome. That paper bag technique reminds me of when we were kids, covering something in pieces of masking tape, then covering with brown shoe polish to look like leather 🙂
Cute idea!
Thanks for linking up to my Flaunt it Friday party, please come back next week! 🙂
So cute!! I want one!
I love this tutorial! Thanks for the idea! I would have never thought to use a box from the dollar store. Bet you can’t guess where I am going to go today? Thanks for the inspiration!!
Super Cute! I really like how you tore the paper
Another super tutorial! Thanks for linking up to the Mad Skills party!
Your such a good thinker! Thanks for helping us have another great link party!
~Bridgette
Love this Allison! Right up my alley! Fabulous tutorial as well! Thanks so much for stopping by and joining the Sunday Showcase Party! I greatly appreciate it. Hope you have a wonderful week. Hope to see you again next Sunday! ~ Stephanie Lynn
Hi Allison, Just wanted to let you know I’ll be featuring your dice tomorrow! Stop by and grab a featured Button if you like. Thanks so much for linking to The Sunday Showcase! ~ Stephanie Lynn
Wonderful remake! I would have thought from the photo that it was a wooden block! Gotta love dollar stores!!
Thank you for sharing with Talented Tuesday- don’t forget to check out some of the other links posted for some cool projects!
What a great way to wrap a guys gift, too! Wouldn’t multiples of these be great props for a Casino Night themed party! Rory
You clever thing! 🙂
Thanks for linking up this cool tute!
What an awesome idea! Thanks for linking up to Saturday is Crafty Day!
This is very cool along with the other projects you submitted to Trendy Treehouse! I will be saving your info for the Mag ideas. Thanks!
~Tara
I just made some like this! I found some blocks at Hobby Lobby on clearance, painted them white and then put the black dots on them. Love them!