
The dining room is getting tinkered with again. What I really want to do is finish those chairs (!!!) but that requires W-O-R-K which is kind of a turn-off for me. Ten chairs = very overwhelming.
(Can you tell I’ve been painting them though? hint hint)
I still want this room finished though, and I’ve got this big ol’ blank wall staring me down mocking me.

I’ve been trying to figure out what to put here, but all my ideas seem to compete with the curtains, which I want to be the star of the room. I don’t want anything on this wall that will distract from the curtains. Instead I want something that will enhance them.
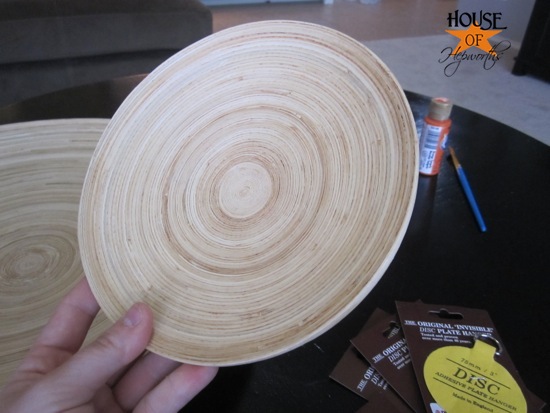
I bought these shallow decor bowls from ikea at least a year ago. I was going to put them up on the shelves in the dining room but I never liked how they looked up there.
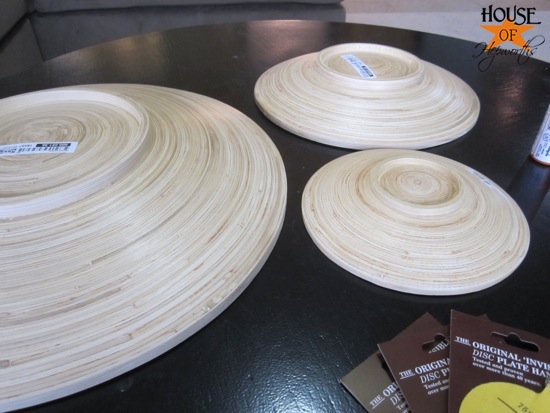
Ikea had three different sizes to choose from so I bought one of each. Once I ix-neyed (pig-latin for nixed) the idea of putting them up on the shelf they’ve been stuck in my decor closet just begging for a home.
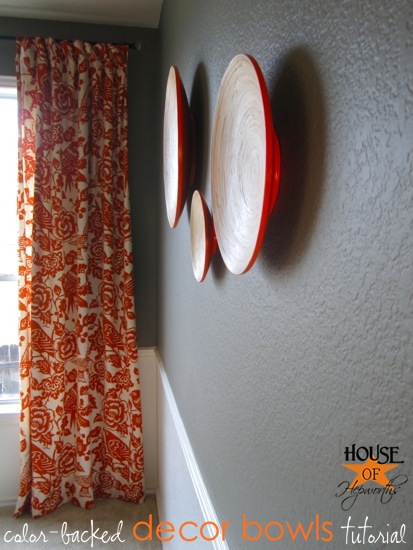
Then one day an idea smacked me right in the face. What if I took those three bowls and hung them on the wall? It would fill the wall, and the bamboo is subtle enough to not take away from the show-stopping curtains.

They needed something though. Something that would make them less blah that would help enhance the orange curtains without overpowering them.
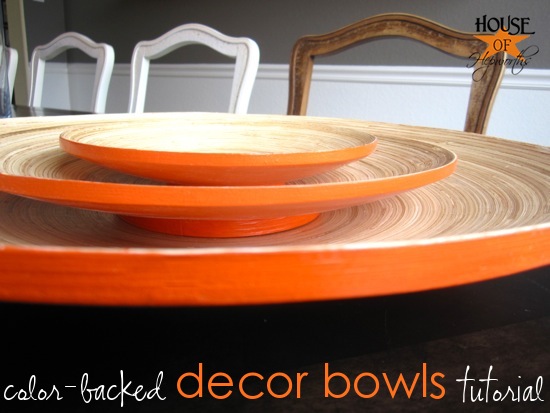
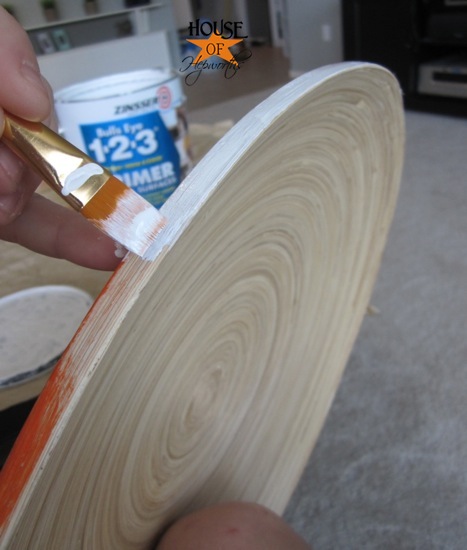
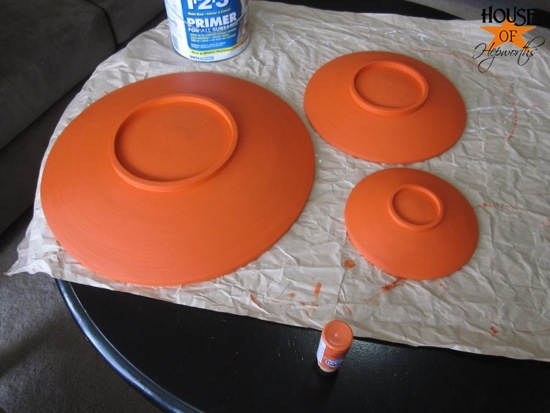
So I painted the edge and back side of the bowls bright orange.
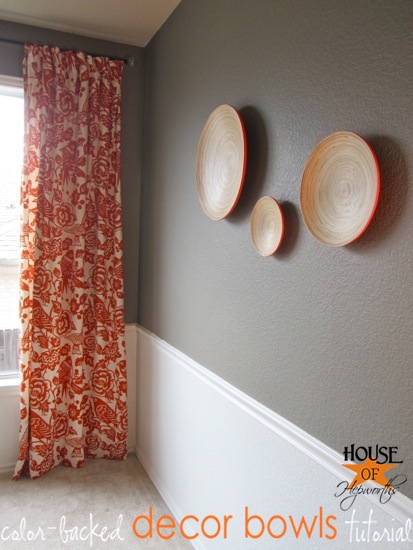
It’s very subtle, but as you walk by the room your eye catches the edges of the bowls just enough that it really ties them together with the curtains.
Painting these shallow decor bowls was so easy, but I did learn a few tips along the way that I want to pass on to you.

Gather your supplies:
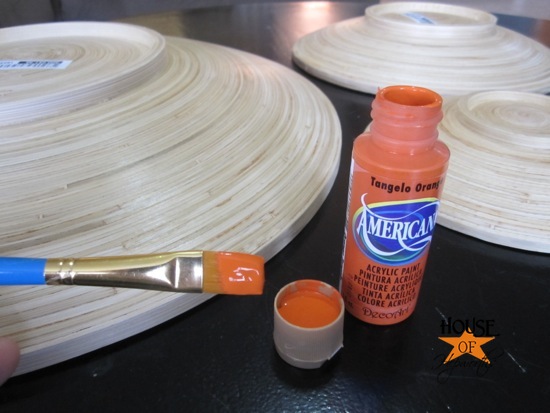
* ikea hultet bamboo bowls
* tangelo orange Americana craft paint
* primer
* clear gloss spray top coat
* paint brush
The first thing you want to do is PRIME the area you are going to paint (unless you are going to use spray paint).
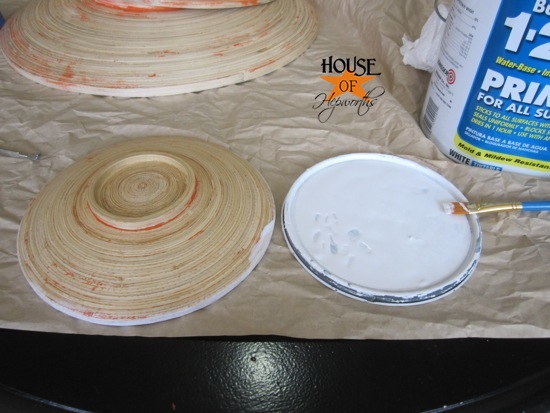
Tip #1: I didn’t prime the first time I painted the bowl and the paint scratched right off. The bowls are coated with some type of clear finish and the craft paint will not stick to it. You must prime first!
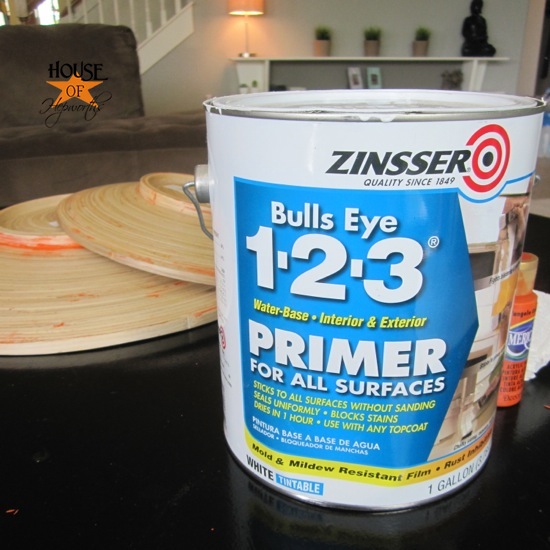
I literally had to wash and scrub the bowls to get all the orange off. Learn from my mistake. When in doubt, prime.
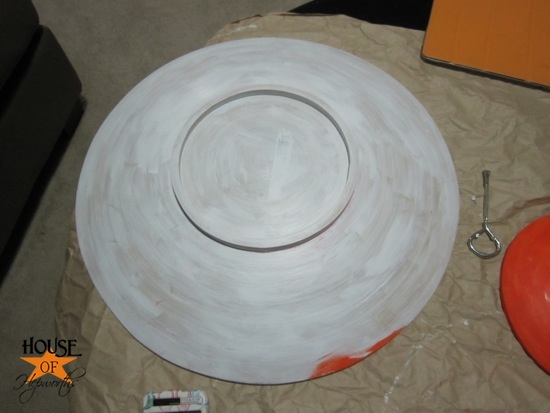
Once the primer is dry you can begin painting. I used tangelo orange by Americana craft paint.
Tip #2: It’s easier to just paint the edge than to tape it all off first. If you have a steady hand, these ikea bowls have a pretty crisp edge that is very easy to follow. Just make sure you use a flat paint brush that edges well.
It took me three coats of paint to get this deep orange color that wasn’t streaky. Be patient and apply several coats.
I chose craft paint instead of spray paint for three reasons. 1) I already had it in my stash, 2) I didn’t have to tape off the bowls before painting, and the most important one, 3) I could do it in my living room while watching TV. 😉
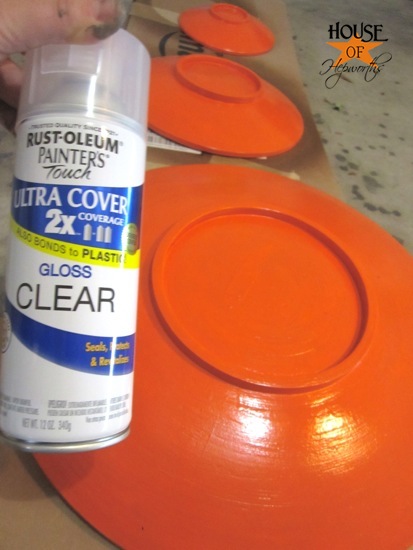
Once the bowls were dry the paint was very FLAT. And it didn’t feel soft and creamy. And it wasn’t shiny at all. Welcome to the world of craft paints, Allison. Dur.
So I gave them a few coats of super glossy clear top coat. I LOVE Rustoleum 2x spray paint (comes in paint, primer, and top coats).
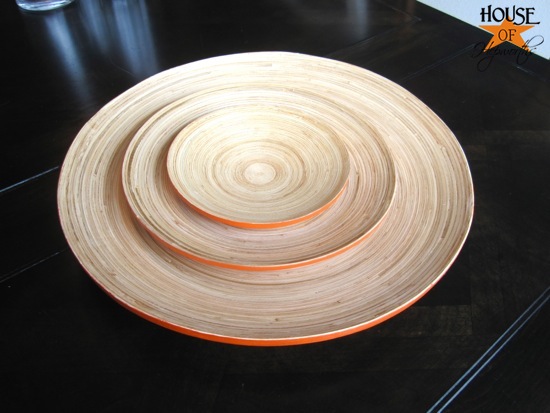
The finished result were three shallow bowls with just a subtle hint of orange. Not overpowering, but enough to make these somewhat boring dishes really POP.
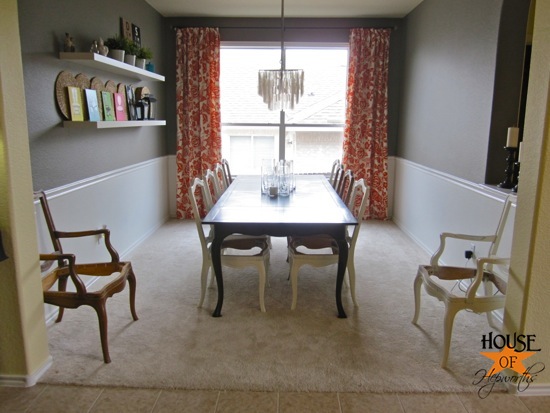
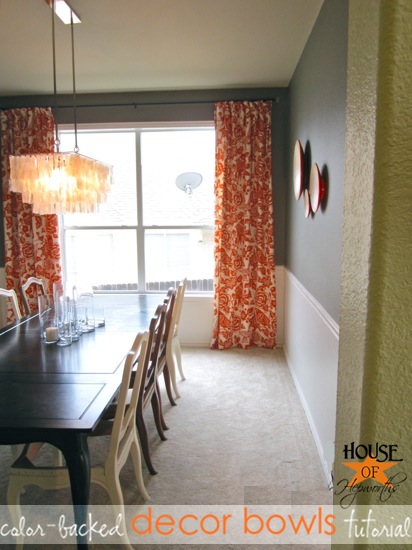
The room before the dishes:
Aaaaaand after:
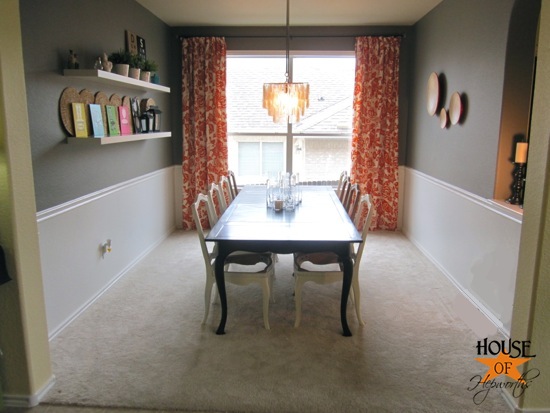
My favorite thing about this project is that it gives a very earthy vibe to the room, but is still fun and bright. Sometimes bamboo bowls and the like are too boring, but the orange edge gives it just the oomph it needs.
I also love that it’s such a subtle accent that you just catch a glimpse as you walk by. It’s one of those details that you notice but don’t realize you notice. Know what I mean?
Sometimes the most subtle details that don’t jump out at you end up making the room.
Now if I can just force myself to finish those chairs already…
Source list: Chandelier, shelves, 4-piece chair art, curtains, curtain rod, table, candlesticks, paint, moulding
You are, officially, my hero! What a really great idea. Easy to do while watching TV and a great “lift” to the room.
these looks great! i am very partial to orange and I love the idea of painting the backs! they look wonderful on the wall! 🙂
Yes, this looks wonderful! Love the pop of orange and I think they help to highlight the curtains. Looks great!
Perfect idea…these look great on the wall. Love it!
Clever, clever girl. But then, that’s no surprise 😉
Love. Seriously.
What a perfect way to sneak a pop of color into a room. My fiance hates colors, so this might be a great way to please us both.
House of Hepworths… solving spousal color disputes one craft at a time 😉 hehe
Also, I chose your blog as one of my fifteen favorites to be tagged with the Versatile Blogger Award! Check out my blog to see the deets:
http://humberhomeproject.blogspot.com/2012/04/versatile-blogger.html
Love it! I’m tinkering with my family room this week, I just linked it up to your party and would really love your opinion!
http://domesticdeadline.blogspot.com/2012/04/making-changes-before-hoarders-shows-up.html
OH I love it, so neat how you can do it to match almost any colour!
Looks great – love it!
Great idea Allison! But I’m hungry for more orange!! Would it be overkill to stencil or freehand a single flower stem on the edge of one of them? Maybe a poppy or a Chrysanthemum. Is it bad “comment” manners to make a suggestion?
LOVE THIS. What a great simple idea. It looks fabulous! I saw a bowl like this at Goodwill and I thought it was too boring, if I ever see one again now I know how to spice it up 🙂
The bowls look great! But to be honest, I couldn’t take my eyes off of the curtains in here! Those are fabulous! Where did you get them?!?
What a fabulous, though subtle change! It’s the perfect “fill” that doesn’t steal from the show!
I’ve already got two of those bowls (always buy in threes, Alice; c’mon!), and I’m so happy to hear that one of your project criteria is “Can I do it on my butt in front of the TV?”
Nice!
How did you hang them? I don’t see plate hangers.
Would love to know how you hung these! Thanks 🙂
Great idea! I love the color. Thanks for sharing!
I LOVE IT! That is such a great idea and it looks really good next to those fabulous curtains. I enjoy picking up from thrift stores those small wooden bowls, but I just use them for my tiny embellishments or yarn pieces while I’m doing a project. This is a creative idea for a large wall space. Thanks for sharing!!
Beautiful! I so want to incorporate this “color of the year” into my wardrobe and home — these bowls are perfect. I love that you just get a little “peek” at the color when you look from the side and thanks for the warning about priming!
Now those are just cool! Perfect touch!!