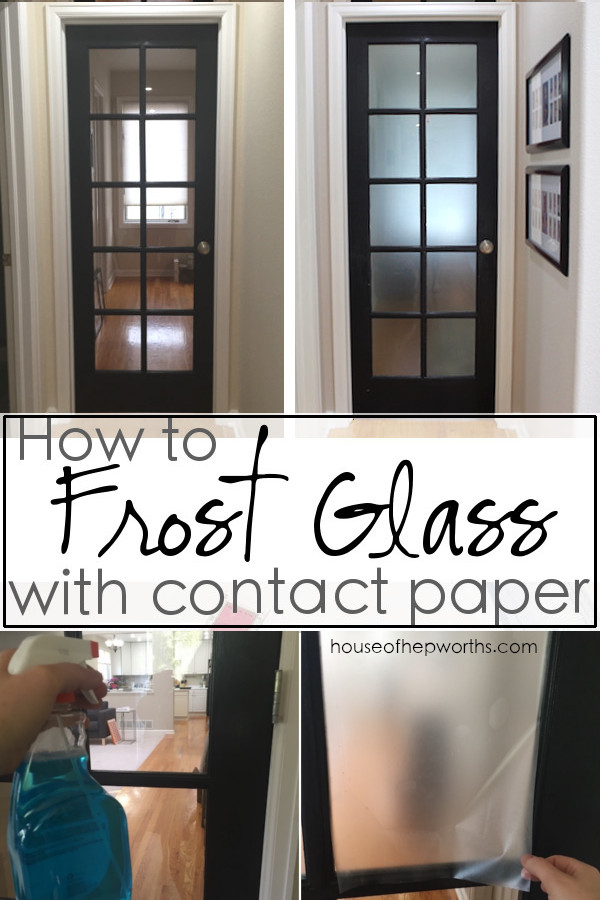
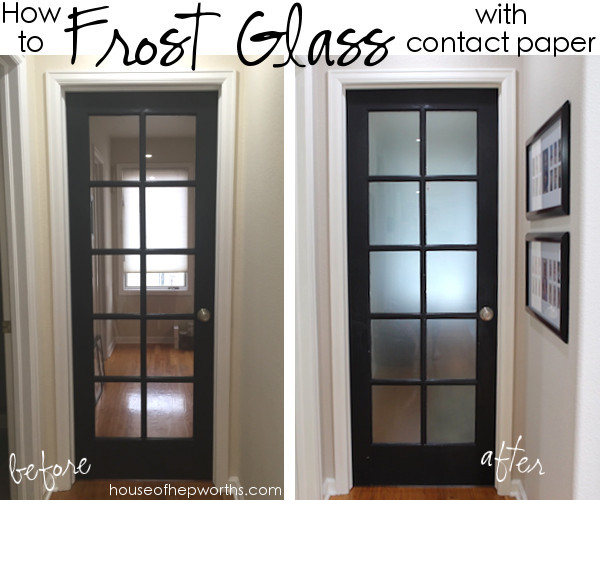
Did you know you can FROST GLASS with contact paper? Today I’m sharing a simple tutorial for frosting glass with contact paper that will change your life. Seriously. It’s that good. Would you like more privacy in your home without sacrificing the light streaming in? Just frost your glass!
It’s so easy, inexpensive, and is totally removable. Yup, unlike sprays and other frost glass techniques, this one allows you to undo your frost if you ever change your mind. Mind blown, I know.
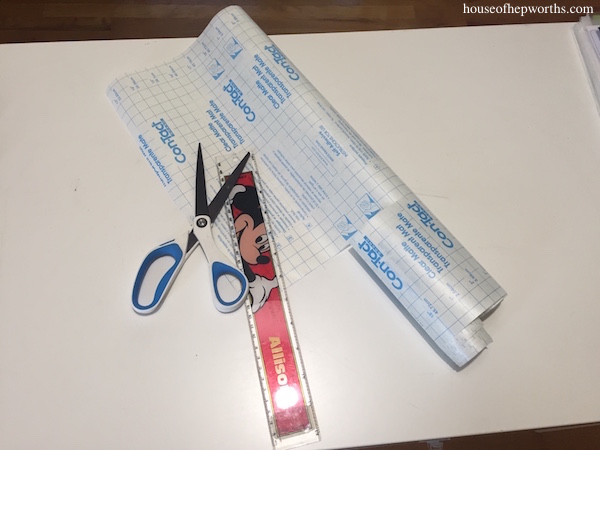
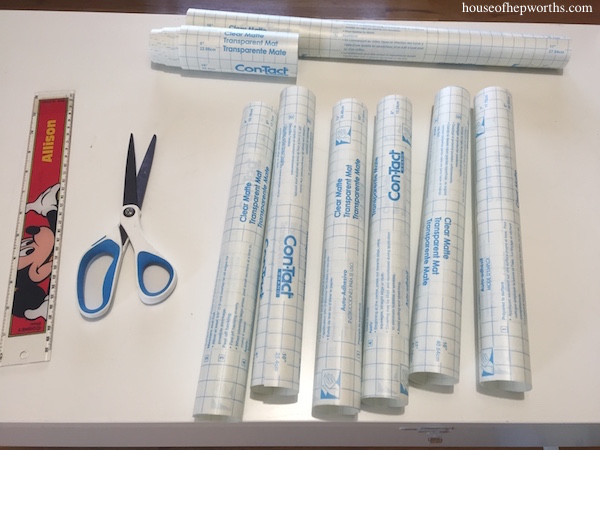
For this tutorial you will need:
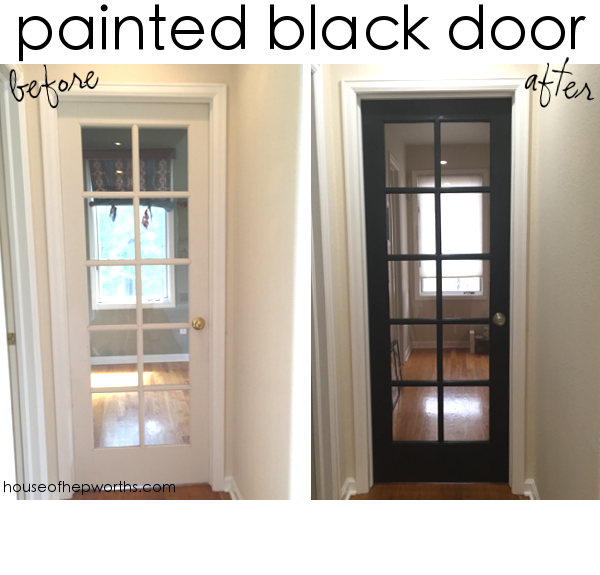
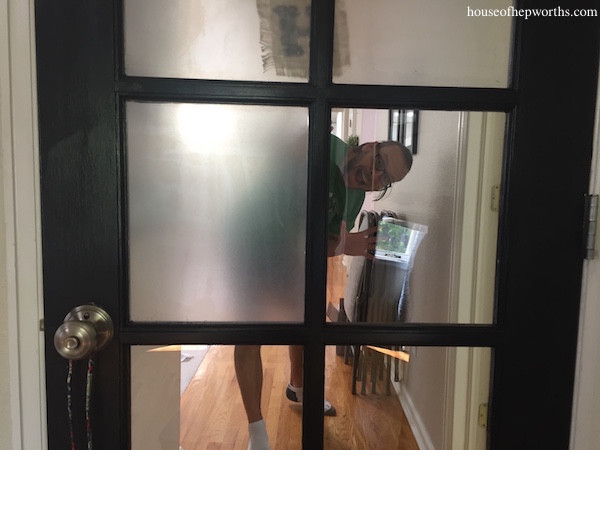
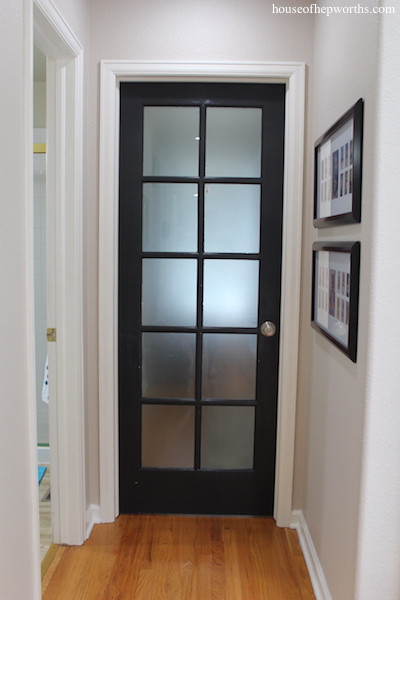
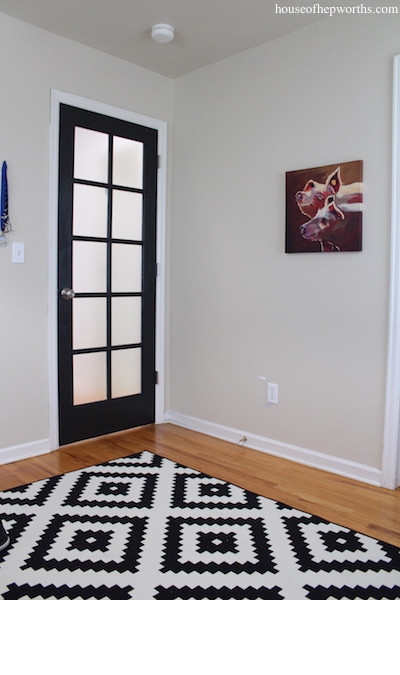
I started out with a 10-panel glass door painted white. Last year I painted it black. I LOVE black doors!
As much as I love this 10-panel glass door, especially now that it’s black, we need some privacy without having to replace the entire door. Enter Contact Paper. This stuff is amazing and awesome and sooooo cheap! I purchased clear Contact Paper. You can find it here if you want to order some. Yes, all you need is clear contact paper to frost glass!
Step 1:
Measure your window and cut your contact paper about 1/2″ wider than your window. This will allow some wiggle room and a perfect tight fit.
I cut a bunch of my panels at the same time.
Step 2:
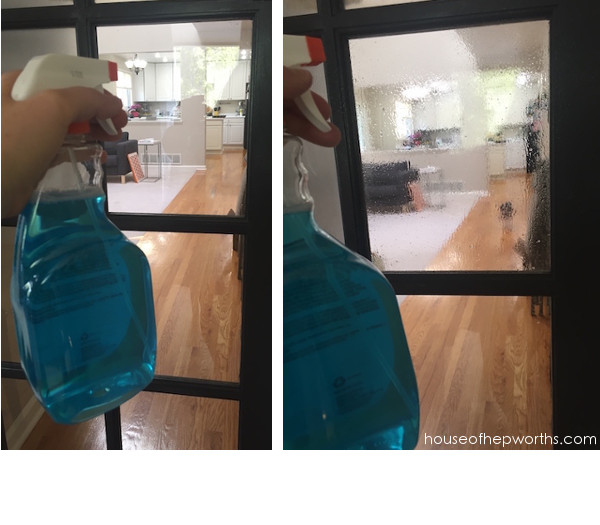
Once you have your panel cut, you want to spray your glass panel with windex. Make sure the entire surface is covered. This allows you to place the contact paper on and slide it around to get it where you want it. Trust me on this. The windex will dry and you will be left with a perfect panel of frosted glass.
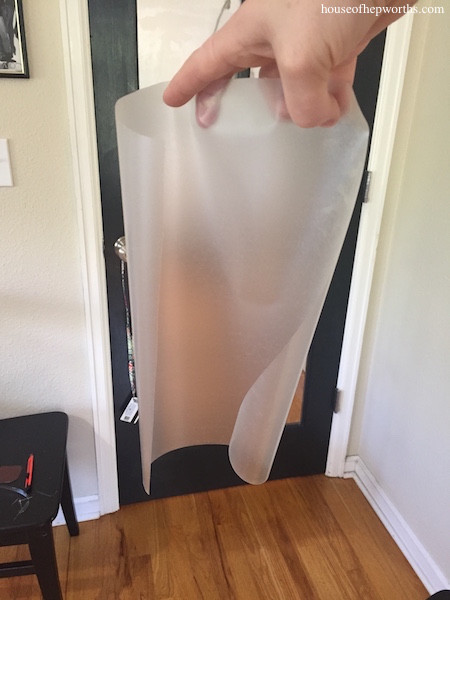
Carefully remove the back paper from your contact sheet you just cut to size. If you are not careful you will leave a permanent crease on your contact paper that you will see on the frosted glass.
Step 3:
Take your contact sheet and stick it to your panel with the windex on it. It will feel slippery. This is good. You want to be able to position it exactly where you want it.
Step 4:
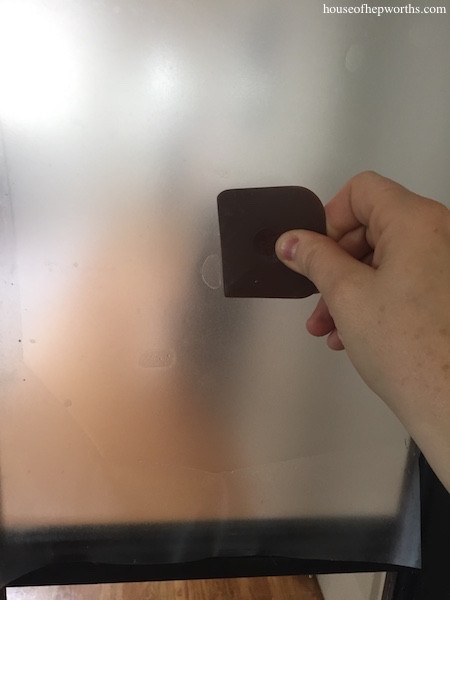
Now, take a credit card or a scraper (not metal or it will puncture your contact paper) and start pushing all the bubbles and windex towards the edges of your window.
Step 5:
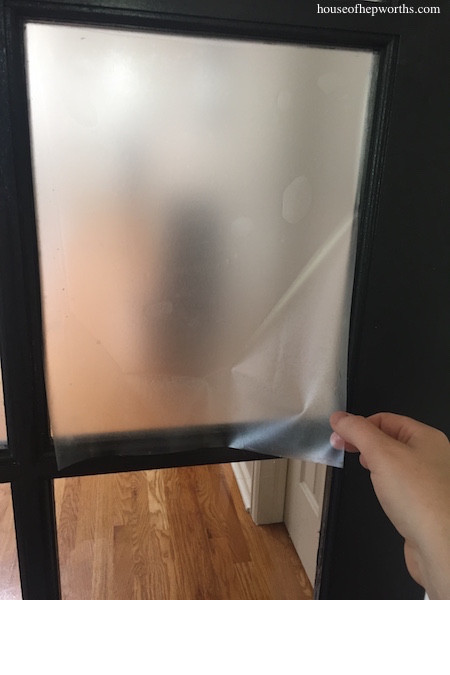
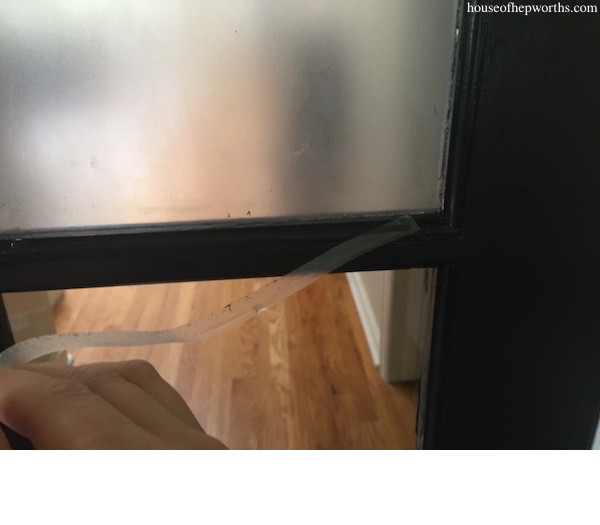
Once you have pushed all the bubbles out, take a utility knife and carefully cut the excess contact paper away. I’ve found if you use it in conjunction with the plastic scraper, you will get a perfect cut.
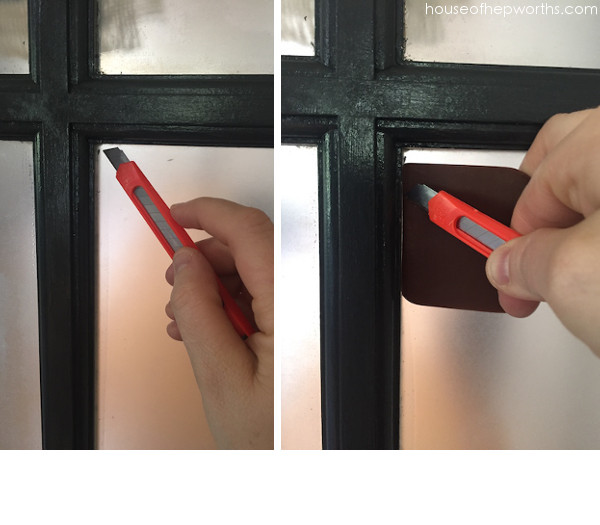
You can see here how I cut the excess contact paper and peeled it away from my window:
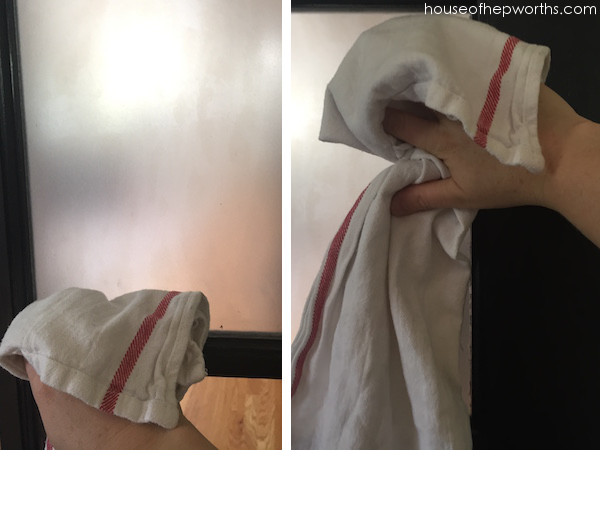
Once you’ve trimmed all the excess off, take a rag and wipe all the windex off.
Here I am, half done with the door. Ben’s saying hi. 🙂
Your door will now look like this:
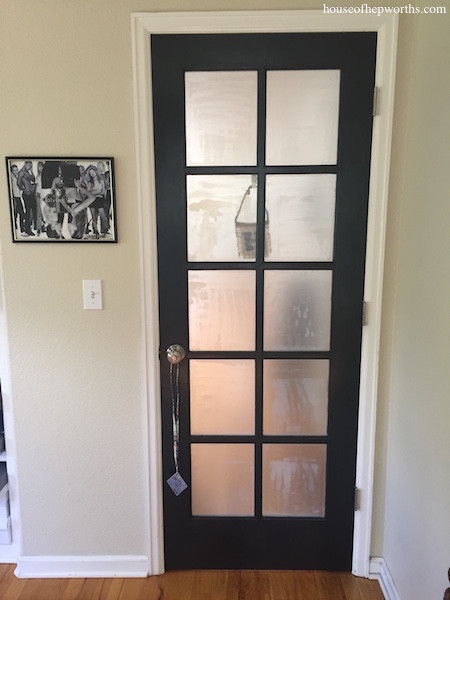
Don’t be alarmed! It is supposed to look streaky and wet. Remember, there is windex behind your contact paper.
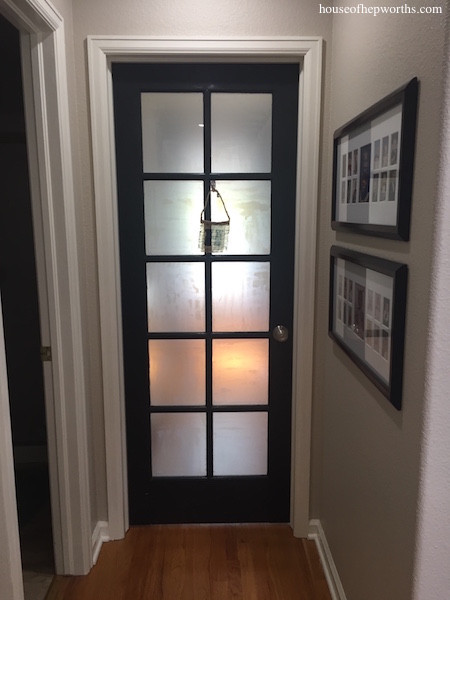
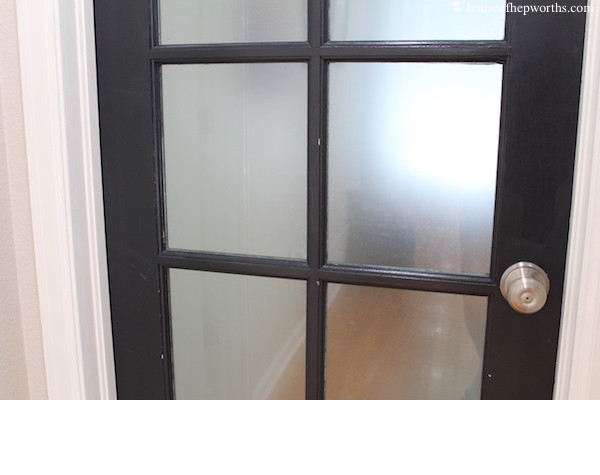
Your windex needs time to dry. This will take a few days. Check out how much better the frost looks after a week:
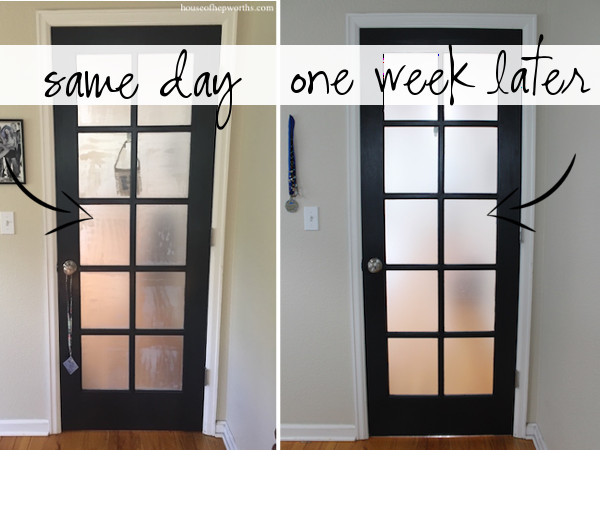
It goes from looking amateur to looking like a professional frost glass job. They look so good you would have thought I hired a company to come out and frost these windows!
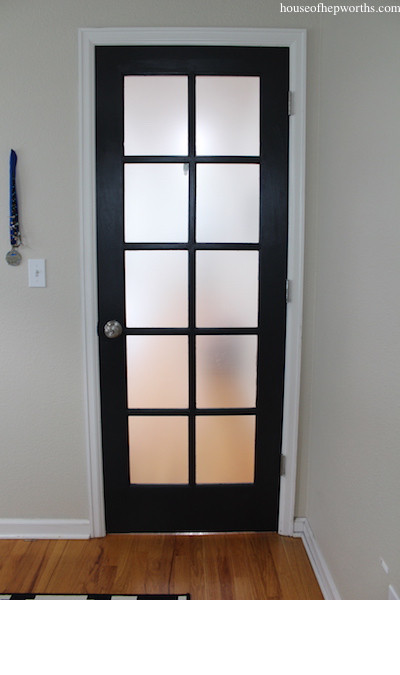
A close-up. The frost is on the opposite side of this door, so you are looking at the back of the frost glass job.
Here’s the frosted glass door on the side I frosted.
And a close-up:
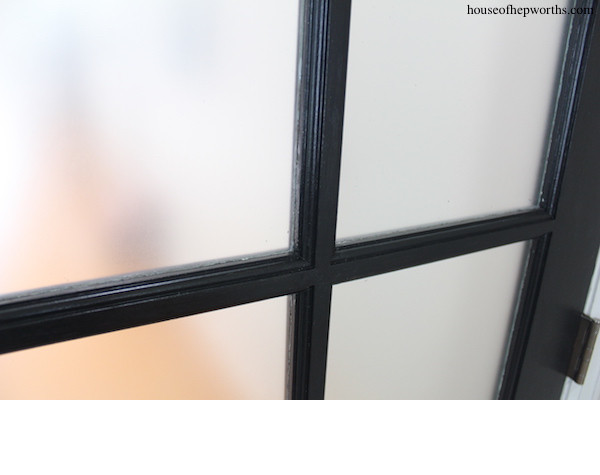
Once you frost your windows, you literally cannot tell which side you put the frost on unless you feel it with you hand. The frosted side feels like the contact paper, while the unfrosted side feels like glass.
Amazing, right?! That is literally how easy it is to frost glass with contact paper.
Here’s a shopping list of everything you will need to frost glass with contact paper (except stuff like a ruler, scissors, and windex. I’m assuming you already own those.)
Here are a few more posts you might enjoy:
- Another post about frosting glass
- How to easily hang a rail with hooks on a wall
- How to custom cut faux wood blinds
- How to easily remove stickers from any surface
- How to hang heavy artwork
- How to remove a wall cabinet by yourself
- How to get rid of that ugly cord hanging from your attic stairs
- How to make tile grout look brand new again

Instagram || Facebook || Pinterest || Youtube
Thanks for reading! Have a wonderful week!
*This post contains affiliate links
I love the door but like you….I love it black! And adding the frosted contact paper really makes it look great.
So awesome, love it. I would love to put a French door for our bedroom door between our room and mudroom but not give up privacy. Not holding my breath however til we can afford a French door. Seeing how wonderful your black door looks am thinking about putting clear Contact paper on bottom parts of our living room and bedroom windows, little more privacy at least. See what you started?
Now I need to print out how you put contact paper on your door so I don’t forget about the windex first.
Have great week
I like to protect your doors like that but now a day there is a combination of Glass and fused silica such a great designs for home decor
OMG. I am so happy to find your site! I was looking at your old post about electrical conduit for drapery rod. I want to know if conduit has bent or sagged, if you still have it hanging! I am trying to do 120″ rod for patio doors without center support so I can use curtain rings. Thanks. Lucy
I’ve never had an issue with my conduit curtain rods
Hi! I was wondering how this was holding up a year later. It looks amazing and I’m hoping to do this soon on my paneled front door. Thank you!
It’s great – no issues
I love this! Thank you! Does it have to be Windex? I just use peroxide to clean my glass (which works great, BTW) and don’t have Windex around. Thanks so much!
How do you remove it and will it cauz damage? Im a renter and i have a large balcony door and kitch window that I need to do..
You just peel it off
Eucalyptus Oil removes any glue residue. Water soluble or straight, both work great.
I love this! Thank you for sharing! Question: Does it have to be Windex or just anything wet? I don’t use Windex. I use peroxide to clean my glass (which works great, BTW!). Im wondering if I can use that instead…? Thanks!
Did your contact paper have opaque white blotches when it was first finished? After 2 days mine don’t appear to be going away.
I appreciate your post and the use of contact paper – but you didn’t use clear contact paper you must have used a frosted. You said clear and you link is also to a clear contact paper on amazon. Now I have 3 rolls of clear that I can’t use!
Please delete above comment, I see ‘now that it is t quite clear
Hi,
I hope you are in good health. I am a passionate reader and writer as well.
I am writing you to present an offer that can benefit both of us.
I want to publish a guest post article on your website and will send you some topic ideas for that.
The article however, will be of great quality and is free of cost. If my ideas interest you, I would send the article on the selected topic idea chosen by you. I would just need you to provide me a backlink within the main article.
Please get back with your kind response to this offer.
I look forward to your prompt response.
Have a great day!
Regards.
Annika Wells
Hello,
Hope you are feeling good during global crisis
I’m Roy,
I am owner and senior communications manager of bloguin.com
I wanted to ask, do you accept guest posts for fee or niche edit in existing articles on your site?
If so, what are your fees?
Looking forward to working with you, thanks in advance and have a good day
Regards,
Roy from Bloguin
Hola yo lo hice en la ventana de la.cocina y ahora veo que de noche de adentro para afuera no se ve. pero de afuera ora adentro si me ven. Que hice mal?
You say this is clear contact paper. My clear contact paper is basically just that clear not the frosted look your picture shows.
I love the idea and yes this works and saves lots of money and easy to remove for renters or if you want to change the look.
If you have suggestions on the clear vs frost please let me know.
Thank you.
Great Tip for frosting windows. I’m definitely going to try it. Much better than spray on.
Hi,
How are you doing? I am reaching to offer a simple 3 step process of guest post on your website.
1. I will send you some interesting topic ideas for a guest post
2. You will choose one topic out of those topic ideas
3. I will then send you a high- quality article on the topic chosen by you
I would just expect you to give me a do-follow backlink within the main article. So, shall we start with step 1?
Best,
Eliza Megan
Hi,
How are you doing? I am reaching to offer a simple 3 step process of guest post on your website.
1. I will send you some interesting topic ideas for a guest post
2. You will choose one topic out of those topic ideas
3. I will then send you a high- quality article on the topic chosen by you
I would just expect you to give me a do-follow backlink within the main article. So, shall we start with step 1?
Best,
Qasim Ashfaq
Do you think this would work on sliding glass door panels to outside with the temp. Changes against it?
I did this over the weekend on my front door. So easy and looks great. You’re a lifesaver! I had tried the static cling film (which was expensive for how little I needed), but it didn’t stay on the window. This was so much better. Thank you!!!!
My daughter did this on her college dorm. It looks beautiful and blocks the view on the first floor in . Thank you
What about if I do both sides of the glass will it create more “privacy”? I want to do my pantry door but don’t want it to be super noticeable what’s inside.
This looks awesome! Wanting to do a cabinet.
Also where did you get your black and white rug? I AM IN LOVE!
Costco
I have a really ugly window with bad condensation inside the panes. I tried a light white cling on and you can see the ugly right through it. What do you think about this technique?