Do you remember when my ceiling flooded and I had to tear out the sheetrock and replace it with new…
Read More
Goodwill {finally} rocks
Goodwill freaking ROCKS. Yes, you read that right. Allison is actually saying something nice about Goodwill. I went to Goodwill…
Read More
Goodbye past, hello future!
It’s time to retire the ol’ blog layout, header, & buttons. I’ve loved every second of the orangie blog. It’s…
Read More
Round 3: Readers create wreaths & pumpkins
I’m seriously in awe that I was able to inspire so many amazing people to create their own wreaths and…
Read More
The best of September 2010
Let’s wrap up September, shall we? (Click on each picture to see the original post.) I started off the month…
Read More

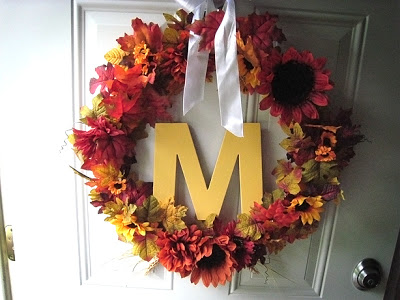
Reader Submission – Fall $ store wreath
Last week I showed you how to make a Fall Wreath using dollar store items. Ring a bell? Karin, an…
Read More
16 hours (but who’s counting?)
Guess what happens in 16 hours?! (1:30pm Friday) CLOSING on our house!!!!!!!! Woo Hoo! In 16 hours, this is all…
Read More
Idol – the final recap
This is the follow up to my post about all the famous people I met after the Finale. I promise…
Read More
My brush with fame – American Idol style
As promised, here is my American Idol Finale experience. Lee DeWyze is the winner!!!!!!! So excited!!!! LOVE HIM. There are…
Read More
On my way…
Headed out the door right now to line up for… American Idol Finale!!!! I never realized going to a one…
Read More