Well, my friends, I am FINALLY back from my oh-too-long vacay. For your and my sanity, I swear I’ll never…
Read More
A mini closet makeover
Do you remember when my ceiling flooded and I had to tear out the sheetrock and replace it with new…
Read More
Goodwill {finally} rocks
Goodwill freaking ROCKS. Yes, you read that right. Allison is actually saying something nice about Goodwill. I went to Goodwill…
Read More
Goodbye past, hello future!
It’s time to retire the ol’ blog layout, header, & buttons. I’ve loved every second of the orangie blog. It’s…
Read More
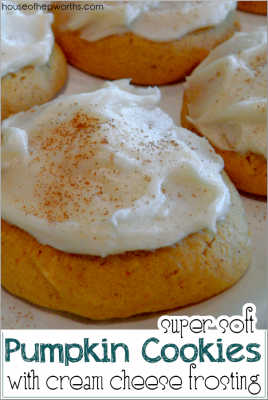
Super Soft Pumpkin Cookies with Cream Cheese Frosting
These Super Soft Pumpkin Cookies with Cream Cheese Frosting are to die for! The pumpkin cookies are fluffy, soft, moist,…
Read More