Posts Tagged ‘splash of color
Pinecone framed artwork

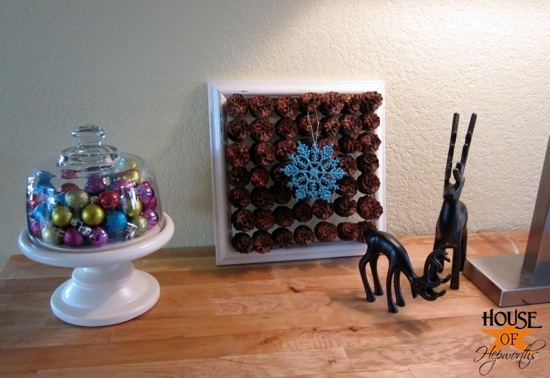
I finally get to use my pinecones I’ve been saving since March!
For this project I used the mini pinecones, not the jumbo ones, but don’t worry! I’ve got some jumbo pinecone crafts in the works! Yippie!
First, I found a frame in my stash of extra stuff I’m not using.

I love that this one is square.
Next I grabbed all my mini pinecones.

I patiently sat there and hot glued each pinecone directly onto the glass of the frame.

It was actually really easy and took me about 10 or 15 minutes.

I love that you can see through the frame.

And here’s the back of the frame. You can see all the hot glue!

When I was done I hung it up on the wall…

And then I stared at it for like a month.

There was just *something* about this artwork that I didn’t like.
Then it finally hit me. It’s too plain and boring. So I added an ornament from the Dollar Store.

I already like it about 1000 times better.
But I still wanted more color, so I added this ornament from Target (it was in a 4 pack for $1).


And now I’m happy.


Have you made any pinecone crafts this year? Tell me about it in my comments section!

I just got slapped by Captain Obvious
Do you ever have moments where you are just like,
“Dur! Wow, I can’t believe I didn’t think of that. It just seems so obvious.”
Well, unfortunately for Mrs Oblivious over here, I have these moments all.the.time.
Que Captain Obvious here.
Three bunches of leaves stuck in a round floral foam thing.
Why oh why have I never even thought of this?
Do you realize how many times I’ve put ivy and plants above my cabinets and bent them all over the place to get them to stay in a certain position?
More times than I’d like to admit, thankyouverymuch.
I found this pre-made floral bunch at Goodwill. The second I saw it, I was like, “OMG wow, could there even be a more obvious solution?”
Five seconds later (the amount of time it took to drag a chair over and climb on the counter)…
… I have perfectly positioned bunches of leaves.
Sometimes I wonder how I even manage to function in this world walking around with my head in a bubble.
Living in my own oblivious universe is fun and all, but I sure feel like a dope sometimes.

Christmas Tree from terra-cotta pots
MERRY CHRISTMAS!
Ya, ya, I know, it’s NOT EVEN TURKEY DAY YET!
BUT, and that’s a big fat BUT…
Don’t you want some Christmas crafts NOW so that you can make them for the entire Holiday Season?
Ya, that’s what I thought! You are welcome!

Make an adorable Christmas Tree out of terra-cotta flower pots!
(Isn’t this just adorable?)

Do you want to know how to make this? And I’m going to be extra super nice and include a cost break-down for you as well. Yippie!

If I’ve peaked your interest and you want to make one, read on! This isn’t a hard craft. You’ll love it.

To make this exact tree:

…you’ll need:
* 3″ pot ($.98)
* TWO 4″ pots ($.87 each)
* 6″ pot ($1.27)
* 6″ saucer ($1.27)
* white school glue
* glitter (large container $6.99 @ Hobby Lobby – I used about 1/20th of it)
* Spray Paint – Krylon Olive ($2.99)
* Spray Paint – Krylon flat White ($2.99)
* Spray Paint – Krylon Leather Brown ($2.99)
* Primer (spray or paint)
* Acrylic Paint – Americana Santa Red ($.79)
* red sequins ($1.99)
Total: $17.01
(I didn’t add in the glitter since you can buy a much smaller thing of it for way cheaper, and I didn’t add in primer or the school glue)
First you’ll need some terra-cotta flower pots.

I bought enough for 3 different sizes of trees, so don’t have a panic attack. I’ll show you the other two trees as I finish them over the next week or so. You really only need 4 pots and a saucer for this tree.
The pots need to be PRIMED before you paint them. I just used a brush and painted the primer on all of them. The saucer needs it on both sides, but the pots only need primer on the outside and the bottom.

Once the primer is dry, spray paint your medium sized pot (you have two of these – 4″ pots) with the brown spray paint. This will be the stump of the tree. Set this aside until the end.

Spray paint the lip around the top of each additional pot and the entire saucer with the white spray paint.
When they are dry tape off the lip of each white pot.

Now spray paint the 3 pots with the Olive spray paint. Make sure to paint the bottom of each pot as well.

When the green paint is dry, remove your tape. The edge doesn’t have to be perfect, but if any of the green bled really bad you’ll need to touch it up with a little white paint. I just used some white acrylic paint to touch up one or two spots.
Now it’s time to add the glitter! This part was really fun!
I put a big blob of the school glue in a paper bowl and then added a bit of water (maybe about a tablespoon or so). Mix the glue and water together to make a soup type consistency.
Now just paint the liquid glue on the areas where you want your glitter. I painted all the edges of the pots and saucer (minus the brown pot).

Work in small sections. Paint the glue, add glitter, paint more glue, add more glitter.

I used a large cookie sheet and just poured glitter over the glued areas over the cookie sheet. At the very end I scooped all the extra glitter up and put it back in the container. Believe it or not this was not that messy!

In the middle of your crafting you may want to take a lunch break and watch some TV.
…in your PJs.

I tried the glue mixture AND Mod Podge, and honestly, for this project they worked about the same. School glue is much cheaper!

Now it’s time to wait again. Waiting is the biggest part of this project. Wait for the primer to dry. Wait for the spray paint to dry. Wait for the 2nd layer of spray paint to dry. Wait for the glitter glue to dry….

When it’s FINALLY dry (it really only took an hour or so), you can bust out your red paint!

Now, let me give you a little tip. I NEVER squirt paint out onto a plate. NEVER. It’s messy and wasteful. I just unscrew the cap and pour a little paint into the lid and use that to dip my brush. So easy!


Next I just free-handed some red dots all over the pot.

When the dots were dry I coated them a 2nd time so they would be more vibrant. While they were still wet I put a sequin in the middle of each dot. It’s glued on by the wet paint.

Wait again. This time for the red paint to dry.
Now it’s time to stack them!
Turn your brown pot upside down and set it where you want your Christmas tree to sit.
Place the saucer UPSIDE DOWN on top of the brown pot.
Place your 6″ pot upside down on top of the saucer. Place your 4″ pot upside down on top of the 6″ pot. Place the 3″ pot upside down on top of the 4″pot. Yadda yadda yadda….
For the topper I just found a metal star napkin holder at Goodwill. I spray painted it yellow and coated it in glitter. I set it on top with the ring for the napkin around the top pot.
*NOTE* I did not glue the pots together. I would recommend keeping this away from small children and pets that can knock it over. You can glue them together if you’d like, but I like to keep them separate so that I can nest them after Christmas for easier storage.

There are so many possibilities for this tree! I’ve got a 2nd one in the works that is 4 layers tall with a larger base and larger saucer. You can decorate these ANY way you’d like! Add any topper you can think of! I’ve got two more I’m making that are totally different from this design. Be creative! They don’t even have to be brown and green! Paint one hot pink and lime green. Paint one gold. Glue on bells and bows. The possibilities to decorate these are endless!
If you make one for yourself, PLEASE let me know! I’d love to add you to my Share.Inspire.Create. Party. I’d also LOVE to see all the great color palates you come up with.

Happy Crafting!


Hey! I'm Allison Hepworth. Welcome to my blog. I love showing tutorials for cool crafts, DIY projects, renovations, and decorating. My family and I live in Austin, Texas. To find out more or to contact me click 


