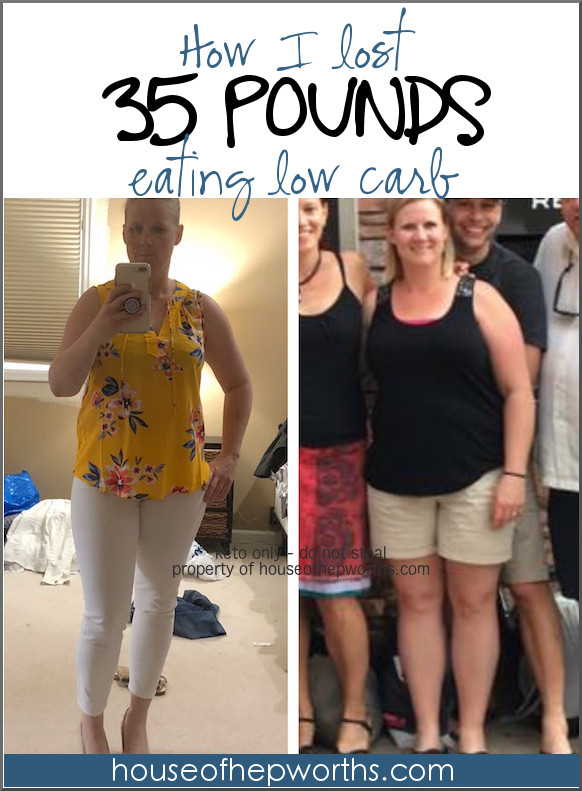
The past year I’ve been eating a low carb diet. I loosely follow a specific diet called the Ketogenic Diet,…
Read More
Helping you DIY your home one awesome project at a time
The past year I’ve been eating a low carb diet. I loosely follow a specific diet called the Ketogenic Diet,…
Read More
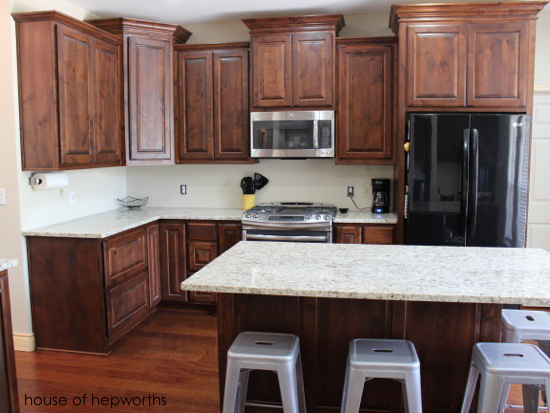
Hey guys! I am here to show you the final kitchen before and afters. We are pretty much finished with…
Read More
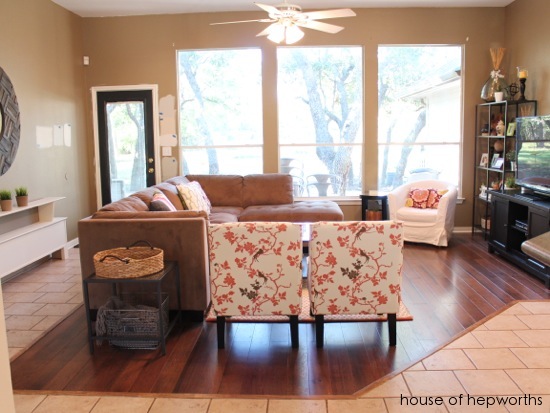
Hey guys! I realized I haven’t updated you on the family room – where we spend the majority of our…
Read More
Well folks, it’s the end of an era. The old house will officially belong to someone else by Thursday. We…
Read More
Every year One Project Closer hosts the coolest Before & After contest benefiting Habitat for Humanity. They are on their…
Read More