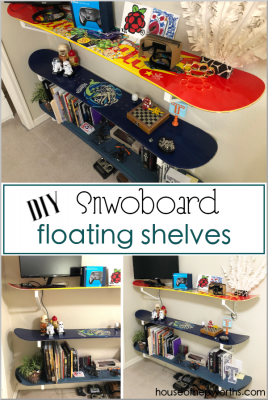
Making your own DIY floating shelves from snowboards is really easy and makes a fun statement piece! Follow this simple…
Read More
Helping you DIY your home one awesome project at a time
Making your own DIY floating shelves from snowboards is really easy and makes a fun statement piece! Follow this simple…
Read More
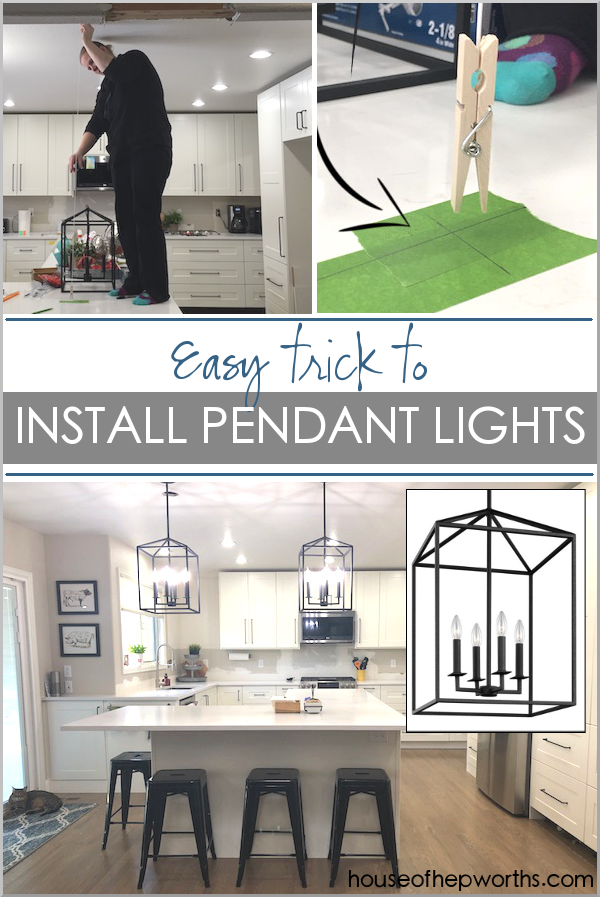
Our kitchen renovation is moving right along. Now that we have the bulk of the kitchen renovation finished, it’s time…
Read More
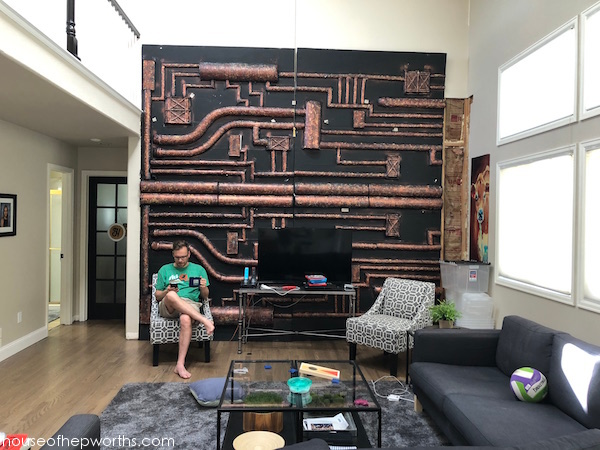
We were recently pranked so good by some of our friends that I am still laughing about it. Seriously, this…
Read More

I’m venturing away from our huge whole-house renovation today to share a quick update in our 1st floor guest bathroom….
Read More
After almost 2 years of living in our new home in Colorado, I realized I’ve never given you a tour…
Read More