Making your own DIY floating shelves from snowboards is really easy and makes a fun statement piece! Follow this simple tutorial to make your own shelves. This tutorial uses snowboards, but you can also use skateboards, wood shelves, or melamine shelves from the hardware store. The sky is the limit!
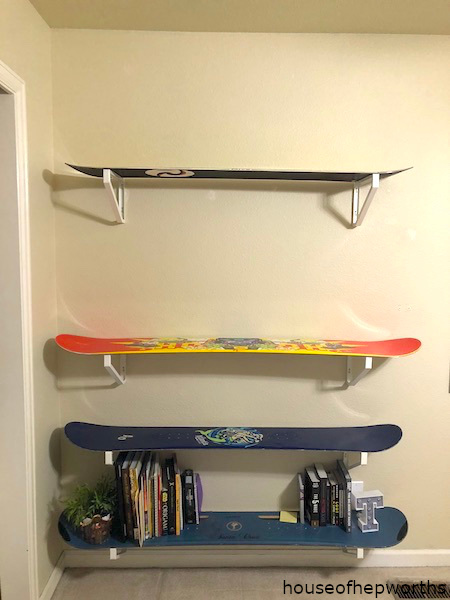
We hung these in our son’s bedroom and they are so fun. They are probably one of my most favorite projects I’ve ever done!
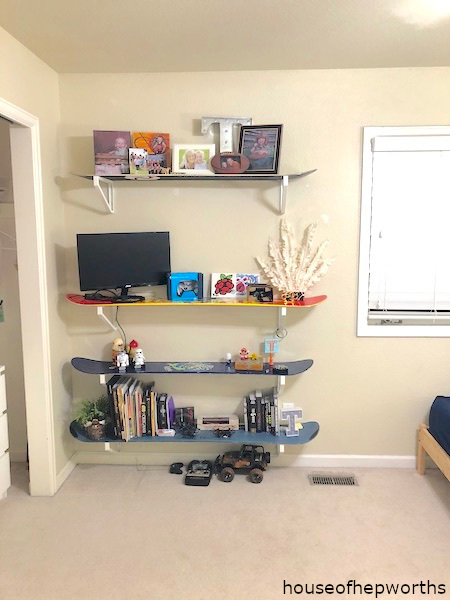
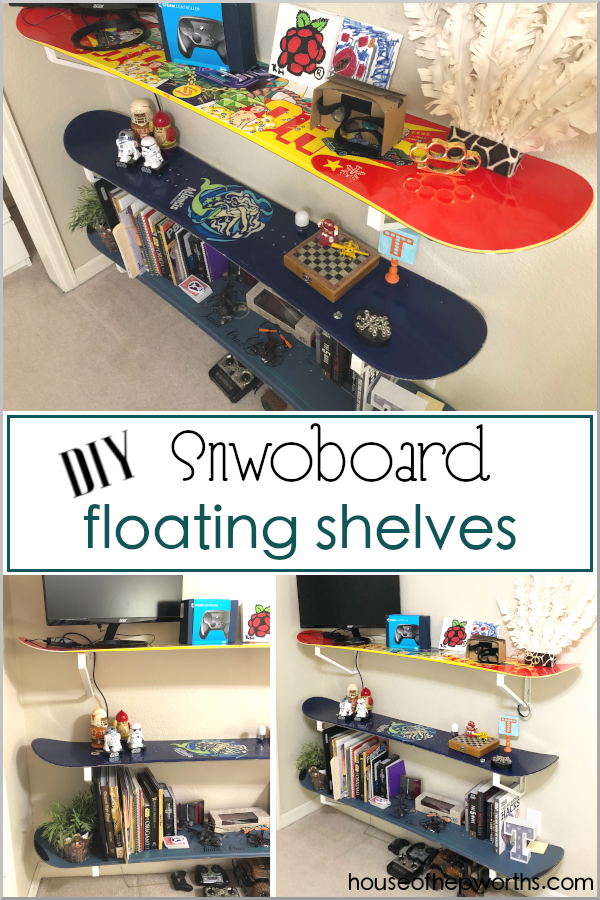
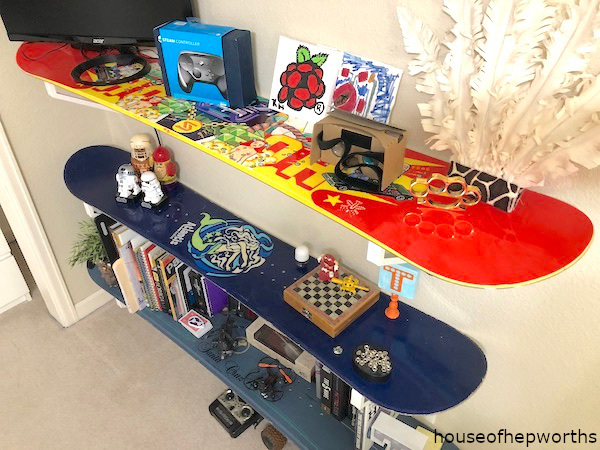
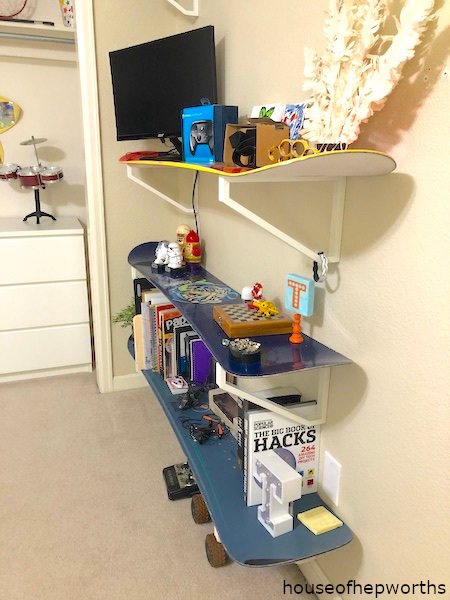
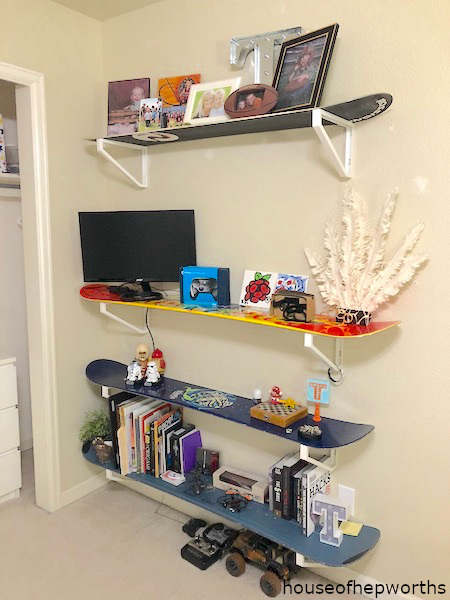
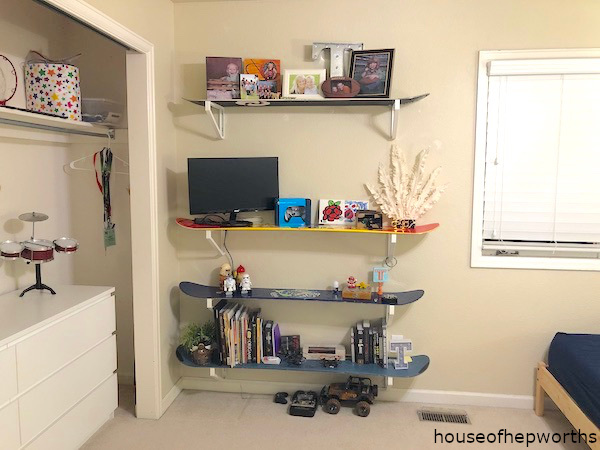
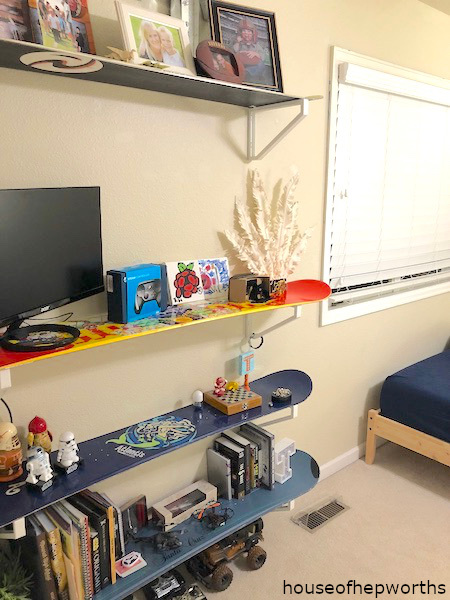
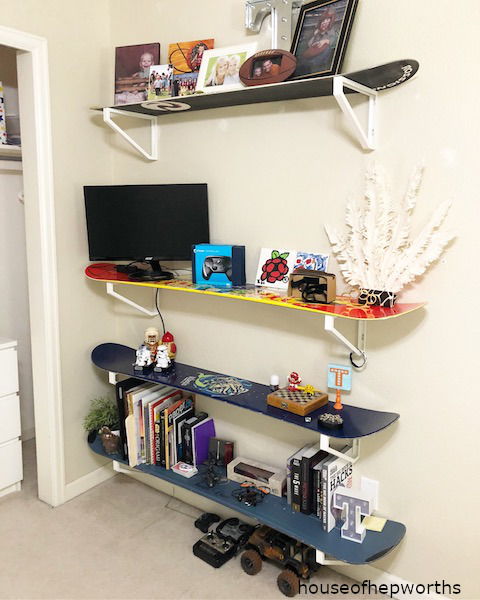
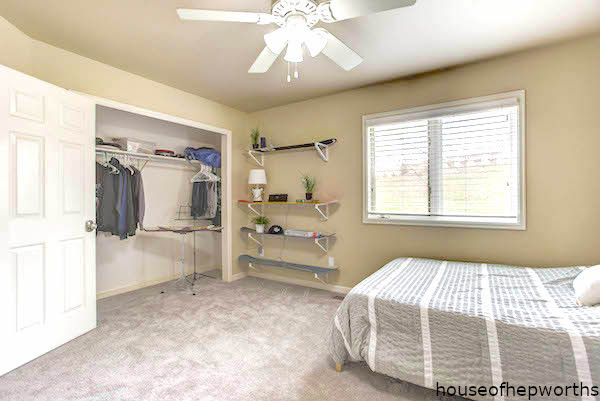
We hung the top shelf much higher than the rest of the diy snowboard shelves because our son wanted space for his computer monitor. You can hang them at equal intervals if you’d prefer them to be more uniform.
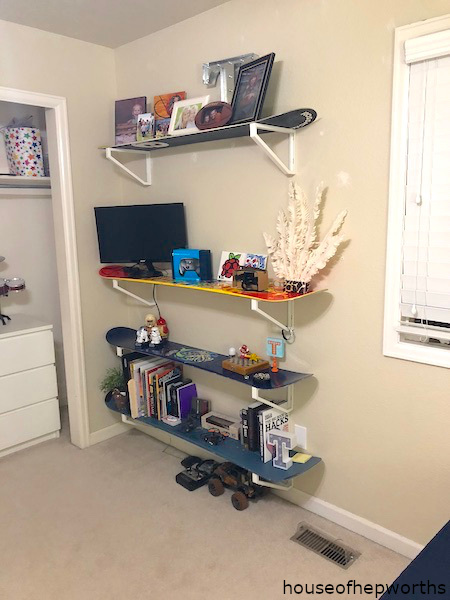
They fill the space between the window and his closet really well. As you walk into his room they are the first thing you see and are a showstopper!
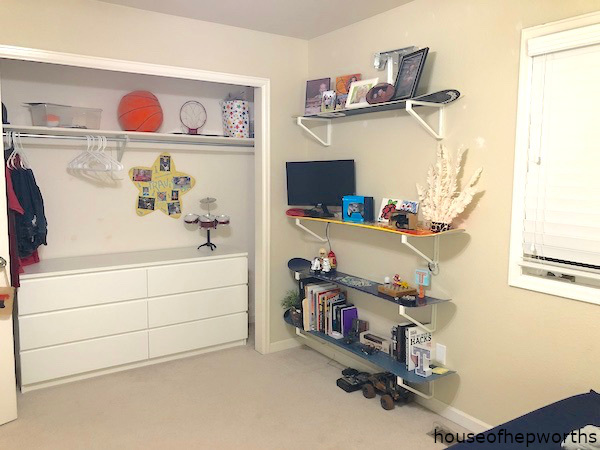
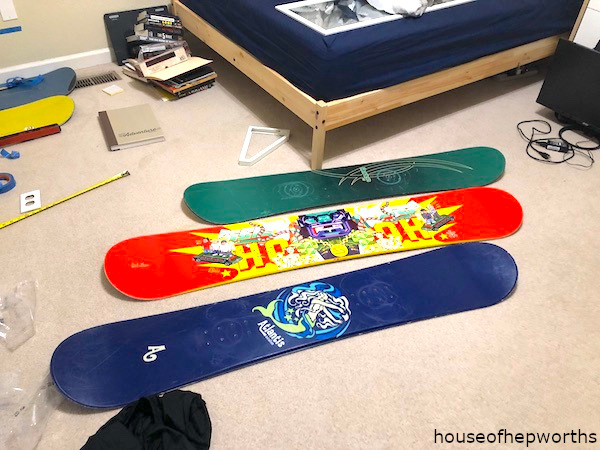
As you can see, each shelf is unique because each shelf is a different brand and style of snowboard! These diy snowboard shelves would look really great with skateboards if you have a smaller wall to fill.
Shopping list:
Used snowboards
shelving brackets
level
screwdriver (these are my favorite!)
wall anchors
command strips
Follow these simple steps to create your own DIY snowboard floating shelves!
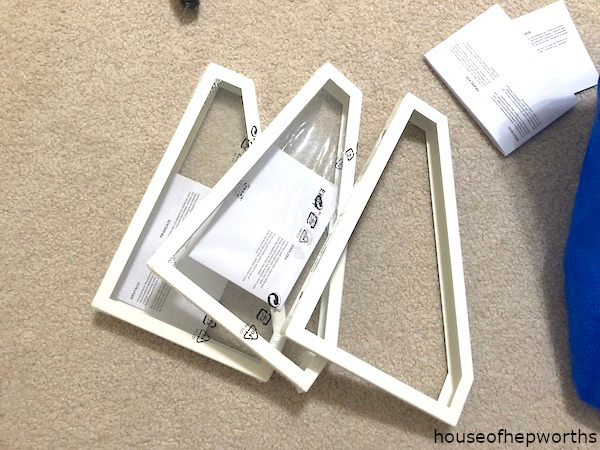
Step one, find your snowboards and purchase your brackets.
I found all these used snowboards at thrift stores for around $12 each.

I purchased these brackets at IKEA. They are called Ekby Lerberg brackets. You will need two brackets per shelf that you plan to hang.
Step two, remove all bindings and then wash your snowboards really well.
If your snowboards are used, they will probably be dirty. Also, if they have bindings, remove them.
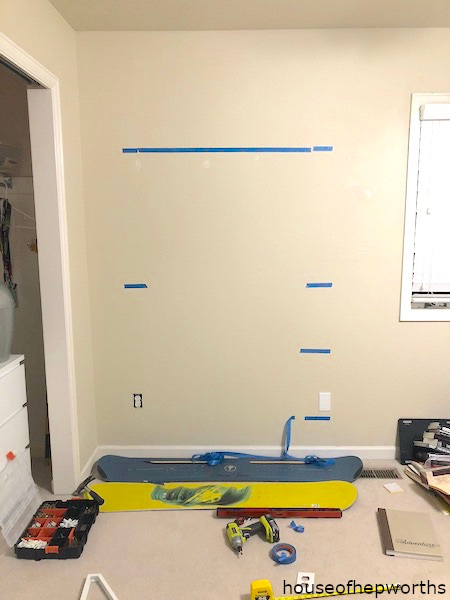
Step three, mark where you want your diy snowboard shelves on the wall.
I like to use painter’s tape to mark where my brackets and shelves go. This way I can reposition it many times until I get it just right.
Step four, hang brackets.
Time to mount your brackets. Using your wall anchors and level, hang your brackets on the wall. Make sure you don’t hang them too wide or too close together. You want the snowboards to overhang on either end by about 6″-12″.
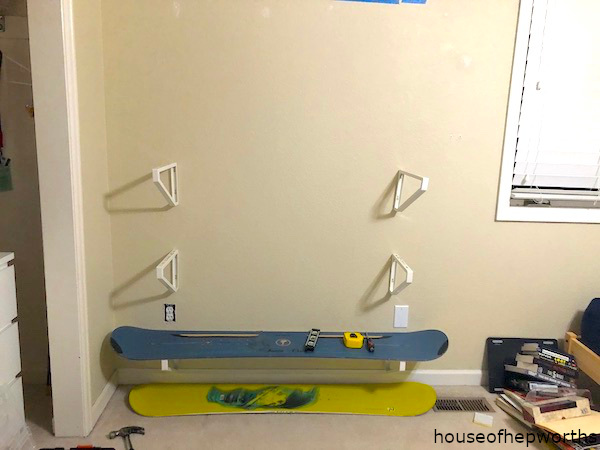
Snowboards come in a variety of lengths, so it’s okay if some boards overhang more than others. Just make sure your brackets are all level and lined up.
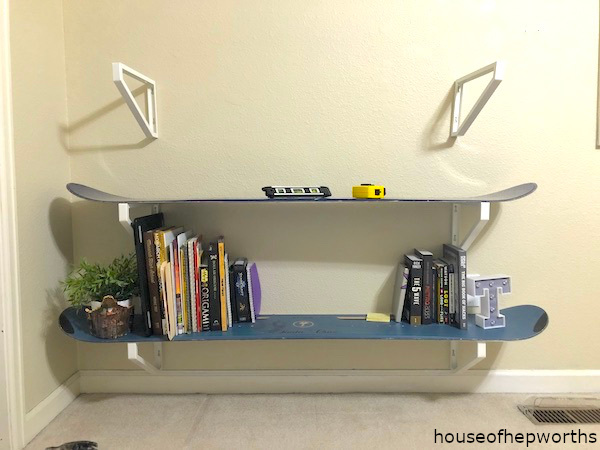
Step five, secure your boards.
To secure your snowboards to the brackets, use command strips. They are double sided and hold very well. Snowboards are hard to drill through so it will be very difficult to screw them into the brackets.
WARNING: Do not hang these in a small child’s room. Do not climb on them. If a child climbs on them, the boards will most likely come off the brackets and the child will be injured.
Step six, style your new diy snowboard shelves!
Take a step back and admire your amazing new custom snowboard shelves! Now get busy styling them with all your favorite things.

Aren’t these so fun?! Do you have any really fun decor in your house? I’d love to see it! Post a link in the comments below and I’ll check it out.
Here are a few more projects you will enjoy:
- How to make your own tire swing
- Make your own magnetic frame to display artwork
- Great way to store LEGO books!
- Make a custom 3D cardboard houndstooth taxidermy unicorn head
- Fun mini monogrammed pedestals
- Custom Disney monograms for water bottles
- Caprisun wrapper bags!

Instagram || Facebook || Pinterest || Youtube
Thanks for reading! Have a wonderful week!
*This post contains affiliate links
I really like this idea. I would assume that the most common material that walls are made of is drywall. Is there any suggestion for a type of material that could be applied to the carving edge of board as to prevent it from damaging the wall?
Is drywall in combo with screw anchor strong enough to support these shelves, or studs required?