It’s time to retire the ol’ blog layout, header, & buttons. I’ve loved every second of the orangie blog. It’s…
Read More
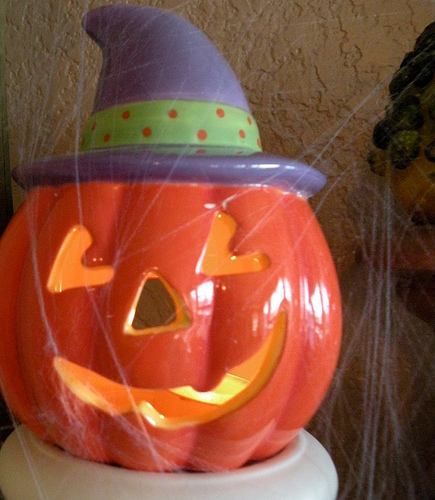
H A Double-L O W Double-E N spells “Halloween”
I’ve temporarily taken down the Fall decor and busted out the Halloween stuff! I pulled out my box-o-scariness… … if…
Read More
The best of September 2010
Let’s wrap up September, shall we? (Click on each picture to see the original post.) I started off the month…
Read More
Spicing up the pantry
I picked a cabinet for all my spices and cooking stuff… It sat like this for exactly 5 days before…
Read More
The Stairs
I tend to get focused on one thing and then obsess about it non-stop. It’s all I can think about…
Read More
mini green flower pot
When you see something like this: Don’t pass it up! I got this cute little worn out flower pot at…
Read More
![A cooler cooler [painting an old faded cooler]](https://www.houseofhepworths.com/wp-content/uploads/2010/05/cooler_after.jpg)
A cooler cooler [painting an old faded cooler]
Eleven years ago my hubbs and I were given a cooler for a wedding gift. It is definitely in the…
Read More
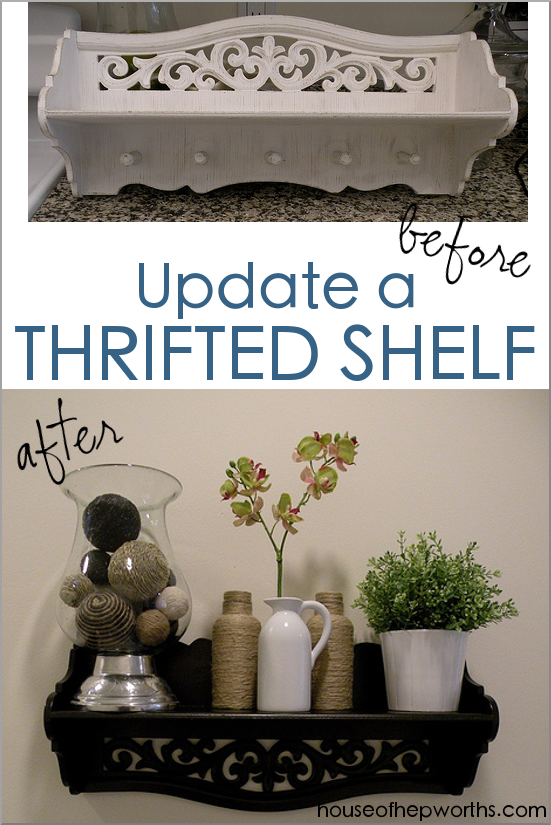
Update a thrifted shelf!
So… I got a new shelf. So cute, right?! I know!! I got it at a certain over-priced thrift store…
Read More
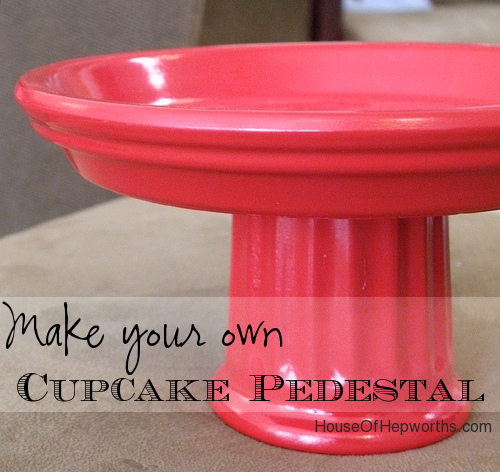
How to make a Cupcake Stand / Decor Pedestal
*edited to add: If you make this cute stand, don’t put food directly on it. The spray paint used isn’t…
Read More
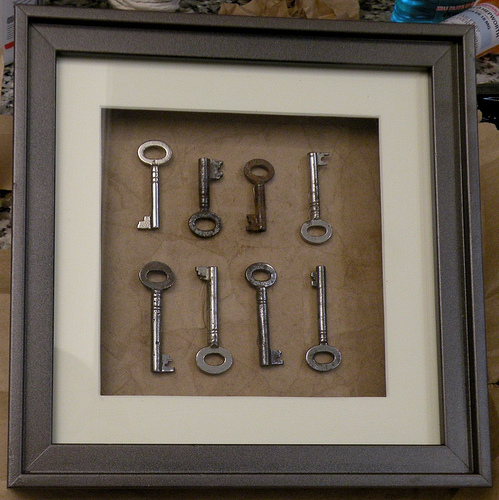
Skeleton Key Art
I am totally loving the framed skeleton keys, so go figure, I made one for myself!! I went to Etsy.com…
Read More
- « Previous Page
- 1
- 2
- 3
- 4
- …
- 6
- Next Page »