
Once again I didn’t take a decent quality “after” picture of this project before we moved. GRRRRRRR!!! This is one of my favorite projects and I’m pleased as punch at how it turned out, so I’m just kicking myself that I only took two after photos, both of which were with my cell phone.
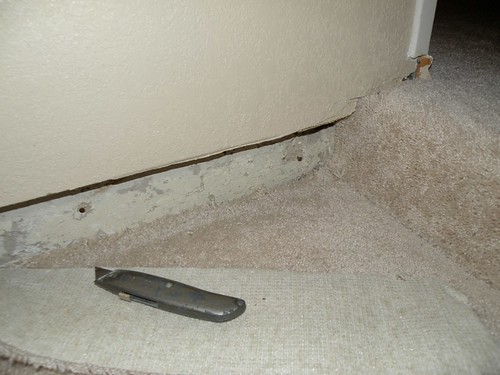
As you can see we had some serious issues with baseboards in our sunken living room. The previous owner had the living room walls paneled. Instead of taking it down to the floor, they attached some panel-type baseboards about 6″ from the ground and had the bottom 6″ (where baseboards should have gone) carpeted up the wall. YIKES! I don’t think this house could have looked any more 80’s if it tried. Here’s what the room looked like when we moved in:
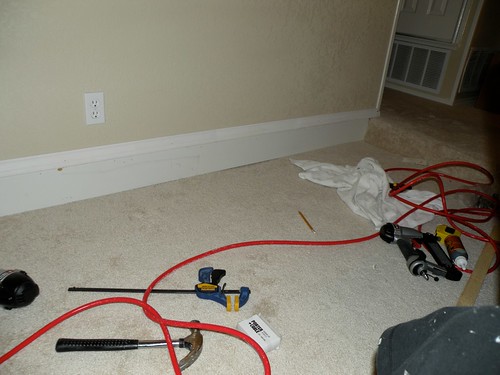
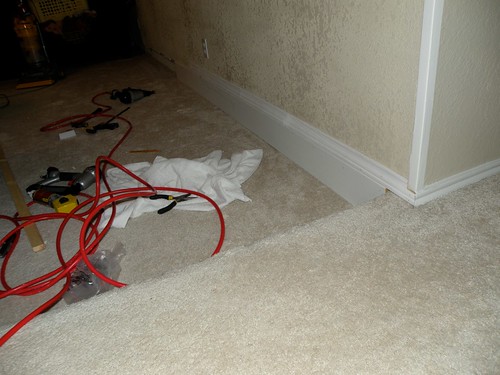
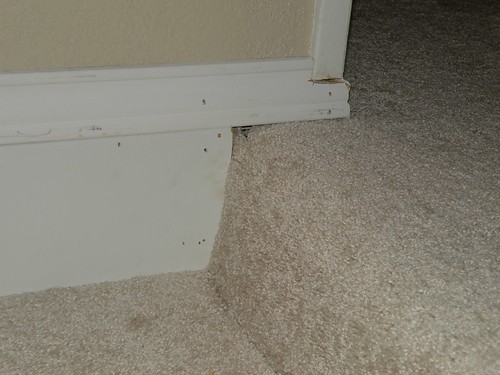
Once the paneling was removed and the walls were re textured we were left with this 6″ gap around the bottom of the room. I knew I wanted some chunky baseboards, but executing it wasn’t so easy.
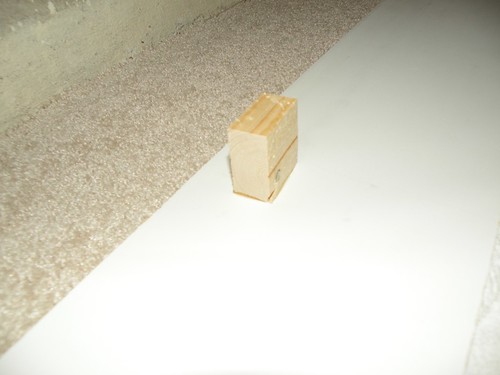
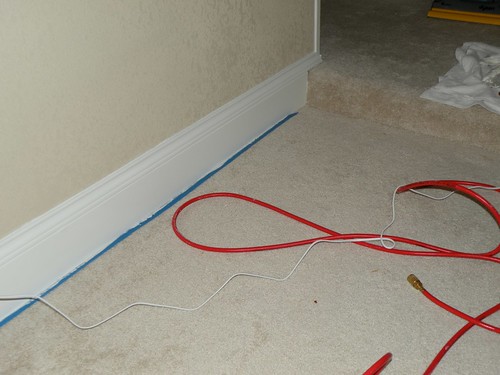
Not sure if it’s obvious from the picture, but the Sheetrock stuck out further from the wall than the cement behind the carpet, so there was a gap between the bottom of the baseboard and the cement wall. I knew if I just attached the boards if they ever got kicked they would buckle in on themselves. I had to think of a way to brace them from the bottom.
Each wall’s thickness from the cement to the back of the baseboard was different, so finally I decided to cut 1×2’s into squares the exact thickness I needed per section of wall. I gorilla clued the blocks to the baseboard and then put a small staple in each block with my air compressor staple gun. I also used my utility knife to cut and remove all the carpet attached to the wall.
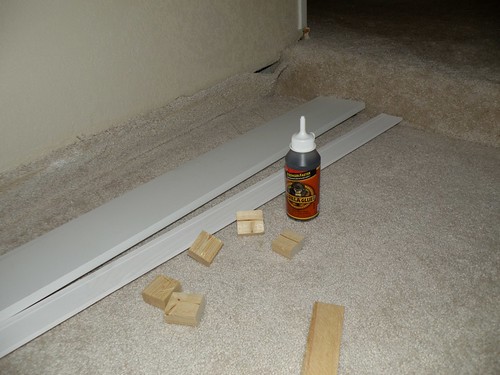
For the height of the baseboard, I decided to use 1x6s and then a strip of molding on top. I looked into buying the thicker baseboards, but they were more expensive. Also, doing it this way gave them more texture.
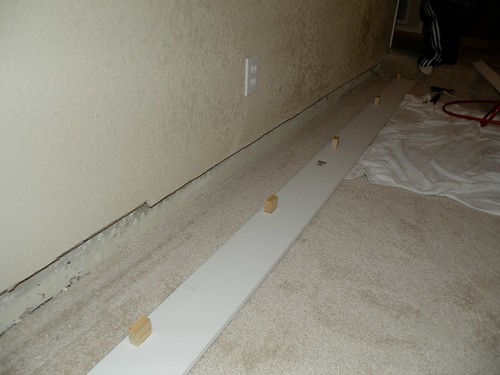
Once the blocks were secure on the back of the 1×6 I nailed it to the wall making sure the nails went into the sheetrock section. Once the 1×6 was attached I placed the molding on top of it and nailed it into the wall.
It’s okay if your woodwork looks crappy and full of holes. That’s what wood filler and caulk (and paint!) are for. Once the boards were attached I taped off the carpet…
…and then I went around with wood filler and filled in all the nail holes and gaps in the boards. After that I got white caulk and caulked the seam inbetween the two boards as well as between the top baseboard and where it hit the wall.
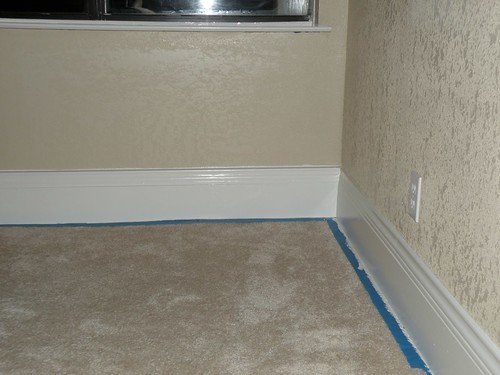
From there I started painting in high gloss (Alabaster by Sherwin Williams). I didn’t need to prime because I made sure to buy boards that came primed – easy way to save an extra step!
Once the paint was dry I used my utility knife to help remove the tape. Voila! Beautiful baseboards!
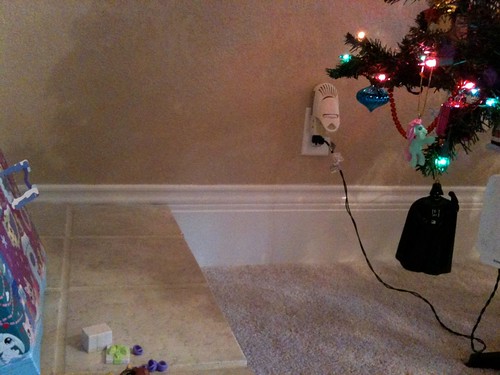
The tile you see is from our fireplace. Yes, that is a Darth Vader ornament hanging from our tree…
I think it looks great! LOVE me some chunky molding! 🙂
Thanks for linking up.
Rachelle
I just started my blog, but I love yours and have followed it for awhile!
OMG – I was laughing so much at this crazy previous owner with the un-even walls and carpeting running up the sides because I can soooo identify with you. It seems like everything we’ve done in our house has been met with some sort of bizarre obstacle. Where do these people learn home improvements? Obviously, they are NOT checking out all the great home improvement blogs. You have done a fabulous job with your home so far. I am looking forward to seeing more as you complete it!
Stephanie, I’m wondering where the previous owner learned everything he did to the house. I can tell that he’d made updates b/c everything he has touched he did in the most crappy cheap way possible. Did you see my post about the tile patch job on the kitchen floor? He glued the spacers in between the tiles and then grouted over them! It’s been one obsticle after another, but I’m pleased with the results so far. Thanks for your comment. I look forward to reading your blog.
That looks great! There is a place in my house where we need chunky baseboards due to some weird sheetrock and I am thinking about doing this same idea! Love it!
WOW! What a project! I can imagine that was a lot of work but it was certainly worth it… It looks great!
Wow, I thought I was the only one on the planet that had carpeted walls! When i bought my older home, I had the IDENTICAL issue that you did, and solved it the IDENTICAL way! Hooray for great minds thinking alike…I was just shocked to see someone else having to deal with the same bizarre design of carpet up the wall that I did. Great post.
Thank you for sharing! We have the same problem in the house we just bought. I didn’t know how I was going to get baseboards attached to concrete! HAHA They look great, I hope I can make mine look good too!