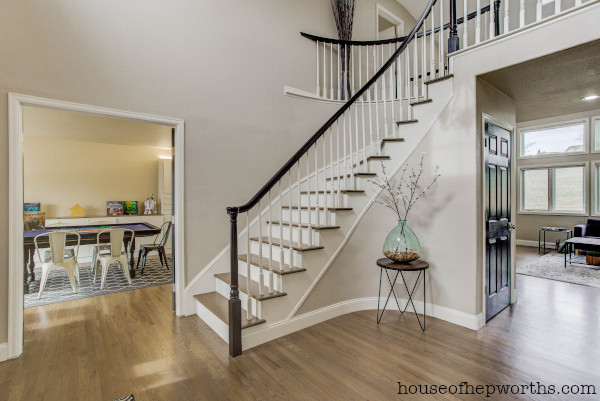
Today I’m sharing how to bend a baseboard around a tight curve. We have a curved staircase which is beautiful to look at but also made for a challenging baseboard install.
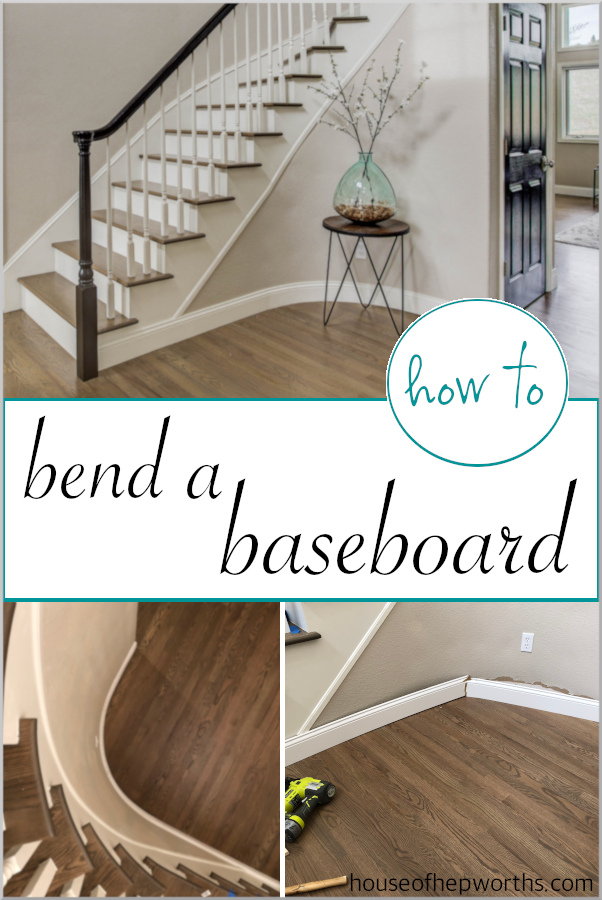
After some trial-and-error, and lots of googling, I figured out the easiest way to install our new tall baseboards. I’m not a professional woodworker, so I’m sure this will make them all get an eye twitch reading this, but for me, this worked the best, and in the end looks great which is all that really matters.
If you are already installing baseboards you probably already have all the supplies needed on hand, but here’s a quick supply list just in case. These are affiliate links.
Supplies needed:
First: Here’s what NOT to do to bend a baseboard!
I started by trying to actually BEND the baseboard. I measured the wall and cut my baseboard to the correct length.
Maybe if I pushed on it hard enough and slowly enough it would bend and fit right into place.
WRONG. The wood baseboard snapped in half. I tried a second time with an MDF baseboard. It also snapped.
After a little googling, I tried a few other ways to get the board to bend. Wetting it down caused the real wood board to separate at the seams and the MDF board to swell. Heating the board up caused the real wood to separate at the seams and the MDF to just snap in half.
Don’t waste your time wetting or heating the boards.
Here’s what actually worked. Follow these steps to bend a baseboard around a tight curve!
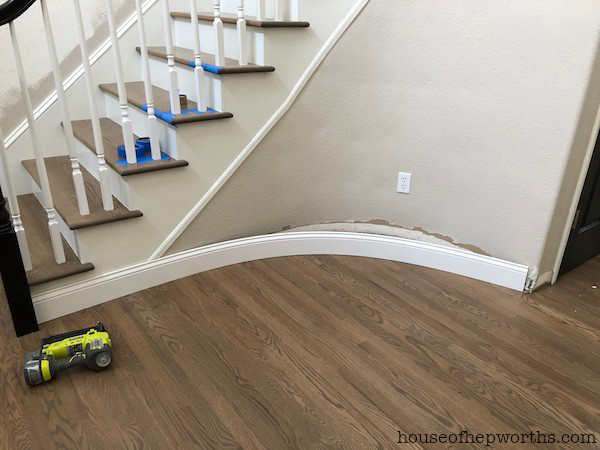
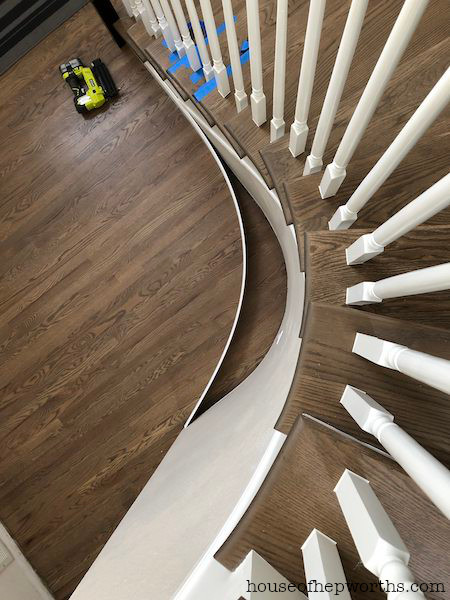
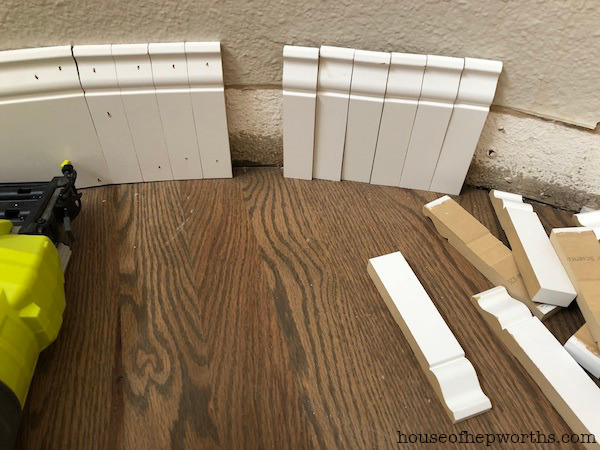
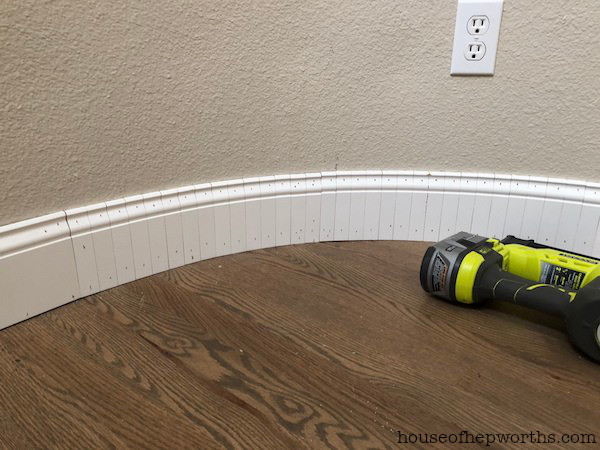
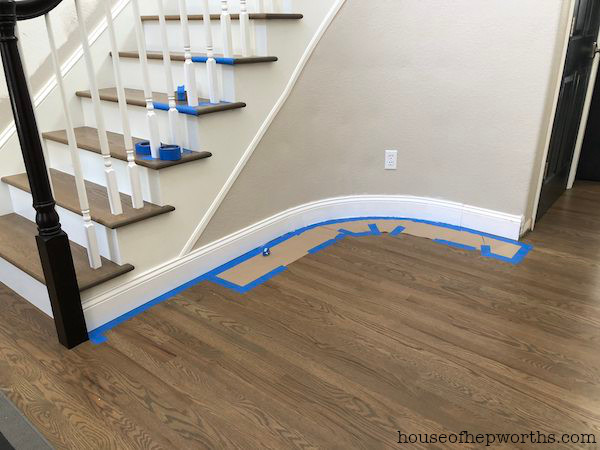
Step one: To bend a baseboard, using your miter saw, cut your baseboard into 1″ pieces.
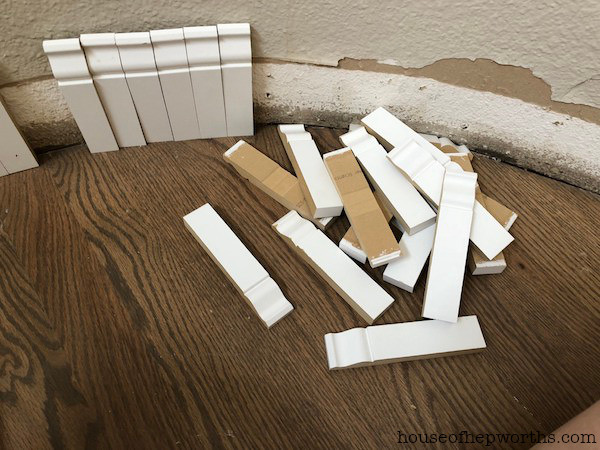
(You can also try your hand at a technique called a kerf cut, but after several attempts at this I gave up and cut them into 1″ strips.)
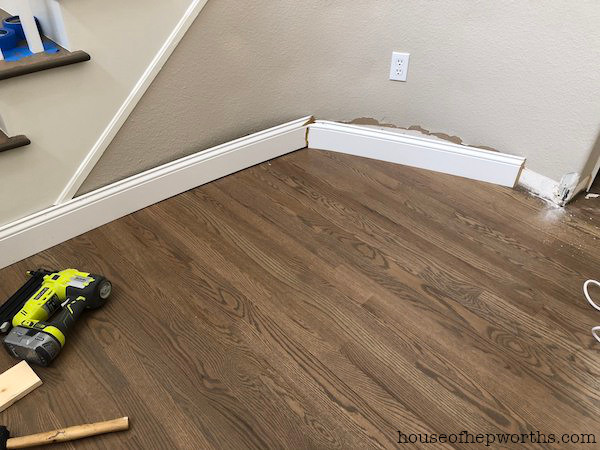
Starting at one end of the curve, nail each piece of baseboard into place making sure to keep them level and perfectly lined up.
Keep working your way around your curve.

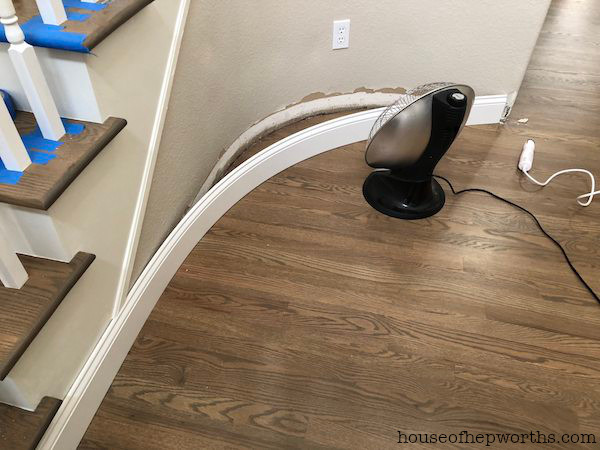
You will end up with a row of 1″ baseboards that form a nice tight curve around your wall.
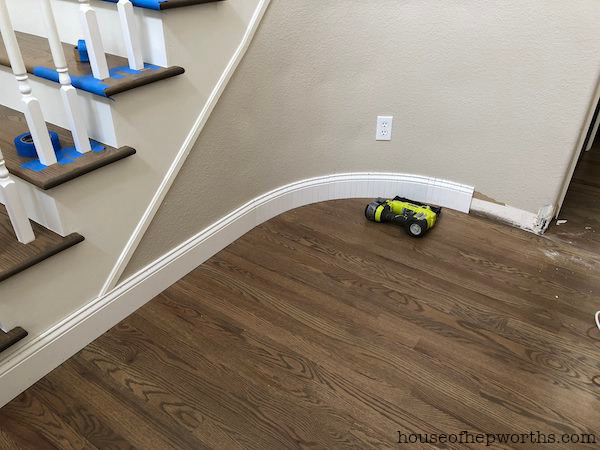
When you get to the end of your bend, you can finish the wall by attaching a piece of longer baseboard cut to length.
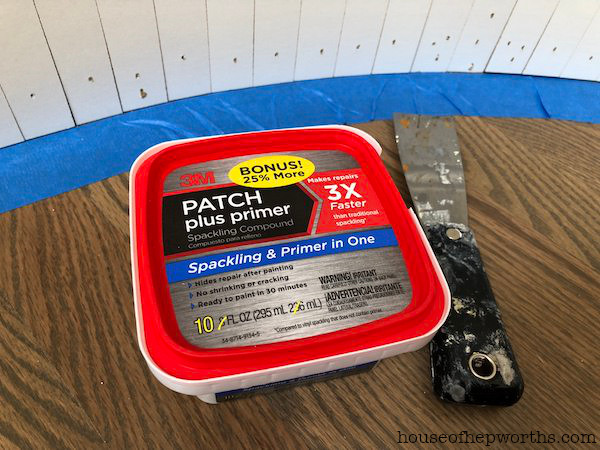
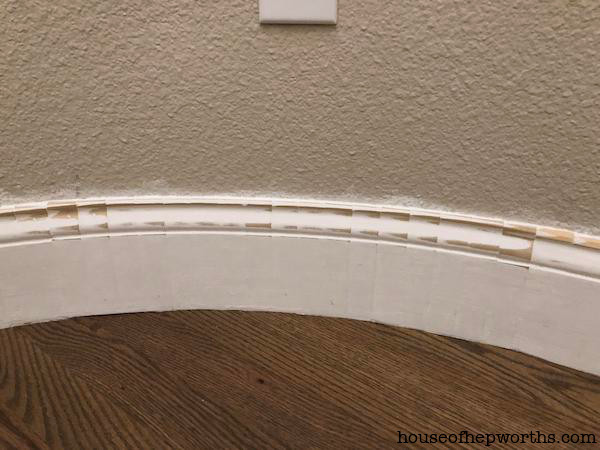
Step two: Begin filling the gaps with your 3M Patch plus primer and a putty knife.
My new favorite patch and putty is this 3M patch plus primer. It goes on really creamy and smooth and leaves a nice primed finished surface to work with. (I am not affiliated with 3M and this post is not sponsored. I just really like this product.)
Before adding any filler, primer, or paint, make sure to tape off your work area really well. You don’t want to get any paint or primer on your floors. Also, the tape around the baseboard leaves a very nice clean line after.
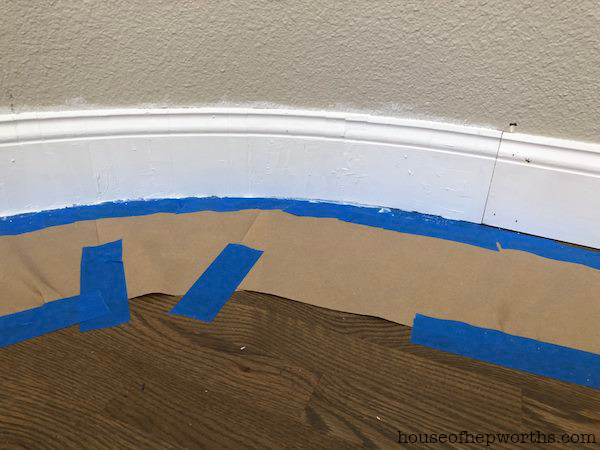
Use your putty knife and the patch plus primer to fill in all the baseboards. Make sure to fill in the top as well as all the nail holes, cracks, and seams.
When the patch is dry, sand it really well. After you have sanded it you will want to do a second layer of the Patch plus primer and then sand again. This will give you a very smooth finish. Note: don’t remove your tape and paper on your floor until you are completely finished with the patch and sanding.
Step three: Add new tape and begin painting.
After you are done puttying and sanding and you have a perfectly smooth baseboard, it’s time to paint it. I removed all the old tape and paper, added a new layer of painters tape, and began painting the baseboard.
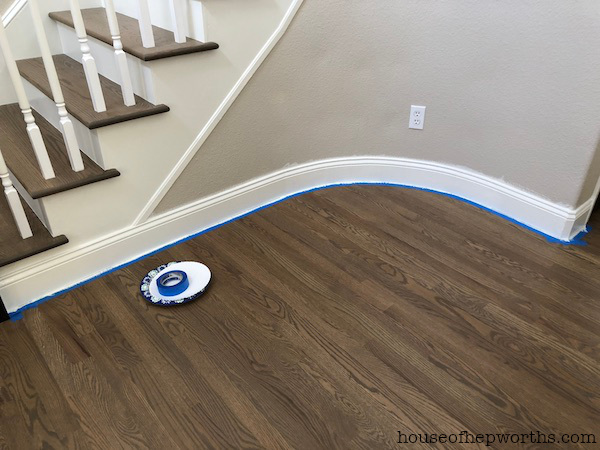
My favorite trim paint and color is Alabaster by Sherwin Williams Pro-Classic, semi-gloss.
Here’s a look at the finished baseboard looking down from above. It looks flawless.
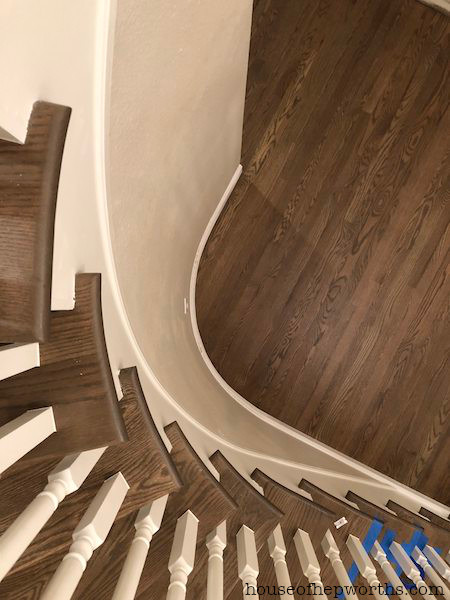
Step four: Admire your perfect bend in your baseboard.
You are done! You can now step back and admire your handy-work.
Can you believe how fabulous this looks? If you aren’t a professional woodworker, and are just trying to hang your new baseboards so you can live in a finished house, this is a great technique to use. Our baseboard around our staircase looks perfect.
Can you believe how easy it is to bend a baseboard? I racked my brain and tried multiple ways to accomplish this task, and in the end cutting the board into small pieces worked the best. If you enjoyed this tutorial, please share it with your friends and on pinterest!
Here are a few more projects you will enjoy:
- An amazing staircase makeover – from carpet to wood
- Install beadboard and hooks in a bathroom
- How to install Craftsman-style moulding
- Frame a bathroom mirror + install beadboard
- Dramatic Fireplace makeover – board & batten + a black mantle
- IKEA hack: mudroom built-ins and beadboard moulding
- Board & Batten moulding in a little girl room
- How to install shelves in a closet

Instagram || Facebook || Pinterest || Youtube
Thanks for reading! Have a wonderful week!
*This post contains affiliate links
I like how you always gave us actual guide and tips and you also share some pictures how you do it. I will definitely try these!
This is genius! I’m SO bad at installing baseboards – what you did is really impressive. Looks great!
Thank you, I have tried all your techniques above and I will now do the 1” strips. I have the same baseboard you are using, they do sell this baseboard in 10’ lengths that is a bendable vinyl, but at an outrageous cost of $230.00 Canadian per length which I could not justify… close, but no.
Thanks again for the post!
Came out great but the kerf technique will work if you have a sliding miter at or a table saw ( I am not an expert). You want to use a test piece and you want to adjust the saw so that it only cut through say 60% of the thickness . Do a test fit and see if it worked go deeper if needed. if you had to cut 15 strips that’s 30 nails!
Oh my god thank you so much for sharing this information. I’m retired and doing little things around the house during this Covid crap and could not for the life of me figure out how to do a curved baseboard.
thank you again!!!!
The kerf method worked for my outside curve but on the interior curve it snapped as yours did. Thanks for osting this idea, it looks a bit fiddly but I’m going to try it.