
I have this random phone jack in my kitchen that I am never going to use.
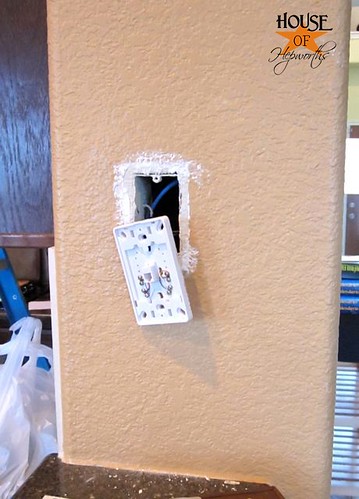
So I decided to just get rid of it. First I unscrewed it.
And I didn’t really know what to do with it, so I just left it all wired up and shoved it through the wall hole.
Then I bought this patch kit:
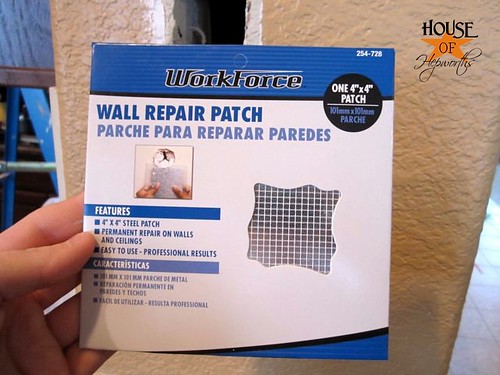
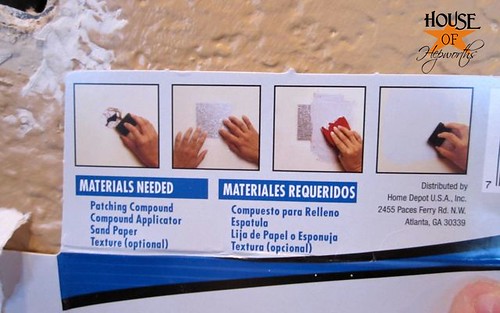
The directions on the back are pretty straight forward.
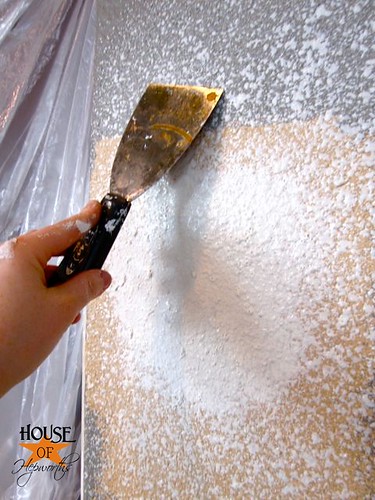
I stuck the patch to the wall and then used joint compound over the top of it with a putty knife.
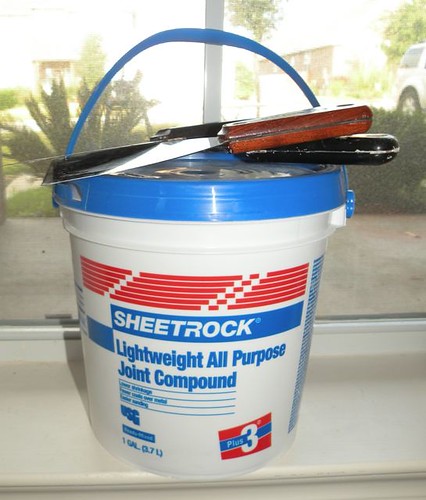
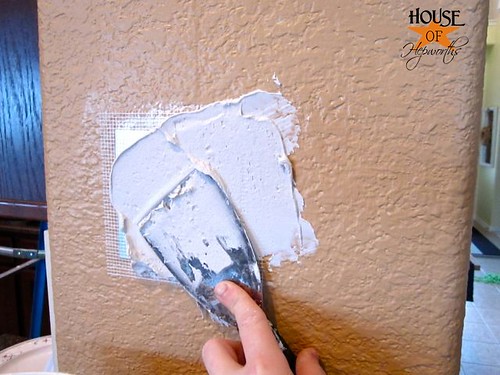
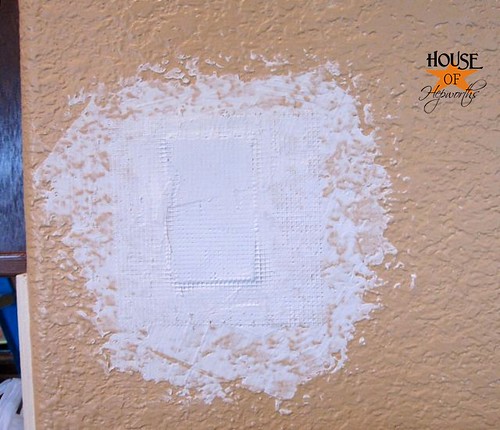
Once I had it all smoothed out I let it dry and then lightly sanded it.
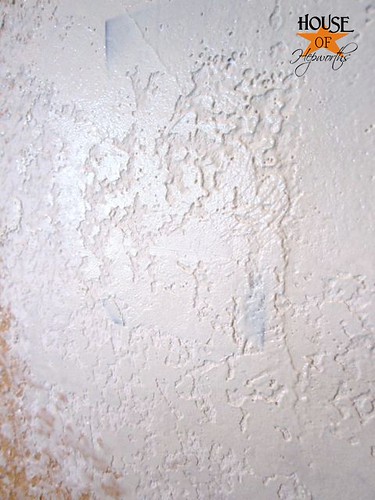
Now the fun begins! I attacked it with a can of spray texture.
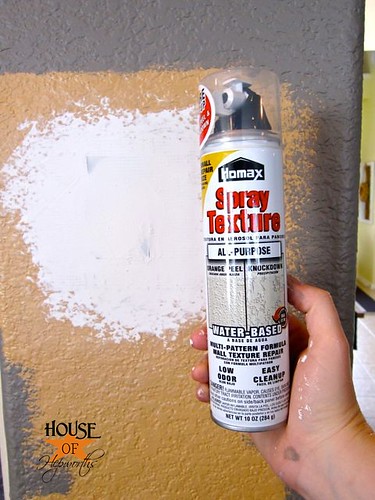
Some homes have smooth walls, in which case you don’t need spray texture. But, if your house does have textured walls read the back of the can to figure out what type of texture to apply.
We have knock-down texture, so I’m going to show you how to recreate the knock-down.
Set the dial on the texture can to the thickness you want. Then just spray all over the area you are texturing.
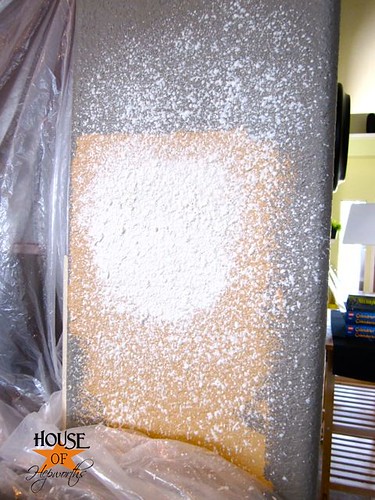
This stuff gets everywhere so it’s a good idea to put up newspaper or plastic around your area.
To make the “knock-down effect” let the spray texture set for about 5 minutes or so. Then take your putty knife and LIGHTLY “knock-down” the texture.
Isn’t this texture just beautiful? So easy, and looks great every time!
Once the texture is dry, paint the wall and then stand back and admire your handy work.
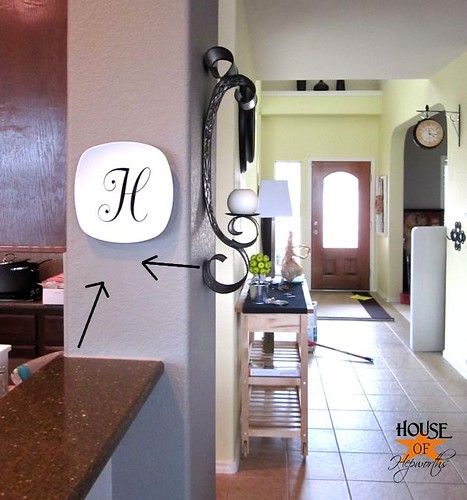
You can still kinda see the area that was patched, but it’s going to be almost impossible to match it 100%. If you didn’t know the area was patched though, you’d never notice it.
Sure beats having a big ugly white phone outlet!

And now I can hang up my monogram plate, ’cause you guys know how much I love my monograms!
Oh my gosh, plasters for walls! I so need to get me some of these!
i love it!!
We just did away with our Land Line so I have one of those to patch too thanks for the tip!!
We have one in the kitchen that I hate. It’s in such a weird spot that I can’t even hang anything over it. I wish I’d thought to do this when I repainted the kitchen last year. I probably still have paint left so I’ll give it a go.
We have textured walls, which I also hate, so I’ve used the orange peel spray before. I’ve just never used the patch. It seems easy enough, though. Thanks for the tips!
The renters that lived here before we bought our house were rough on the walls, there was a hole about the size of a shoe and a couple of fist size ones… I mean they must have had it rough living rent free for a year while the foreclosure process went through… why not do some redecorating… it worked out for us because the house was as cheap as chips and only 2 years old (sure knock a couple of holes and I will pay $40,000 less than asking price booya!) Anyway the holes got patched except for the texture. I knew it would be you that would show us how to do it properly. Ours is the knock down texture too, which confused me while looking at the cans. Well duh on me that looks rather simple. Thanks! The odd smooth patches in our hall are going bye bye soon!
It looks great! Nice job! 🙂
Michelle @ http://www.thrifty101.blogspot.com
I wonder if you can use that texture stuff on the ceiling? I hate… no wait… I LOATHE the pop corn crud on my ceilings!! We are redoing our bathroom this summer (hopefully!!) and the popcorn is the first thing to go… well… that and the hunter green trim work… blah!
I love this! I don’t think my husband will let me do it though since we will probably sell the house in the next few years. Mine is right in the same place and I would love to be able to hang something there instead. Maybe I will just remove the jack and cover it with something!
Gah, I hate texturing. In theory it is so easy…but I’m never any good at it!
Great job! You rock! 🙂
Thanks for the tutorial – I need to do some fixes around here soon and this helps. I am surprised you covered a live phone jack though – as someone who lives in a “one jack” house ( I WISH I had one in my kitchen!) – that is something that a future owner may really want to have. At the very least, if you ever sell, make sure the realitor points out that there is a phone jack back there. I know land lines aren’t what they used to be but a lot of people still need them for TV’s 🙂 or internet.
Hopefully the phone outlet was either wired in ‘parallel’ (i.e. no other outlets are connected to it) or you (or future owners) never have a problem with that now buried phone jack as it will be impossible to fix now that you have buried it. You may want to add a note at the point where the phone line enters the house indicating where the buried outlet is so that any future problems with that outlet can be fixed with only limited damage to the walls when trying to find that outlet.
Great job! Everyone uses cordless phones anyhow so what is one less jack.
nice job, you are so handy!
I think it turned out great! You can hardly make it out! Well done!
Hugs
SueAnn
I LOVE this!! I would love for you to share it at my Linky Party!
*ENTER LINKY PAR-TAY Here! *
xoxokara
Great Job! Thanks so much for sharing. We have 5 hideous and obvious heat control boxes from old ceiling heat in our home. The are approximately 2 feet above our light switches. I have been staring at them and dreading trying to get rid of them. I now know it is a job I can tackle and master by myself. Thanks again.
Just happened upon your site… Love it, and I am SOOOO going to patch a phone jack or two in my house – I knew I could do it, I was just intimidated… Thanks!