• about
    • press
    • work with us
    • Privacy Policy
  • archives
  • our favorite products
  • popular projects
    • link parties
    • Facebook
    • Instagram
    • Pinterest
    • Twitter
    • YouTube

House of Hepworths

Helping you DIY your home one awesome project at a time

  • DIYing
    • Decorating
    • Fixing
    • Furniture updates
    • House Tips
    • House Tours
    • IKEA hacks
    • Kids DIY
    • Moulding
    • Organizing
    • Outside
    • Painting
    • Renovating
    • video
  • Crafting
    • Crafts
      • Craft fails
    • Dollar Store Crafts
    • Decor
    • kid crafts
    • Seasonal
    • Vinyl crafts
    • Wood Art
    • Wreaths
  • Sewing
    • Bedding
    • Costumes
    • Curtains
    • Kids sewing
    • Pillows
  • Eating
    • Appetizers
    • Breakfast
    • Candy, Cookies, & Cakes
    • Healthy
    • Kids Food
    • Main Dishes
  • Lifestyling
    • Announcements
    • Challenges
    • Diet/Exercise
    • Musings
    • Random
  • Blogging
    • Blog Tips
    • Brands
      • Giveaways
      • Product Reviews
      • Promotions
    • Conferences
    • Features
      • Guest Bloggers
    • Link Parties
      • Hookin Up with HoH
    • Press
    • Roundups
      • HoH Roundups

in Crafting· Crafts· Seasonal

How to make paper roses


With Valentine’s Day right around the corner, I thought I’d show you how to make a pretty rose out of paper!

paper_roses_hoh_14

These roses can be used for so many different things from filler in a bowl or cloche, glued to stems, or added to a variety of accessories.

Paper Roses are so easy to make and only require a few supplies and some patience (I like to make them while watching TV).

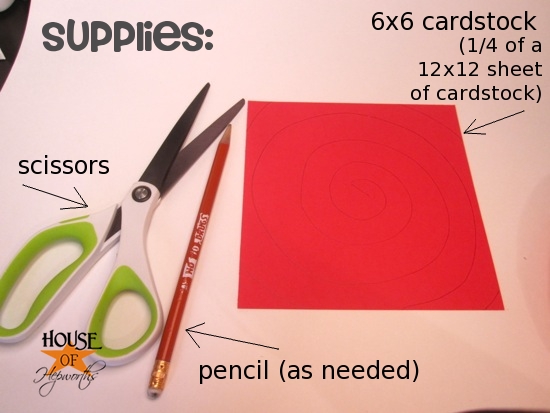
To make the roses, you will need:

* a 6×6″ square of cardstock. I buy 12×12″ sheets of cardstock and cut them into 4ths.
* a pair of scissors
* a pencil until you get the hang of cutting
* hot glue gun

paper_roses_hoh_01

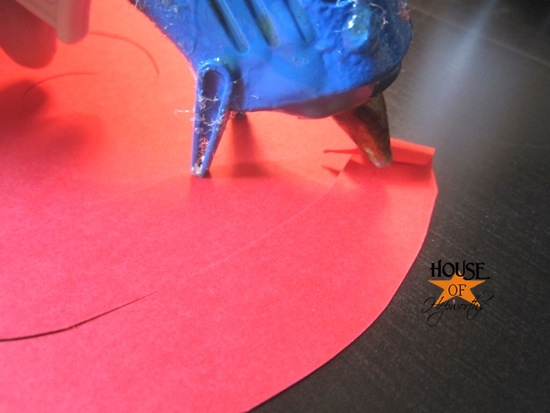
Start by drawing a spiral on your paper. Make the lines of the spiral about an inch apart.

paper_roses_hoh_02

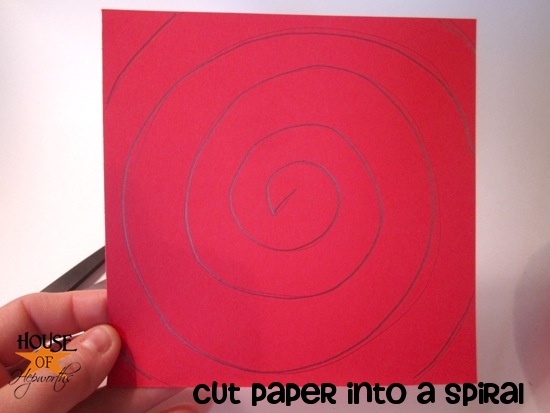
Now cut your spiral out. Once you do this a few times you can probably eyeball it and won’t need your pencil anymore.

paper_roses_hoh_03

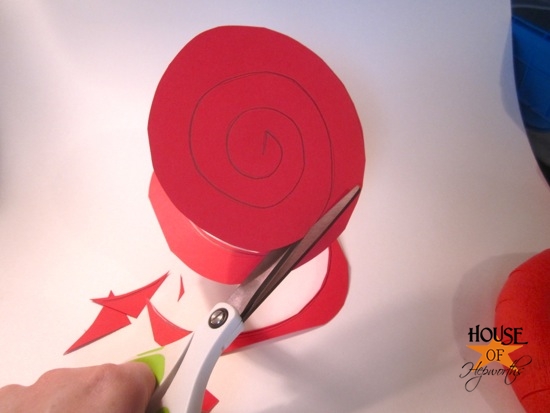
When you are done you are left with a spiral or spring of paper.

paper_roses_hoh_04

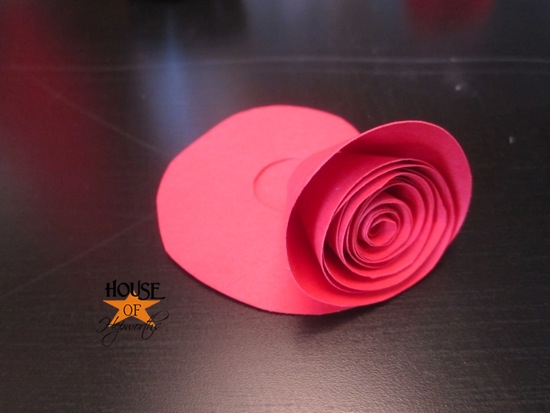
Starting with the outside of your spiral, you roll the paper around and around. Do it tightly at first, then get looser the closer you get to the middle.

paper_roses_hoh_06

paper_roses_hoh_05

Add a very tiny dab of hot glue ever few twists to secure your flower in place so it doesn’t unravel.

paper_roses_hoh_07

As you work your way to the middle of the spiral, keep the bottom edge in line. Because of the spiral shape, your “petals” will get further and further apart as you roll.

paper_roses_hoh_08

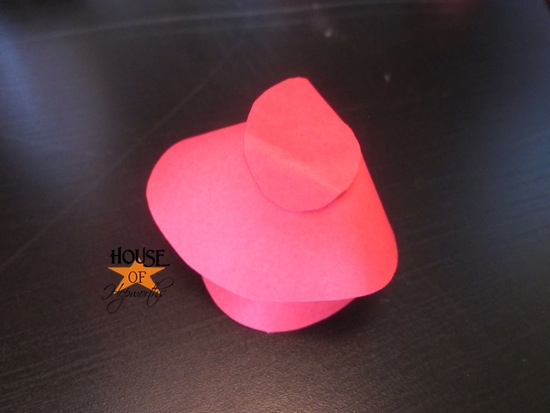
When you get to the center of your spiral, you will be left with a piece that doesn’t quite fit anywhere.

paper_roses_hoh_09

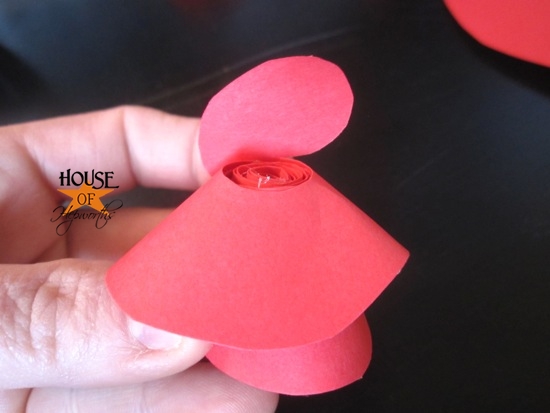
You can cut this piece off, but I prefer to hot glue it down to the bottom of my flower for additional stability.

paper_roses_hoh_10

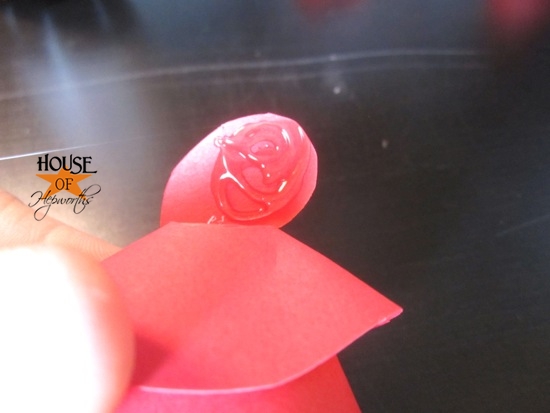
Here’s the underside of the rose now that it’s finished.

paper_roses_hoh_11

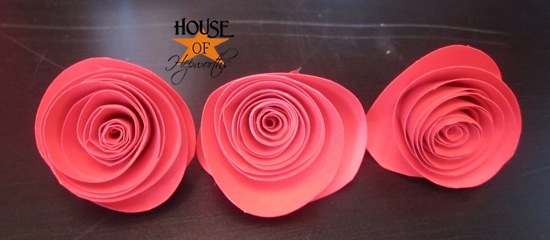
And here are the completed roses. Aren’t they stunning?

paper_roses_hoh_13

I’ve got a great Valentine’s project in the works using a bunch of Paper Roses, but you will just have to wait and see!

In the mean time, enjoy making your own paper roses, just in time for the big day o’ love.

paper_roses_hoh_14

Filed Under: Crafting, Crafts, Seasonal Tagged With: how to, how to make paper roses, paper craft, paper roses

Check out our most recent posts

  • How to BEND A BASEBOARD around a tight curve
  • diy SNOWBOARD shelves: an easy tutorial
  • Make your own succulent hanging wall planter
  • 20+ amazing FARMHOUSE counter-height barstools
  • Recipe: The most amazing CHICKEN SALAD!

Get the latest via email!

« I’ll choose Safety for $100, please?!
Poop Emoji Cupcake Cones »

Comments

  1. kendall says

    02/06/2012 at 10:46 pm

    Ooh, pretty! I’m going to have to make some of these babies!
    -Kendall
    {songbirdsandbuttons.blogspot.com}

    Reply
  2. Jenny Joy says

    02/06/2012 at 11:07 pm

    Wow! Those are so pretty! They remind me a lot of the ones I made in my blog tutorial in April of last year! They’re a great project, no? I’m so happy they turned out well for you. 🙂 http://www.grabbingmyhappy.com/2011/04/rolled-paper-rose-tutorial.html

    Reply
  3. Amber @ Quilted Euphoria says

    02/06/2012 at 11:53 pm

    Cute! And EASY! I love it!

    Reply
  4. faye says

    02/07/2012 at 2:11 am

    that looks really nice and pretty simple to make

    Reply
  5. Sue @ Cakeballs, cookies and more says

    02/07/2012 at 8:16 am

    I remember trying to do something like that in school, but ours never looks that nice, I love it.

    Reply
  6. SueAnn says

    02/07/2012 at 8:19 am

    So beautiful. Thanks for the tut….!!!
    Hugs
    SUeAnn

    Reply
  7. barbara says

    02/07/2012 at 1:00 pm

    i will have to try that love your blog have been reading for a while

    Reply
  8. Ashley@AttemptsAtDomestication says

    02/07/2012 at 1:11 pm

    I have a ton of card stock… I may try these for an indoor wreath

    Reply
  9. linda says

    05/12/2012 at 9:08 pm

    I have read sooooo many tutorials on how to make this rolled paper rose wreath & not a single one mentioned some of the tips you did! Glue every so often to help the roses hold their shape & my very favorite. . . . wrapping the form in crepe paper first! Hot glue, tacky glue, quick dry glue, etc., etc. & the darn little roses just slid off the foam, no matter how much glue I globbed on or how long I held them down! Why didn’t I think of covering the form?! (I tend to miss the obvious!) Lightbulb went off as soon as I read your instructions! Augh! Thank you a million times!
    Linda

    Reply
  10. Ashley says

    06/11/2013 at 4:41 pm

    This post gives clear idea designed for the new visitors of blogging, that in
    fact how to do running a blog.

    Reply

Trackbacks

  1. Nothing says {I love you} like a Paper Rose Wreath says:
    11/23/2012 at 10:15 pm

    […] To make the Paper Roses, follow my Paper Rose tutorial. […]

    Reply

Leave a Reply Cancel reply

Your email address will not be published. Required fields are marked *

Recipe Rating


Welcome to House of Hepworths!

House of Hepworths Family
Our mission is to help you DIY your own home, one awesome project at a time. Learn all about us by clicking here.
  • about
  • archives
  • our favorite products
  • popular projects
Privacy

Copyright © 2023 · Market theme by Restored 316