Helloooo my friends! How are you? I am doing great! Well, except for the fact that my entire body hurts. I started Crossfit this week and have gone twice. I now can no longer move my legs or arms. I am so sore! It’s a good kind of sore though. It’s the type of sore you get when you can tell that you are getting toned and in shape. Now I need to just keep on going and turn this into a habit.
So, my sliding door handle broke. It was shut and locked, and the lock literally broke off in my hand. Uh oh. Now what?
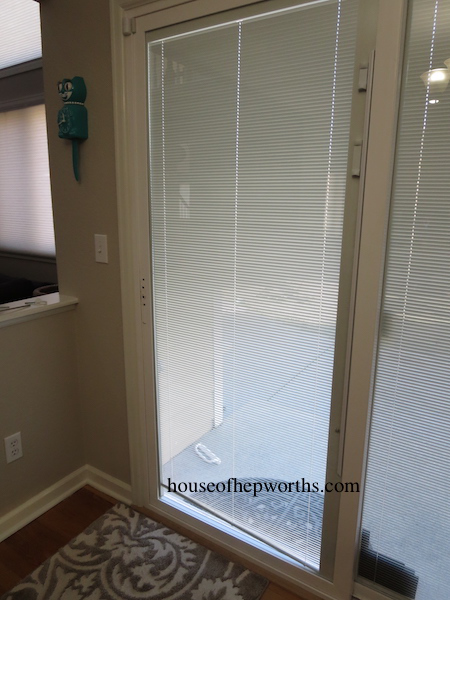
How on earth do you get a locked door open when the lock breaks off? Well, trial and error, my friends.
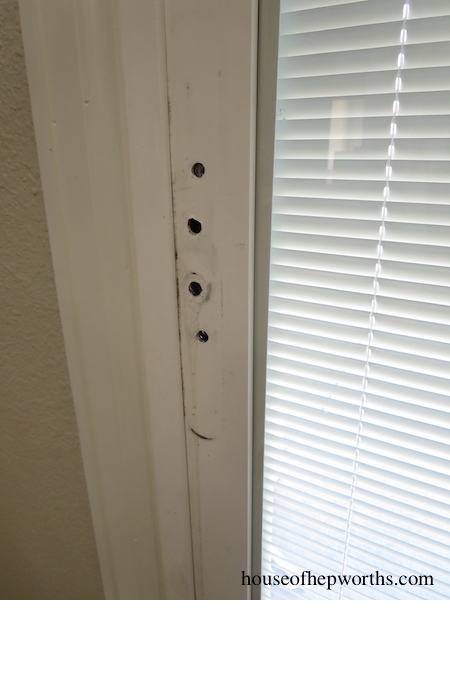
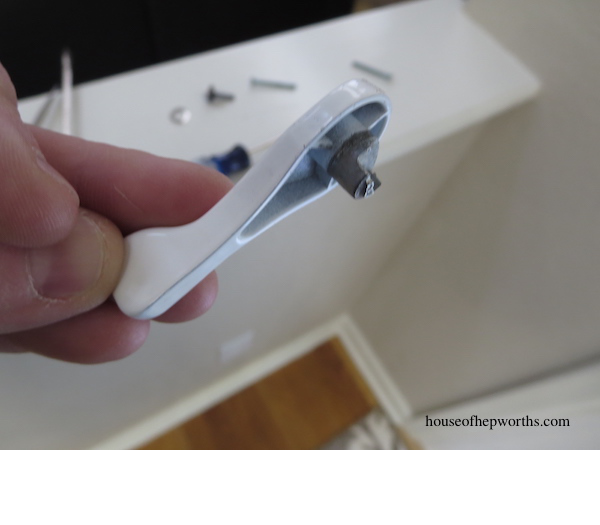
I basically unscrewed the handle and took it off (there were two visible screws on the inside of the door handle). After that, I shoved a screwdriver into the holes in the actual door, and wiggled and fought until the lock popped up. I have no pictures of this step because I was too busy cursing at the door.
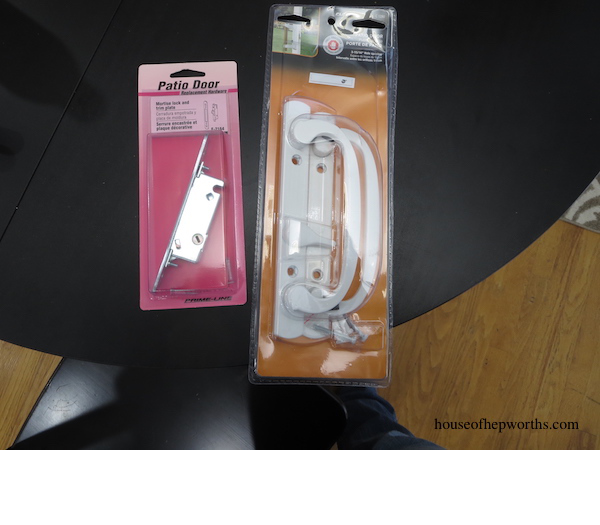
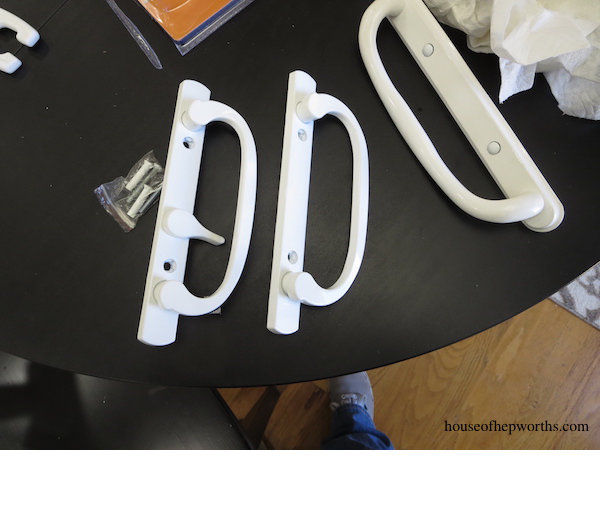
Then I took my broken handle to the hardware store and tried to match it as best I could. They had a few varieties of door handles, so I bought the one that would fit my door. I literally eyeballed it with the broken handle. I also bought a new lock for good measure, but it wasn’t the correct size so I returned it. Turns out I didn’t even need a new lock, I just needed a new handle anyway.
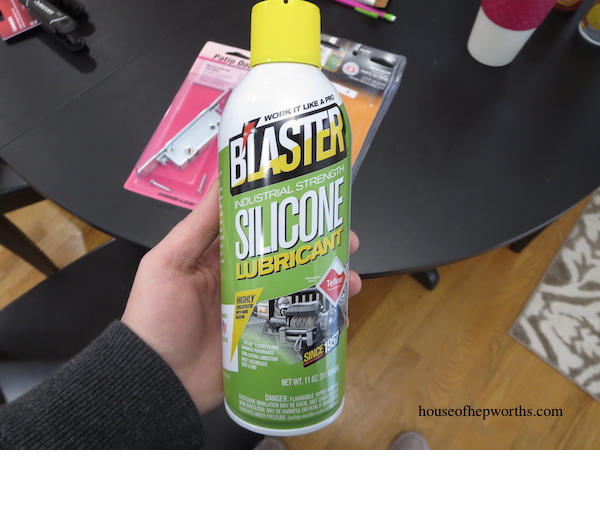
Okay, so after much visual inspection, I realized the reason the door lock broke in the first place was because it just got jammed from not being lubricated enough. I’ve tried a few different types of lubricant (WD40 is the most popular) and I’ve found that Blaster Silicone Lubricant works the best. WD40 tends to leave this gross slime and makes a mess, while the silicone one tends to be cleaner.
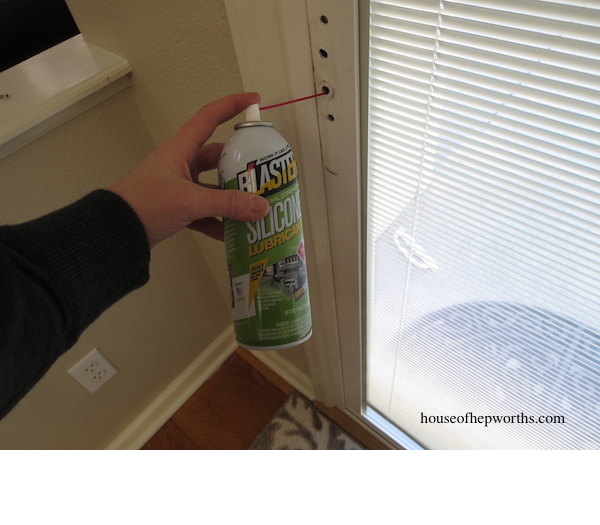
I blasted the door with silicone from all angles. I squirted it in the door handle holes as well as the side of the door where the lock comes out.
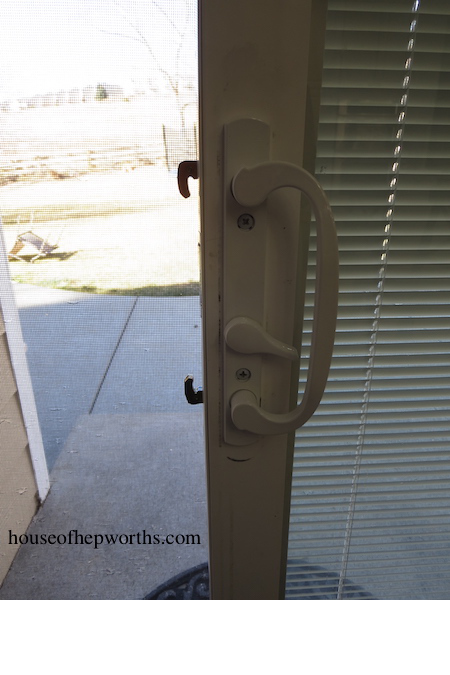
Finally, time to attach the new handle.
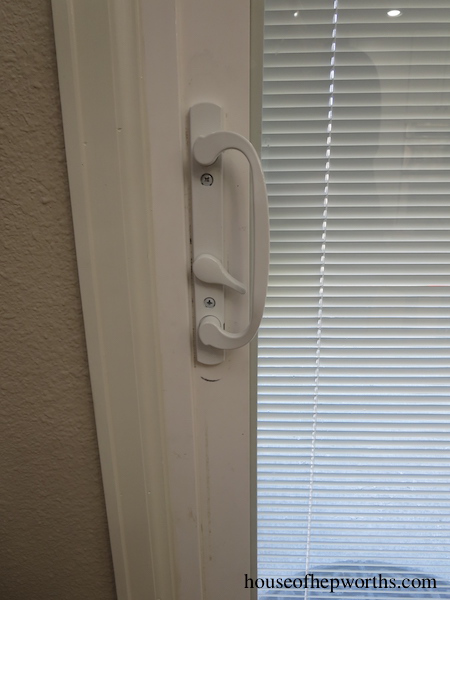
It was as simple as two screws. You just put the handles on either side of the door, and screw them together. I did over-tighten at first and my lock seemed to grind a little, so I unscrewed about a quarter turn and that did the trick.
From there I just tested the lock over and over, added a little more silicone, and called it a day. I’d say it was about a 45 minute fix from start to finish.
I fixed the handle a few months ago and have spent this time testing it out daily. It has held up perfectly.
Thanks for reading! Have a wonderful weekend!

*This post contains affiliate links
Nice one. Thanks for sharing. It looks easy to replace the broken handle. You did this perfectly.
Thanks for the post, I fixed my door!