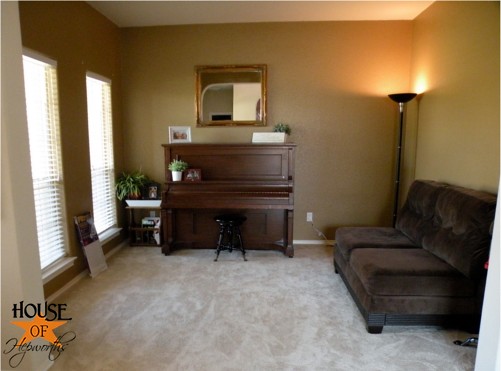
The past week I’ve been working on updating my piano room.
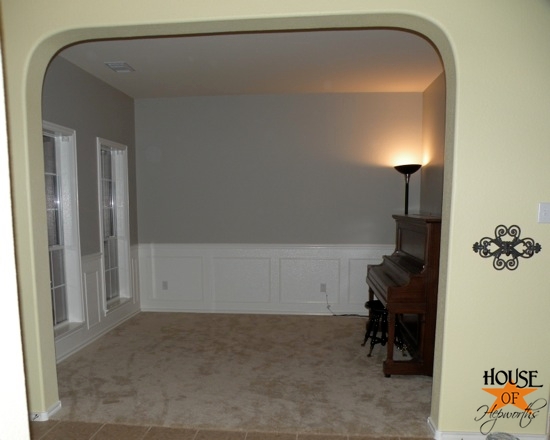
The goal is to go from this:
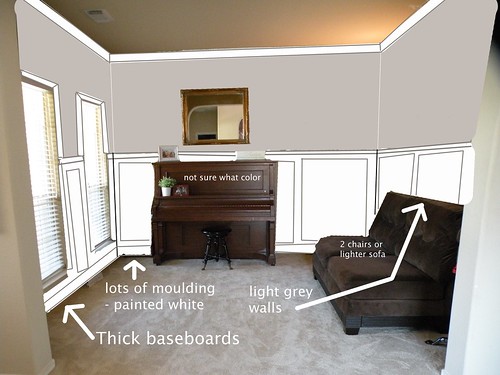
To something like this:
I started my room makeover by priming the walls here and then I hung all the moulding here.
The room is {finally} basically done – ie: the “bones” of the room are pretty much finished. I’ve got a few little things left to do, but the hard part is over and now I get to focus on decorating!
So, how did the room turn out you ask?!
I think it turned out better than my crappy GIMP drawing at least! Here’s a side-by-side comparison.
Obviously I moved the piano to the other wall. I received few comments suggesting moving the piano to the other wall and I’m so glad I did. I love this new placement.
So, the break down and more “after” pictures? No problemo!
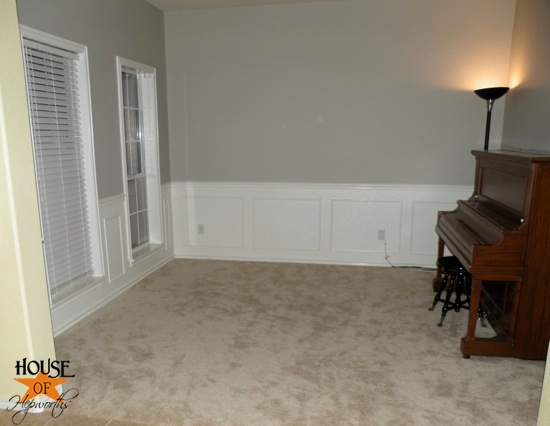
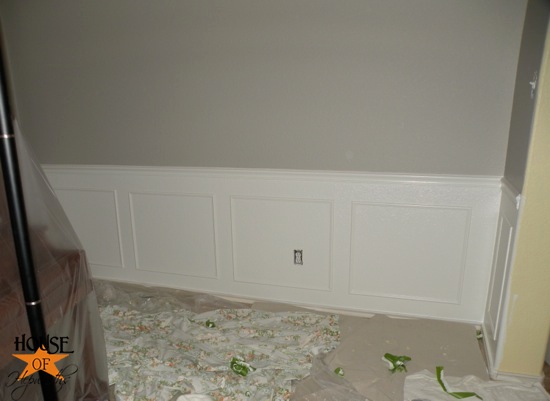
The first thing I did was painted the gray paint above the chair rail. I used my Dutch Boy paint which I am more in love with now than I was before. This paint looks ah-freaking-mazing on my walls. The satin finish is perfect and my walls look flawless. The color I used is called Route 66.
While the gray walls were drying, I needed to fill all the nail holes left from hanging all the moulding.
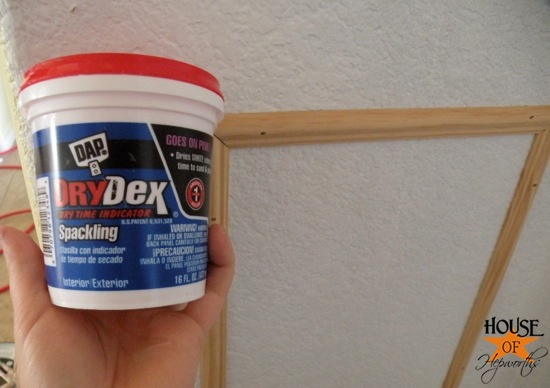
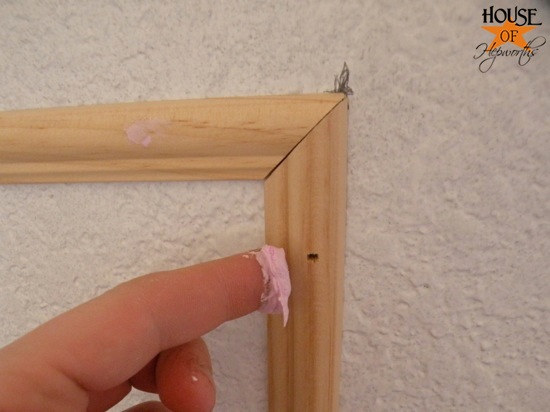
I have used both caulk and spackling, and IMO spacking is the way to go. I recommend using this exact brand – DryDex. I’ve used the store brand before and it’s too watery. Just smear a blob of spackle into all nail holes and let dry. If there is excess try to wipe it off before it dries, but if you miss any you can sand it down.
Next you’ll need to caulk around all the boxes and chair rail.

I love the brand DAP Alex Plus Acrylic Latex caulk plus Silicone in brilliant white.

Last week I found an excellent tip for caulking and painting over at Bower Power:

“When you peel off the tape, it’s literally like magic. You are gonna smile like you are four and a magician just pulled a live bunny that poops candy out of a hat.” -Quote from Bower Power
I’ve never caulked/painted this way before, but I thought I’d give it a go.
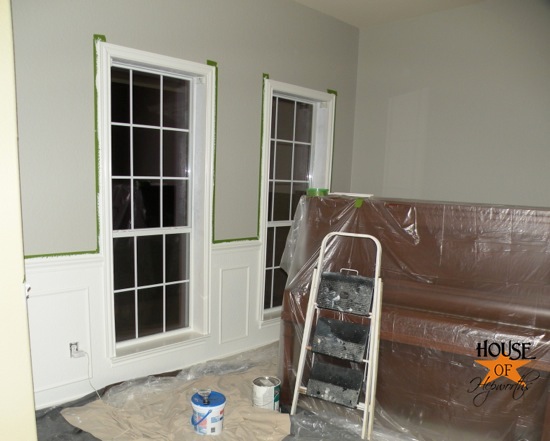
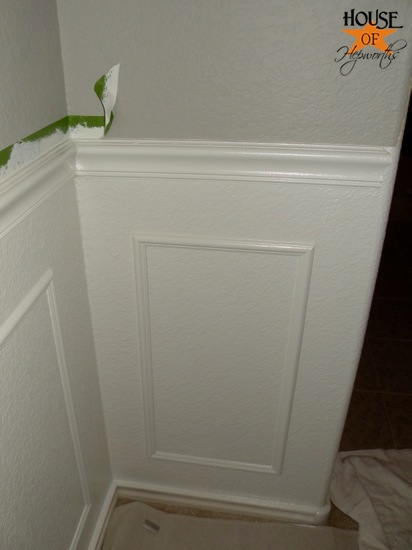
I painted all the chair rail, moulding, and wall below the chair rail white.
I used Sherwin Williams ProClassic Smooth Enamel Finish for Trim & Doors – GLOSS – in my favorite white color – Alabaster.
I have definitely lived in a construction zone the past week!
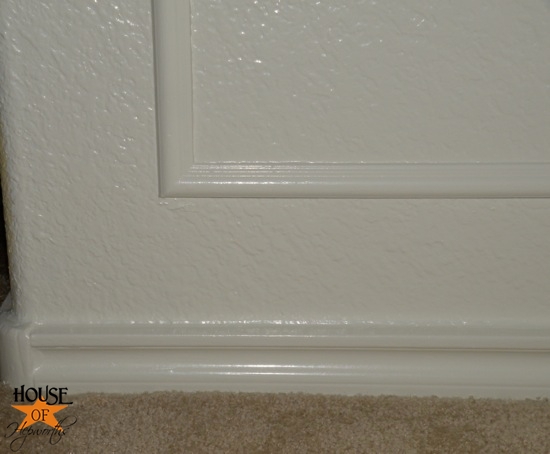
Katie was right on the money with her caluking and painting tip.
Just look at that smooth line!
I don’t think a pro could have painted a better more crisp line. Now, in all honesty, I did have to use a utility knife on parts of it as I was peeling the tape off the wall. Sometimes the caulk didn’t want to tear as smoothly so I’d slice through it with the blade. Overall, I’m using this tip again for sure!
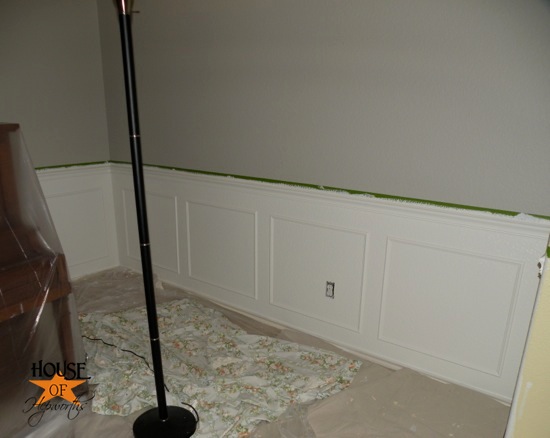
Now that the white is finally finished the room is starting to look great.
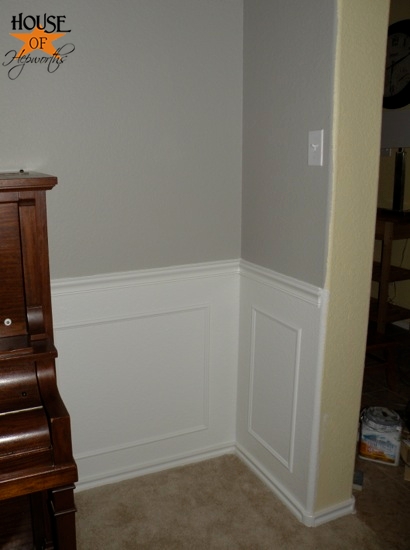
Even my wonky wall looks great!

I waited to paint the baseboard until I was totally finished with the rest of the room. I cleaned up the room and then began on the baseboards.
The easiest way I’ve found to paint baseboards without getting paint on your carpet is to tape them off. But I want to know my entire baseboard is getting painted, not just the top half, so here is how I do it.
First, get a putty knife and a roll of painters tape.
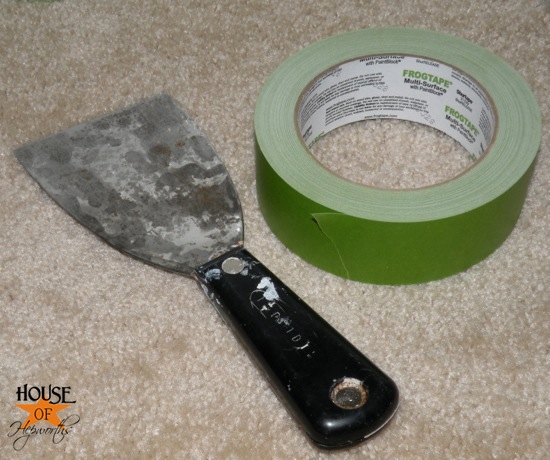
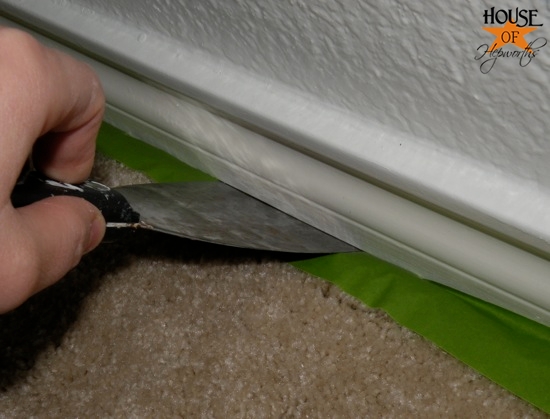
Next, run your tape along the baseboard allowing the tape to overlap the baseboard a little. You want to leave enough tape to tuck under the board. Then get your putty knife and carefully start pushing the tape under the baseboard.
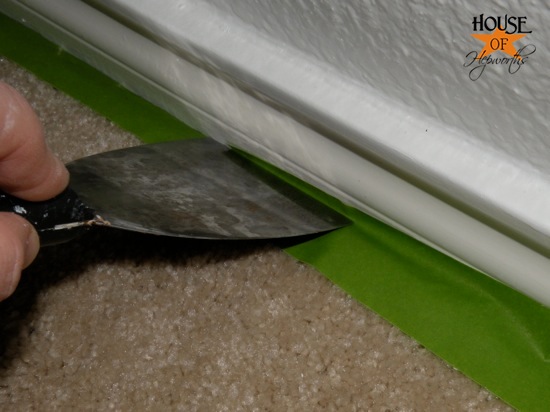
Your putty knife should push the tape completely under the board thus protecting the carpet as well as allowing you to paint the full board.
Now it’s time to finish painting that baseboard! Once the boards are dry carefully peel up the tape. Now you are left with clean carpet and a perfectly painted baseboard.
And now I’m done!
I do have a few more things to finish up. I need to hang the blinds, but one of them is too wide so first I have to take it to our local hardware store and hope they’ll trim it for me. I also need to do a small amount of touch up on the gray.
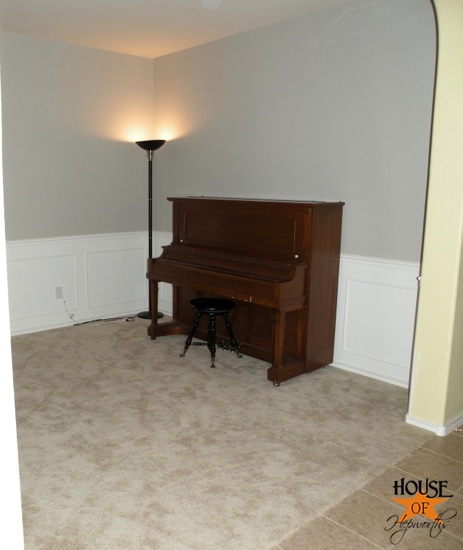
Eventually the piano and stool will more than likely be painted white unless I get a wild hair to paint them lime green or yellow.
All the corners in my house are rounded, which looks nice but is a huge pain to paint along.
The next thing I need to do is touch up the edge where the gray and yellow meet.

Personally, I don’t mean to brag (ya I do) but this room looks like a million bucks.
I’m completely thrilled with how the bones of the room turned out.
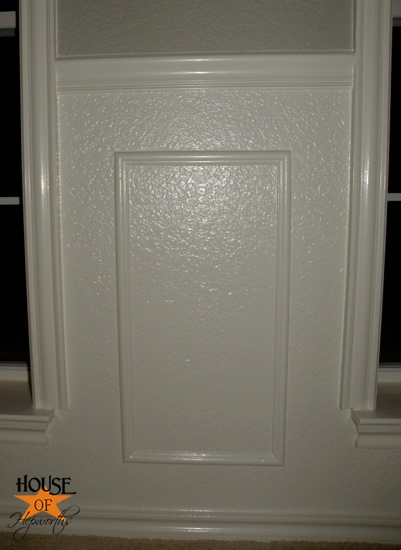
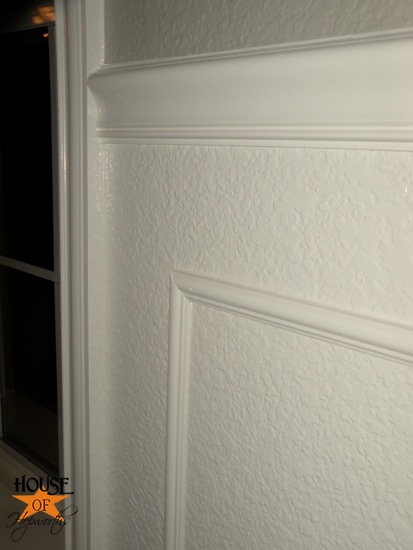
The boxes are flawless and I love them!
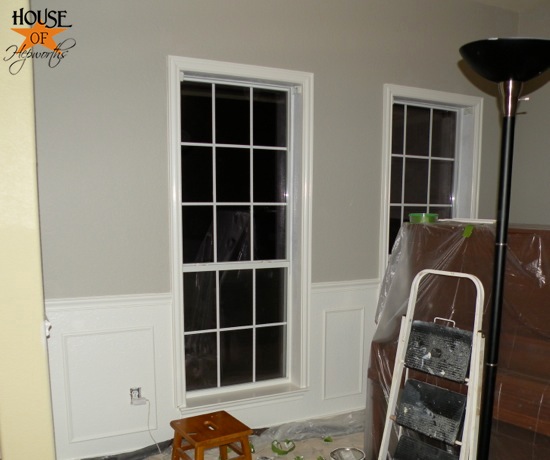
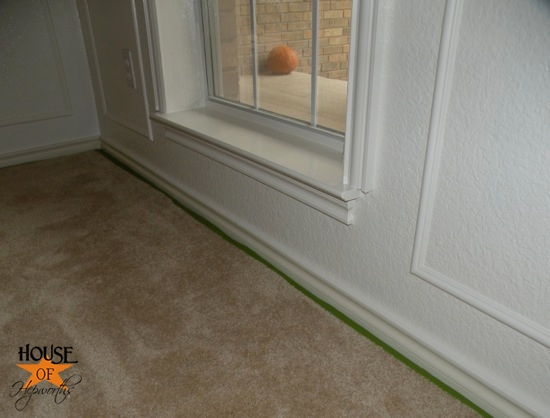
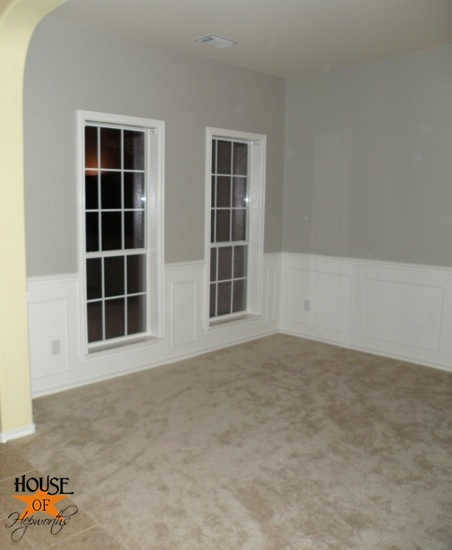
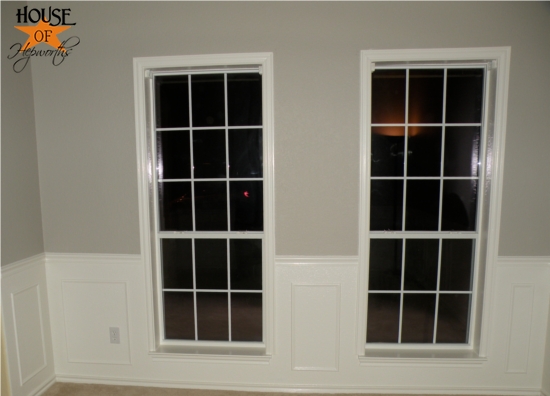
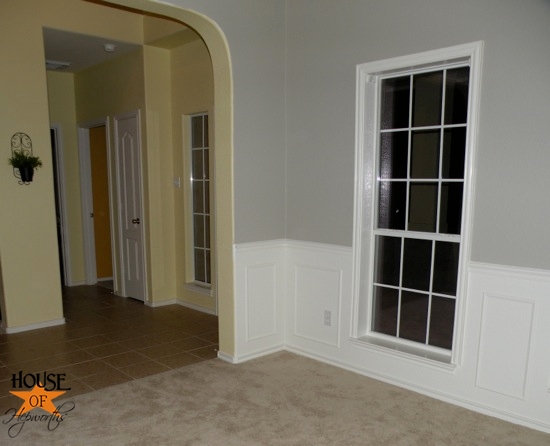
I think adding the moulding around the windows made them POP.
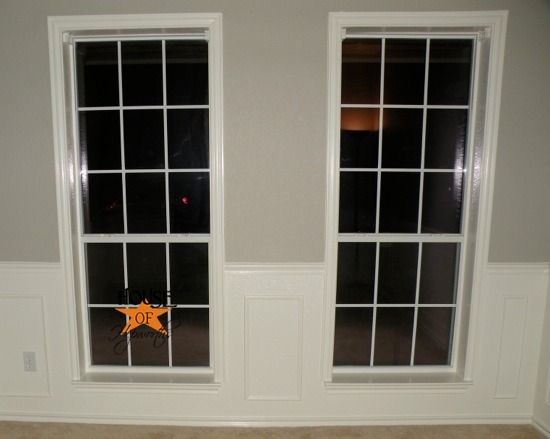
I’m in love with the chair rail and boxes, but the small touch around the window just makes this room perfect.
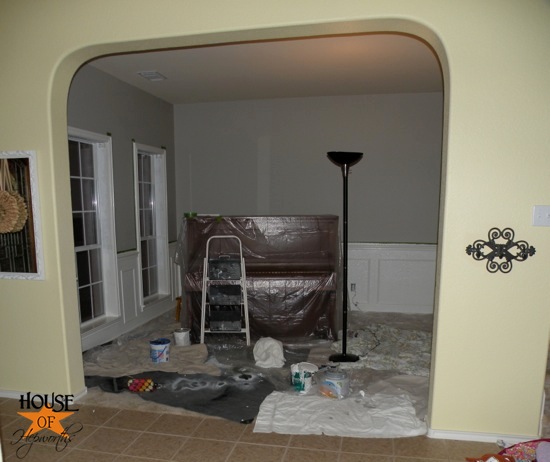
Here’s a view from inside the piano room facing the foyer. The front door is on the right just past the narrow wall of the piano room.
And here’s looking from the piano room into the foyer and dining room.
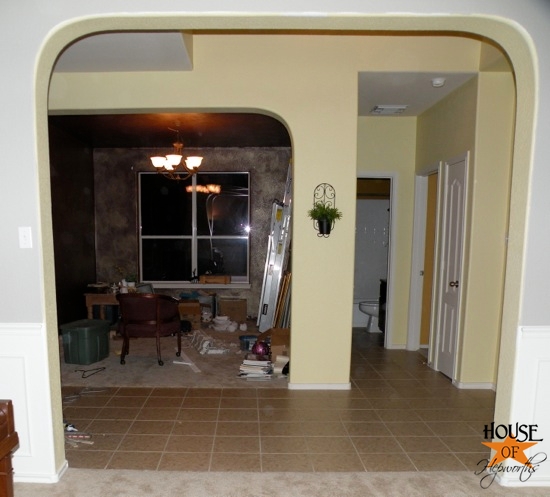
Yikes! Yes, the purple walls are HIDEOUS and can you say MESS?!
Because I don’t have furniture in my dining room it becomes the drop off place for all crap. I’ve got my Christmas stuff out, all the stuff from my piano room is crammed in there, and I’ve got a few crafty projects going on as well.
Anyway, back to the room…
I started out with this train wreck:

And ended up with this:
Overall, I’d say I’ve had a pretty successful week.
🙂
Now it’s time to decorate!
There are few things more satisfying than a freshly painted room 🙂 Yours is no exception ~ I love that gray color and the contrast with the white is so crisp. Love the new trim, too! I hope you smile every time you walk by it!
I’ve started following you! Your room turned out beautifully! I love the color combination… nothing says clean, open and inviting like white. Can’t wait to see how you’ll decorate this one =)
Plus, I’d truly love to have you follow me and get your suggestions… YAY! http://www.bargaincornerdesigns.blogspot.com
Simply gorgeous! SO clean and yes – very professional looking!
Looking gorgeous, you have me on pins and needles waiting for the end result.
Don’t think I’m just a PITA with my suggestions, i.e., last one was about getting the molding cheaper at the lumber yard.
This time it’s about the paint around the door opening. The rule and don’t ask me who wrote it, but it makes sense visually, is to paint the inside of the archway the color of the room you are entering. So yours would be painted gray instead of retaining the color of the room next to it.
Like I said, I didn’t write the rules and no one says you have to follow it. The archway kept distracting my eye though so I thought I’d mention it for your consideration.
Looking forward to your progress.
I love the moulding! And the gray is gorgeous! Thanks for all those handy tips too!
I just read the first commenters tip about the arch, and I am actually thinking that you should paint the inside of the arch white. That way it compliments both rooms.
It will make it look more like trim and less like wall.
Of course, I don’t love arches, so I would really just suggest you rip it out! Bwahahaha!
absolutely.love.it
Wow!!
That is so funny. I do the same thing with my dining room. Given the week and the projects I have going on it can be in shambles. I think I do that because it is the one room that nobody sits in. lol. Your piano room looks gorgeous! Well done lady! I love it!
http://dejarenew.blogspot.com
Wow! I am soooo copying your ideas and tips when we get our house in February!!
Looks fabulous, I really like the color too. 🙂 My contractor BIL taught me about caulking over tape for crisp lines, isn’t it great?? And um… don’t hate me when I say this, but ohmygosh don’t paint the piano!! LOL 🙂
This looks amazing! Great job!
That is looking really good! And I love the curved doorways in your home!
The room looks AMAZING! Great job! I LOVE the color of the walls, the moulding, EVERYTHING! Might I make one suggestion?!?! Take it or leave it it’s your house but I would turn the piano catty-corner… Just a thought! Like I said take it or leave it! Can’t wait to see how it turns our after you’ve decorated it!!! Love your work!
Allison! What a great job!! You’re right – you room DOES look like a million bucks. The window moulding really adds a little somthin somethin, and the grey is such a great color! You’re awesome!! And I’m sure Ben agrees! 🙂
Way to go Allison! It’s gorgeous!
Nice job! You work fast. I think a nice area rug that ties in the wall color, with the entryway color would tie the two together well, since the piano room is so open to the rest of the house.
Looks so great. Love the “before” and “after”. So such a great sense of accomplishment to finish a project like that. Love your boxes and trim. All that hard work paid off. Can’t wait to see more progress on your house.
That looks gorgeous! I love the gray and the white – it’s perfect! You did such a great job. I have to agree on the caulking with painter’s tape – it’s definitely the way to go! We did that anytime we needed a straight caulk line over an existing surface – like when we put up crown molding in our bedroom, and recently when we put up a tile backsplash in our kitchen. Love that method!
~Chelsea
Allison, love the room! It looks great. Please re-consider painting the piano! It really stands out with the colors in the room. It’s a beautiful focal point. If you paint it the same white as the trim, it will blend in, and if you paint it a different shade of white, one or the other will look dirty. I have a white cabinet against my beadboard. In the daytime, they look the same and the cabinet just blends in, but at night, the cabinet is a dingy gray against the white beadboard. And I agree with some of the other posters here that you should get rid of the yellow paint in the archway. (I know you’re just itchin’ to get the paint out again!)
It’s gorgeous! You did a great job! =)
ok my 2 cents (since everyone else is giving theirs)
Yes, paint the trim on the doorway white to match the room
Yes, move the piano at an angle in the corner, it will make the room appear wider and give you more room for the seating on either side of the windows, with a small round table in between (keep them round since you have so many sharp corners with the trim and piano and it will balance it all out.)
If you keep it as it is you will have that odd feeling of being too symetrical, like your on a boat and afraid it will tip.
Yes, paint the piano, not white but black it will look awesome and pop against the wall color and if you keep the seating the same or a similar color it will bring the look together and adding white/grey accessories like pillows and throws will finish it off.
Yes, get a bench and lose the stool, it looks so lost and paint it black with a nice white fabric seat.
loving the trim around the windows!! super job, Allison!
The room looks fantastic. Love the colors. So elegant!
Hugs
SueAnn
The room looks great!! We just did the same thing to our “toy room” {would love to get a piano to turn it into a “piano room!”}. I am lovin’ it!!! Just thought I’d add my 2 cents in on the piano. I would either keep it as is, or paint it black {or some contrast to white}. It will look so great against your new white molding!
Are your walls textured? The walls in our house are textured and I thought that this treatment would look weird, but I love it in your house! I may have to rethink it and find a room where it would work! Also thanks for the tip on painting baseboards. I am planning to paint the baseboards in our house and was dreading removing all the boards to get them fully painted.
I like what you did with the room but I like it just as much before you embellished it. Sorry to say but it is the color of the couch that is a problem for me. I would have probably not embellished the walls but reupholstered the couch. Funny how we all have such different taste. But don’t get me wrong I do like what you did. I have thought of that in my dinning area but wondered if it was hard to do.