Yesterday I was so excited to show you my new West Elm Chandelier. Well, unfortunately this chandelier installation was not all unicorns and roses.
I’m here to tell you what really went on behind the scenes. And maybe offer some tips so that you can try to avoid these hiccups for yourself.
Drama part 1:
This part is called “constructive feedback” for West Elm…
The instructions that came with the chandelier were horrible. The only thing worse than the instructions it came with would have been including no instructions at all. I recommend that West Elm put a little more effort into explaining how to install this fixture.
I am very good at figuring things out. It’s one of my talents. I can look at something and figure out how to take it apart, put it back together, fix it, or simply how it works, in literally a minute or less. Even with this skill, I had a hard time installing the fixture. I think most people would be beyond frustrated and the chandelier would be thrown through the window before the day is over.
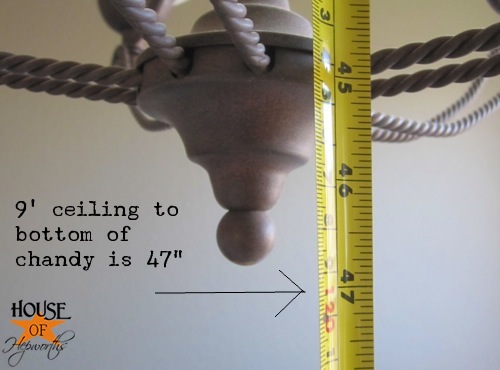
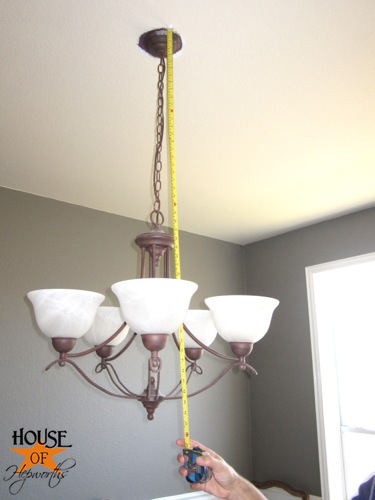
My biggest frustration was that it came with several extension poles, but absolutely no indication as to how many to use based on ceiling height. All it said was to use them as needed. The wiring has to be totally installed and the fixture 90% installed before you get a good visual of the height of it, so if you guessed wrong it would require removing the fixture from the ceiling, pulling the wiring through the poles, adding more poles, and rewiring the fixture. Big PITA IMO. It wouldn’t be that hard for them to give a general guideline in the instructions. For example, if you ceiling is 9′ tall, you will probably want 2 long extension poles and 1 short one. I had already removed the old chandelier before I realized I didn’t have a clue how high to hang the new one. Fortunately I’m a blogger and actually took photos of the old fixture next to a tape measure. This photo was the only reason I could even guess how many extension poles to use. Most people don’t generally take photos of tape measures before removing old fixtures.
Of course, knowing how many inches from ceiling to bottom of fixture only helped so much as West Elm didn’t include how many inches tall the actual shade was once installed. I had to eyeball it and guess how thick the shade was going to be. Thankfully after some math I was able to guess that I’d need 2 long poles and 1 short one (in addition to the one long pole that came attached to the chandelier).
These are both issues that people just don’t think about until they are ready to hang the new fixture, so adding this basic info to the instruction sheet would help immensely.
And one more thing that really wasn’t that big a deal; the instructions had the wiring labeled “hot”, “neutral”, and “ground” instead of “negative”, “positive”, and “ground”. I was fairly certain what that meant, but I did a quick google search just to verify – you know, so I don’t burn my house down.
Maybe this feedback will help someone else out. The rest of the issues were basic stuff that I didn’t anticipate having to deal with, but I think most projects have set-backs… at least all mine do!
Drama part 2:
I took the old fixture down and was greeted with the Barney Massacre.
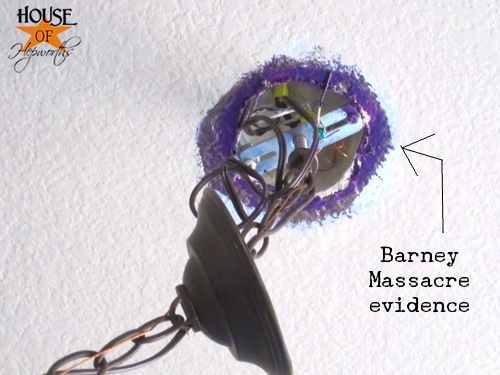
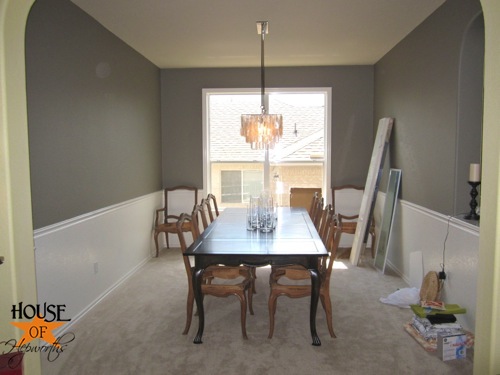
Just a small reminder that my entire room use to look like this! I’m talking walls and ceiling. It was a sight for sure!
So I had to bust out the ceiling paint and paint over that mess. That wasn’t something I was planning on dealing with and set me back several hours (waiting for the paint to dry). Once the paint was dry it was finally time to hang my fixture!!! Yay!
Oh wait… there are now holes the fixture isn’t covering up. UGH!
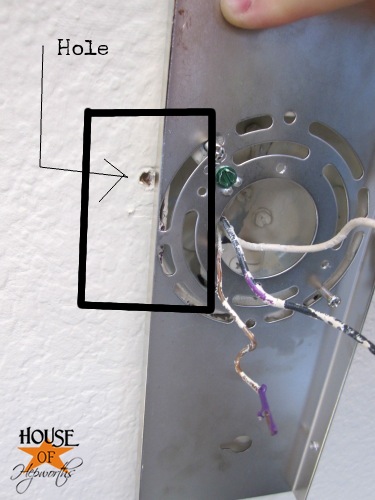
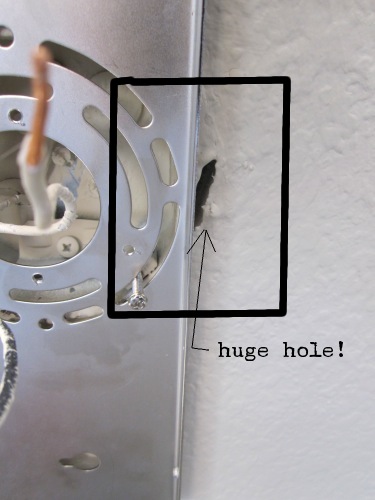
This fixture is going to kill me. KILL ME I’m tellin’ ya. So I bust out the spackling.
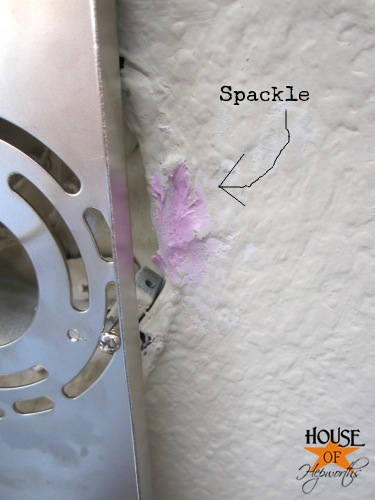
And wait for it to dry. Tick tock. Then I have to paint the spackling. Tick tock. And finally, I can move forward with the installation.
(This is where I realize I have no clue how high to hang the fixture; see Drama part 1 for those details.)
And ta-da! The fixture is hung.
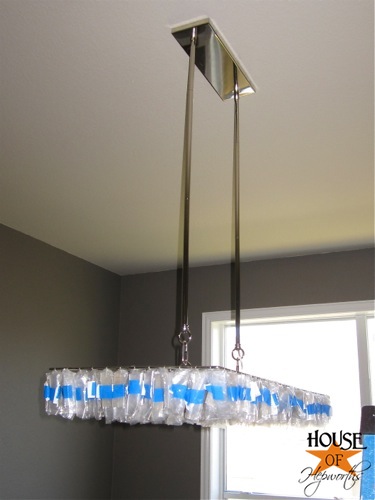
I then spend the next HOUR unwrapping each of those little plastic baggies that are holding all the capiz shells. I’m glad they packaged the fixture so well, but my arms were really done by the time I had that last wrapper unwrapped.
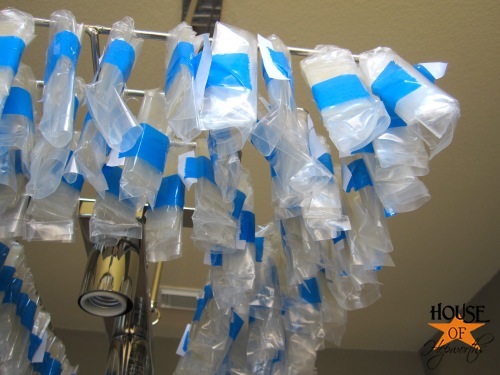
I was going to count how many wrappers there were, but I was so over this install by that point. Let me just say that there were a lot. A LOT. (Hey West Elm, that would be another great fact to include in the instructions! How many wrappers and shells are on the fixture!).

Believe it or not, after three full days, I finally had the chandelier installed and looking fly.
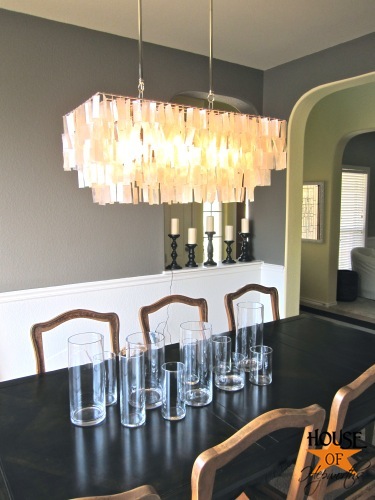
Things are not always as they appear on blogs. You get to see lovely before and after pictures, but many times, more times than not actually, there are lots of hiccups and obstacles in my way for most projects I do. This chandelier was one of the most dramatic installs to date though. I’m happy it’s over and I’m left with a pretty fixture. 🙂
* West Elm has no idea I’m writing about them. This post is my own opinion and is not sponsored in any way, shape, or form. I just thought I’d tell you about my experience.
Allison!
I could almost hear your voice while reading your post! WOW! What a roller coaster!! I’m glad it worked out and the chandelier looks GREAT!!!! We’re in the market for one too, just have to find the ‘right’ one…..
xo Tara
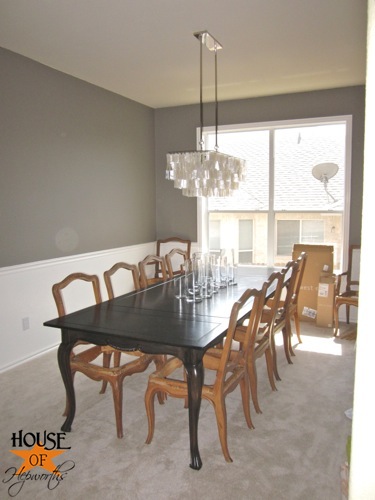
ps…. I love the grey you have in your dining room too!!!
xo
WOW! That looks amazing.
Kim
I tell ya…who has more fun!? Home decorators/re-modelers that’s who!! I have had similar fun times!! Ha!
But your fixture is gorgeous!! I love it and it really makes your dining room pop!!
Congrats on the completed task!
Hugs
SueAnn
Oh- My- Goodness! What an experience! I could just imagine your frustration, but wow-o-wow, what a gorgeous chandy! I can’t wait to see the final dining room completed!
What. a. pain. But, my, how spectacular!
Im sooo bummed I have seen this capiz chandelier for years, Im now remodeling my dining room and kitchen and of course west elm no longer carries this rectangular capiz chandelier. Im devasted, I called wesl elm have no idea if will ever get them again, most likely not. If you know or see another one like this please let me know, I so really wanted this capiz rectangular chandelier for my dining room.. Immmm sooooo bummmed.
Thank you,
Joanne
https://www.westelm.com/products/large-rectangle-hanging-capiz-pendant-white-w696/?catalogId=91&sku=5607963&cm_ven=PLA&cm_cat=Google&cm_pla=Lighting%20%3E%20Chandeliers
Yes, they do still sell the rectangular version! Look it up on their website. I just installed the round one and it is BEAUTIFUL!
The chandy looks AMAZING!!! Your dining room is a transformation for sure!
Sorry for all the drama! But dang it’s a pretty new chandy!
WOW! What an experience!! But the end result is just FAB!!!! On a side note, you live in Austin?? I grew up in Austin and am not just down the road in SA!!!!
Haha I can’t type! not=now!
That is so lovely! My mom has been wanting something like that after seeing a similar one on design star. She will be green with envy when I show her the pics of yours, LOL!
~Kimberlee
Love the new chandy, sorry you had such a hard time of it! Just a quick note, “hot, neutral and ground” are industry standard terms, so technically they were correct in their instructions. It’s all about what you’re used to I guess! Glad you got it all sorted out and looking fabulous!
my gosh… what an ordeal. I always hate having to call back some store and complain…then starts the run around and red tape… I’m glad you got it worked out so well in the end. It is a beauty !
KAT
FAB FAB FAB!!!!!!!!! GORGEOUS!!!!!! But……………………………..
Can you spell POTTERY BARN?????
LOL
P.S. You are sooooooooooooo patient!!!!!!!!! Unbelievable!
ATTA girl!
Thank you for sharing the frustrating behind the scenes. Thank goodness for a manager that takes his job seriously! The fixture looks fantastic!!!
Im so happy for you you finally got your chandy!!! yay,even though you had to work for it!
I laughed so hard at the Barney Massacre picture! We never got a really good look at the awesome base color of your walls before someone fancied them up with all of that metallic glaze… but there it was in all its glory, hiding under your light fixture. (I’ll bet you were thrilled to see THAT again!) Your dining room looks soooo good now, and I can’t wait to see what you decide to do with your chairs.
At first I was confused and thought “what is a barney disaster” then I saw the purple paint and started to laugh hard even though it’s 2am. Omg! After all that pain and work you had to go and fix the paint? DIY projects are sure not for the faint at heart. The other thing I was thinking..if you had a hard time understand the directions then 95% of the people wouldn’t get it. I guess that is why electricians make such good money.
The after is very gorgeous!!!
FANTASTIC job sorting through the mess to come out the other side with a beautiful project!
And, uh, by the way… how much were you planning on selling the “used” version for? I may be interested… meiermadness (at) gmail (dot) com
so i went to a dinner party on sat night and walked in and immediately saw this amazing chandy! LOL I just had to ask the hostess West Elm? and she was shocked that I knew! Sooo made me think of you!
I stumbled upon your blog after googling “west elm capiz chandelier instructions”…you wouldn’t happen to have a copy of the instructions, would you? You see, I ran across the West Elm outlet section at the San Marcos Williams Sonoma/Pottery Barn Outlet…and lo and behold there was the capiz chandelier! super cheap, except I think the base it came with was not meant for this chandy – instead for the glass link chandy 🙁 anyway, it didn’t come with instructions and even though i’m an engineer – i’m hoping some instructions might show me the light – or at least confirm I’ve got a mis-matched base/canopy combo. Please let me know – I love how the chandy looks in your DR!
We’re currently in the midst of unwrapping all those lovely little packages!! Well…my boyfriend is…I’m sitting on the couch reading your blog post aloud to him for laughs 🙂
Did you have any problems screwing the 2nd plate to the plate that’s attached to the ceiling?? I think the wires were in the way or something but we had one heck of a time trying to get those screws in and get it flush with the ceiling! Also, as the shells get unwrapped I’m noticing they aren’t all laying straight, did that happen to you? I’m hoping the weight will eventually straigthen them out and it’s just curled from being wrapped up for so long!!!
I love your dining room transformation curtains and chandy. It has inspired me for mine. Am wondering though, did you feel the need to have any replacement capiz shells incase some broke? Or do you know where to get them? And is the bottom covered with shells? Like can you see the bare buls when you look up or is this coverd? I can only purchae online as no west elm where I live. Thanks for your great blog!
Hi, I have the same chandelier in grey. We bought it two years ago and I can’t remember if it came with spare capiz shells. I am not sure what happened, but mine is missing one and it is nowhere to be found. Customer support says that they don’t sell these separately. My husband swears it came with spares, but I don’t remember… Did it? Thanks!
I know this is a rather old post but I so need you!!!! I am attempting to put this on a vaulted ceiling which they say not to do. But I see they have extension poles. Are the poles welded to the plate or do they disconnect from the plate. Was thinking I could use pipe cutters to cut one rod shorter than than other if they are not welded. Any help would be awesome. Thank you!!!
Really? My husband had this fixture hung in 15 minutes!
How low can you actually hang the capiz chandelier??
Hang a chandelier approximately 30 to 34 inches over a table with an 8 foot ceiling height. If your ceiling is higher than 8 feet, mount the chandelier an additional 3 inches higher for each foot of ceiling.
Question for you:
I absolutely love this chandelier & really want to hang it in my dining room… BUT… we have a vaulted/slanted ceiling where the fixture wiloukd be installed. Can I make it work? Can it hang w/o the rods? Would that look silly? What’s under there? Thank you so much!
You might want to talk to someone at West-Elm and see if they have any tips.
I love this chandelier and am considering it for over a bathtub. I am totally prepared for the install now – thank you! I only have two hesitations – what does it look like from the bottom, i.e. if you are looking straight up at it from underneath? And secondly, when the lights are off, are the capiz shells more white or creamy/off white/yellowish? Thanks for any info you can provide!