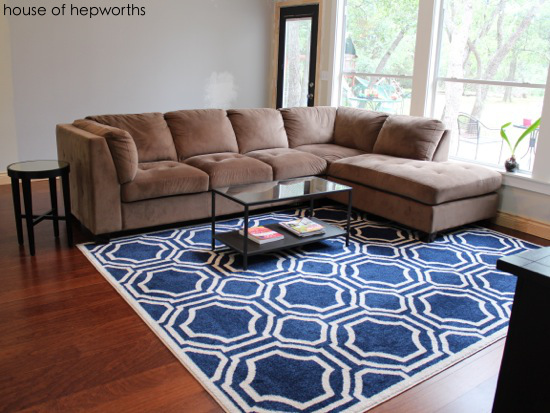
Last week I showed you our brand new kitchen. You probably noticed a new rug in the dining room. I’m…
Read More
Helping you DIY your home one awesome project at a time
Last week I showed you our brand new kitchen. You probably noticed a new rug in the dining room. I’m…
Read More
Hey guys! I have missed you. After I posted about all our new doorknobs a few of you noticed I…
Read More
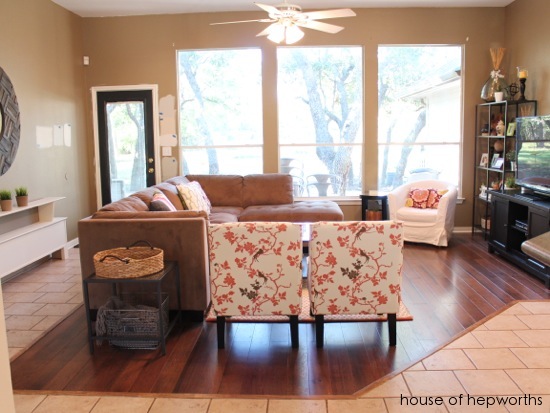
Hey guys! I realized I haven’t updated you on the family room – where we spend the majority of our…
Read More
Several years ago I scored this awesome huge basket at Target in the clearance section after Christmas. I have hoarded…
Read More
The last several weeks I’ve devoted to getting half-finished projects wrapped up and checked off the to-do list. I’m great…
Read More
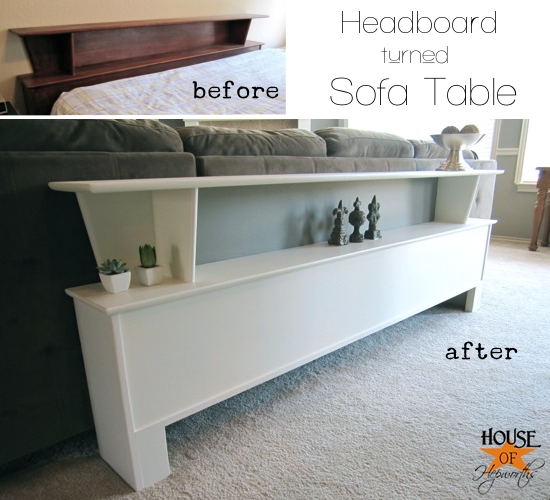
I just finished a project that didn’t take too long and wasn’t too difficult, but has a huge impact. The…
Read More
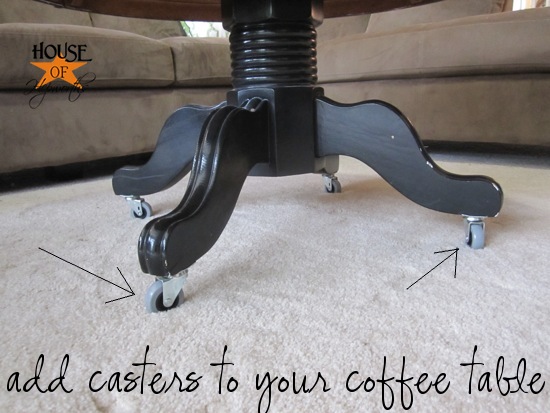
I have this little round coffee table in my family room: (Really old picture of the family room) I’ve had…
Read More
Today one of my friends asked me how I can have blogged for almost 2 years now. Wouldn’t I run…
Read More
So, are you as sick of hearing about that damn to-do list as I am? What on God’s Green Earth…
Read More
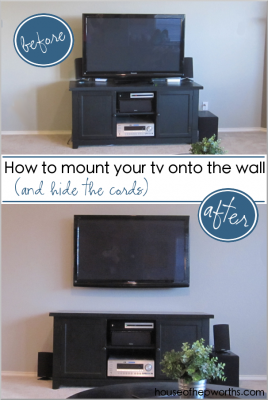
Today I’m going to show you how to mount your tv to the wall and hide the cords. We finally…
Read More