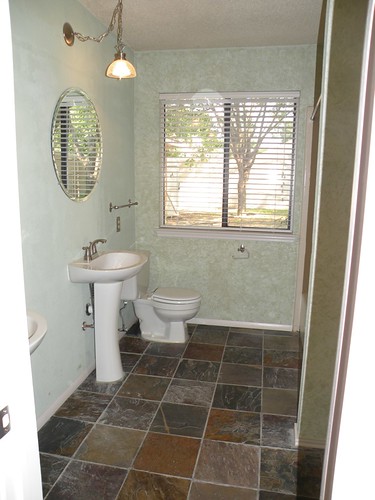
…and turned into an entire new bathroom top to bottom.
I was going to re-caulk the tub. I started to scrape out the moldy caulk and to my disgust and horror tiles started falling off the wall. Lots of tiles. I can’t believe I didn’t take a picture of it. The entire wall behind the tile was rotten down to the studs. Moldy and yucky and disgusting. I’m surprised I didn’t lose my lunch when I discovered it. Who would have thought that a little new caulk would end up costing $4000 and 3 weeks of solid 12-hour days?
I’d love to break this project down into smaller topics, but that’s another thread for another day. For now I’ll post the overall project from start to finish. I’ll get into the nitty-gritty some other time.
I’m so excited to post these pictures! First, I have to gloat by saying that I did this project about 95% BY MYSELF. Ben helped a little chipping the old floor up and doing a few random things for me and I hired a granite guy for the counter. Other than that, I did ALL the construction, destruction, tiling, texturing, installing, plumbing, painting, wall removal, etc myself. Hear me roar! Roooaaaaarrrrrr!!
Remember this?

How could you even forget? Barf-a-rama!!
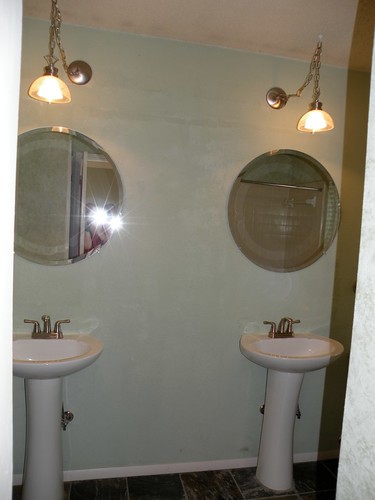
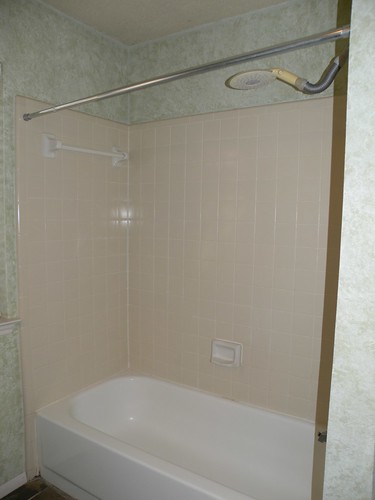
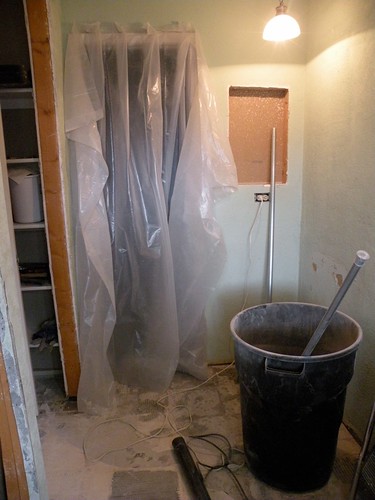
Here are a few more original pictures of the bathroom in all its awful glory the way it was when we purchased the house.
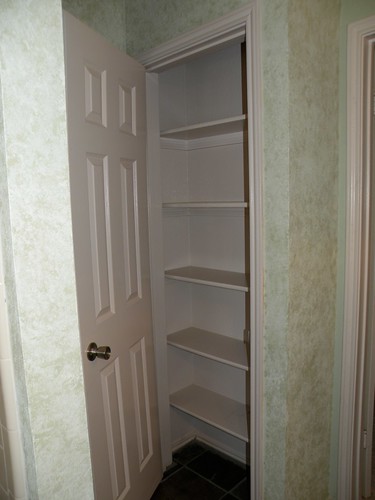
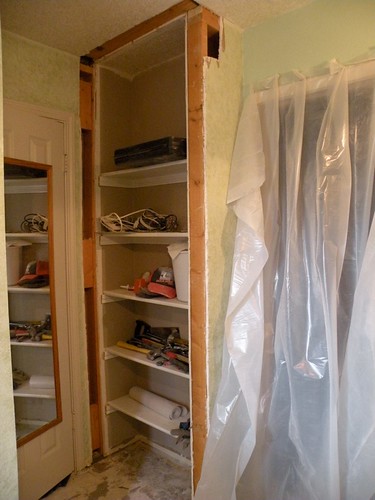
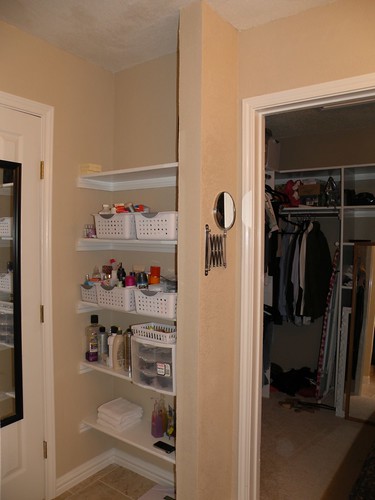
This is a linen closet right behind the door into the bathroom. Whoever designed this should have their architecture degree taken away. The door to the bathroom and the door to the linen closet hit each other so that the door knobs from each overlap with each other causing them to lock together. Ya, it’s really fun trying to get them untangled.
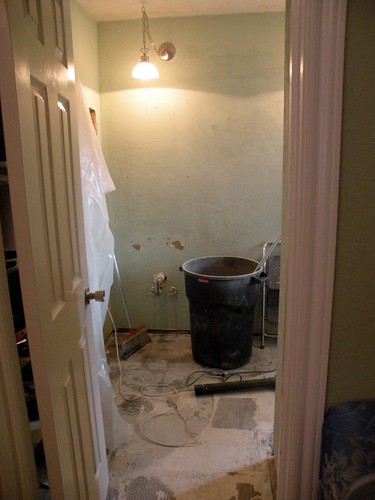
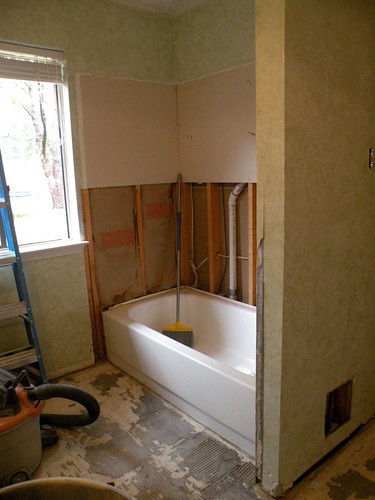
Here’s the bathroom at the start of this total renovation. Ben chipped up most of the floor.
When the tile came down, so did the gross moldy soggy sheetrock. Yes, I said sheetrock. If you know anything about tiling a tub surround you’d know that you are suppose to use cement board. I’ll just add this to the list of sh***y upgrade jobs from previous owners and/or the builder. Cutting corners must have been their mantra.
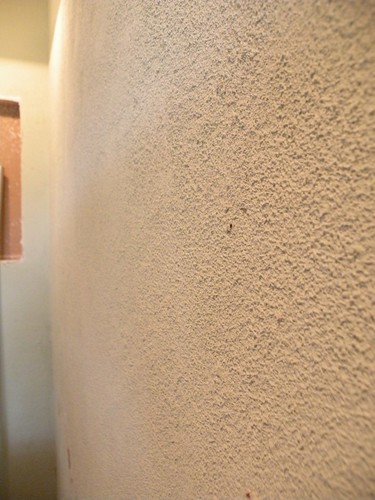
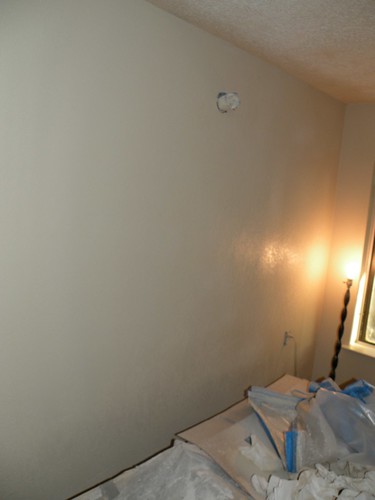
Ahh, my favorite topic to date: sandpaper walls. I’ll give this topic a thread of it’s very own one day, but for now, I’ll just post a picture. It’s hard to give the walls the justice they deserve.
Remember that linen closet with the obnoxious door? Well, in full Allison style, I got out my crowbar and just ripped that sucker down. And it wasn’t just the door. I took out that whole dang wall. Good thing it wasn’t a support wall. That would have been bad. That’s one of those things you are suppose to think about BEFORE you start ripping out 2×4’s with a crowbar.
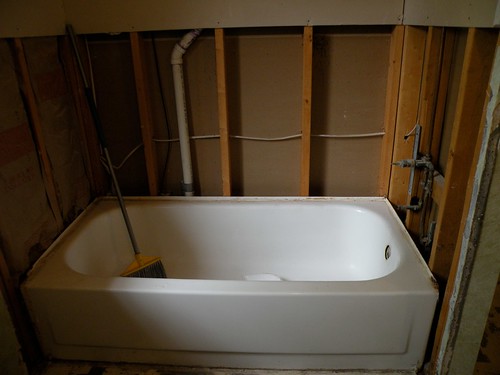
Thank you google for teaching me how to take out a bathtub. Something so terrifying and daunting turned out to be easier than installing a light fixture. Who wudda though?
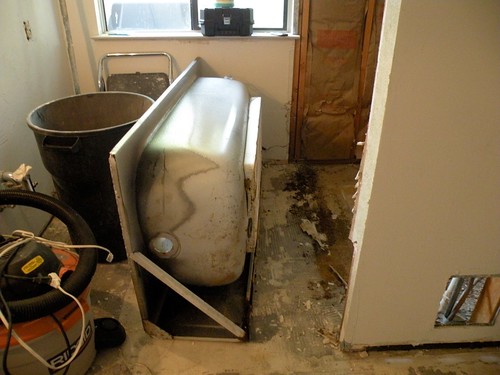
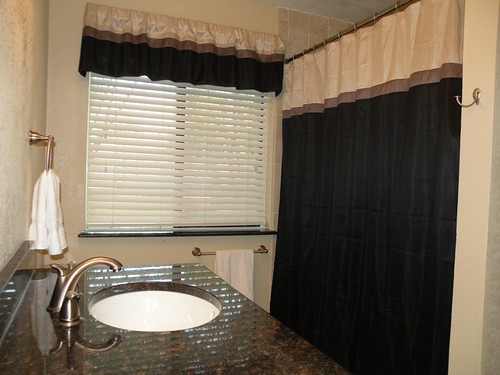
Our purdy new bathtub. It’s actually our 2nd bathtub. We had to return the 1st one. Pretty fun getting a bathtub home and ready to install only to realize it’s too tall for the plumbing. And I was in no mood to learn how to move copper plumbing. So ya, we thought it would be great to get a really deep soaking tub. Remember kids, always ALWAYS measure these things before you bring home your heavy large purchase.

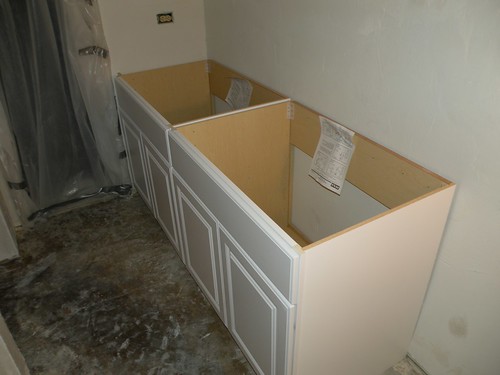
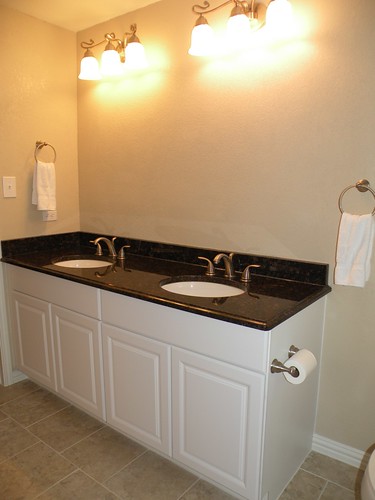
Kitchen cabinets. Brilliant idea. All the new houses are doing it these days. Really saves your back when you are brushing your teeth or washing your face. Loves me my new kitchen height cabinets.
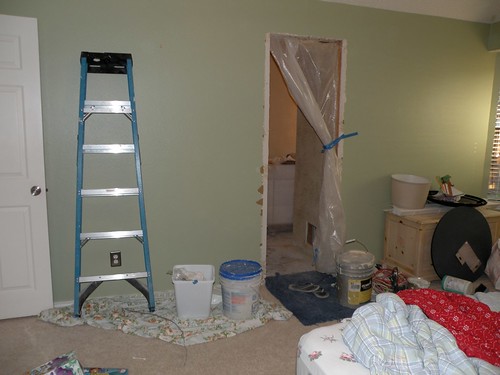
This is the disaster in our bedroom. Side story – We had a perfectly good useable door frame until we realized the dang cabinets were too wide for the door frame. They were also too wide for the window. Only solution was to rip out or perfectly good door frame and those suckers barely squeezed through that opening. Note: The door opening is NOT handicap friendly. Or obese friendly. I’m still scratching my head as to why the opening is so narrow. But by this point I was tired and lazy and didn’t feel like moving wall studs to widen the door. Maybe in my next life I’ll do that.
Boo-tiful new walls. I textured them with my handy dandy texture tool and then painted them with my super cheap not-worth-the-money paint sprayer. If you’re going to get a paint sprayer, don’t get a $30 one. Get the $300 dollar one. Or just buy some rollers and roll the paint on. But aren’t the walls so lovely? And soft! Nope, I can’t scratch my back or bleed my knuckles on these walls, baby!
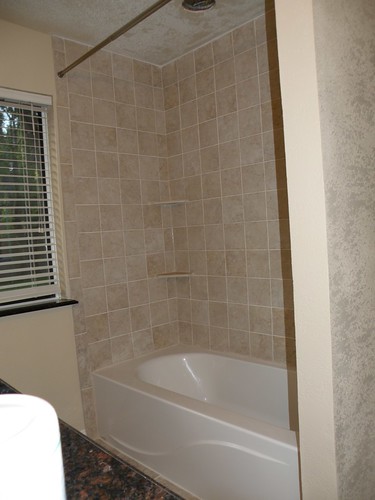
Now I’m ready to tile the surround! Wish me luck, I’ve never done this before!!

I wish it only took me this long to do. This took me D-A-Y-S.
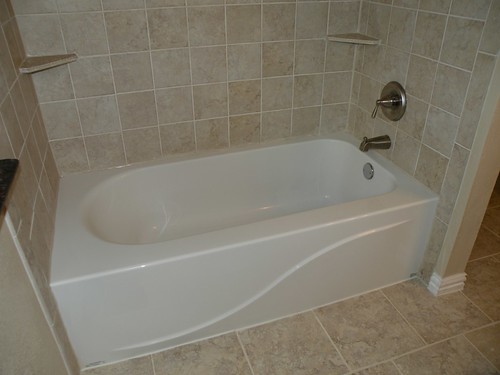
A beautiful sight

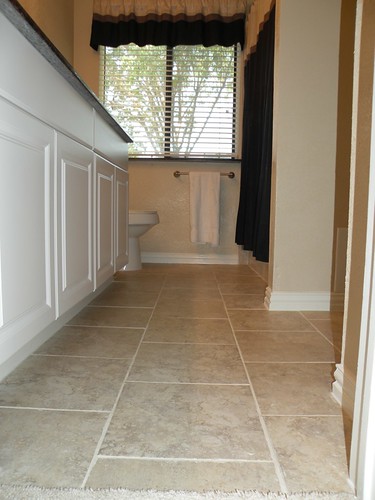
Gorgeous! And check out my brick pattern tile floor! I looovvvvve my bathroom!
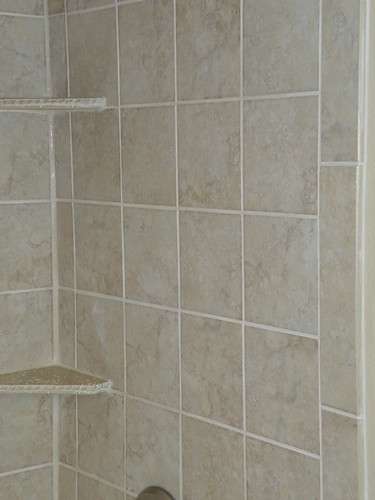
My OCD type A anal personality kicked into full gear on this project. Did I mention that I’ve never tiled before? Seriously. Never. So I looked up “Type A” in the Thesaurus and it said “ambitious, compulsive, consumed, directed, guided, impelled, induced, monomaniacal, motivated, obsessed, possessed, pushed”. Oh come on! Give the girl a break here! (But it does look totally fab doesn’t it?!!)
Tada! Done!

“>
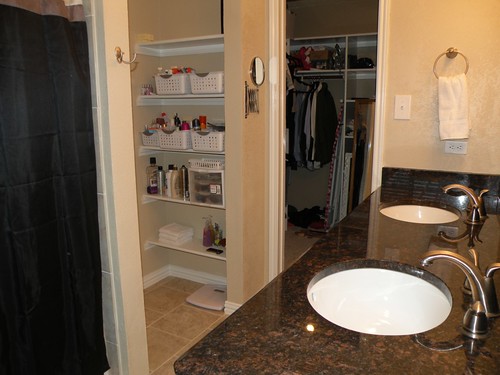
Our steal of a deal was finding the perfect size mirror for this wall on craigslist for only 25 bucks. Yup! I was about to have a mirror company custom cut one for me for a whopping $375. Craigslist is the best.
And just for fun, I’ll show you a quick before and after one more time.
BEFORE:
AFTER:
![]()
Holy cow! You did a GREAT job!! Excuse me while I pick my jaw up off the floor…
Shannon, thank you! You are to kind!
Popped over from Kimba’s DIY. Your bathroom redo rocks. You did a great job.
Thank you! It was so much work, but totally worth it.
I am so thankful I followed along during the initial remodel of the bathroom Allison. I was taking a shower last weekend and I noticed a tile was buckling. Lo and behold, there was more than one and I knew there would be moldy dry wall behind them all. DH has rocked it out of the park and hung concrete wall and retiled with the original tiles. Oh yeah. PLEASE hurry to Dallas. I miss you. I promise I’ll go to DH work more often and stop by your house!! Love ya!
Emily, Eek! Good thing your DH knew how to fix it. I miss you too my Tolbert BFF.
You’ve done an amazing job here! It looks like a million bucks!
Wow !! This is an amazing transformation. I love the colors you selected and how you maximized your storage. Love it !!
Wow! What a great (and messy) transformation. DIY is so rewarding (and messy). I also love the idea of using the kitchen cabinets in the bathroom. It doesn’t make sense to have vanities as low as they are. Great job!
You are AWESOME! YOU ROCK! Esp. doing so much of it by yourself.
wow, what a difference! the “before” is quite something – i’ve never seen double sinks but with no counter…
BEAUTIFUL! You did a great job–you deserve to be really proud of this room! It looks marvelous. Those before-and-after shots are great!
Your remodelled bathroom looks marvelous. It is wonderful to see the before and after shots of the bathroom.What is the name and brand of your floor tile? I have to replace the tub surround and floor tile in one of our bathrooms and your tile looks like something I should check out.
What’s the texture tool you used? I have Walls like sandpaper too and do not know how to get rid of it without new drywall.
Ugh – our last house had sandpaper walls in the hallway & up the stairwell. GAH! But, we eventually bought two random orbital sanders, a truckload of sanding pads, and tamed the evil sand. Of course we did it just before we sold the house – because heaven forbid we actually did it when we were living there & scratching our knuckles every time we tried to carry a laundry basket on our hip…
Your new bathroom looks fabulous. Come to New England for a working vacation sometime & I’ll welcome you with OPEN arms (and plenty of tools).
all i can say is wow.
GORGEOUS!! Seriously you did an absolutely beautiful job! I can’t believe the walls before-ouch! The room looks fabulous and I love the tile.
You might be wondering how I found this post… well I was just exploring and wanted to see what your oldest post was… haha.
Anyways, just wanted to drop in and say holy crap that bathroom looked so much better after you finished it. I bet it was a lot of work, but it was definitely worth it! 🙂
This is such a transformation. It looks so elegant and streamlined.