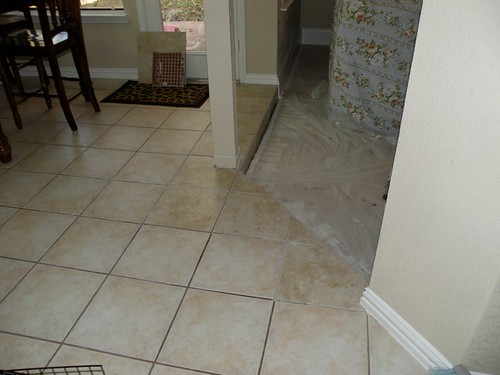
This project was a big mess. I put months of thought into exactly how I was going to tackle this patch job. Here’s what I started with:
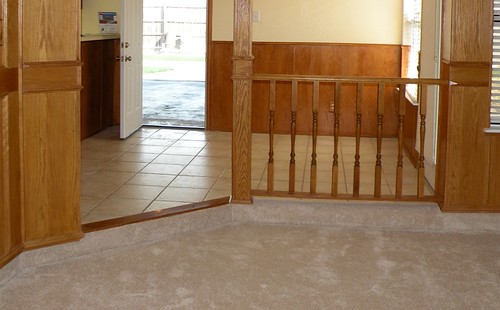
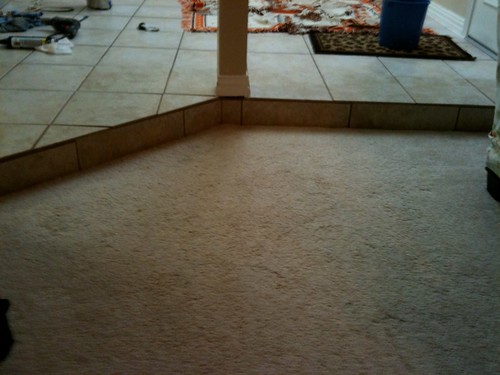
We ripped out all the paneling and the railing. We were left with a carpet-covered step. Here’s the step mid-family room renovation:

The problem is that the carpet wrapped up the step and about 6″ onto the kitchen floor. Not only did this look tacky, the carpet was getting really dirty from normal wear and tear in the kitchen.
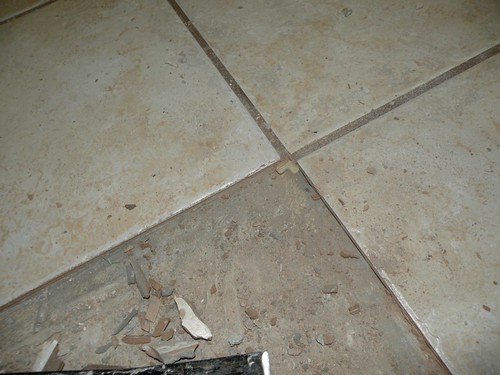
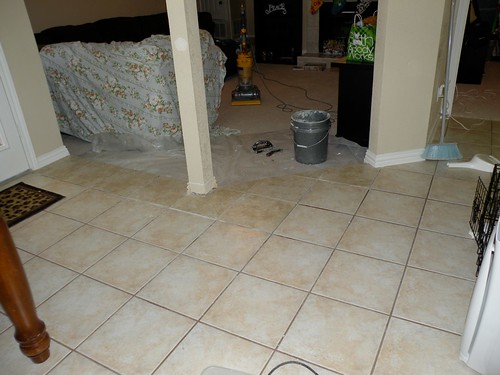
After I removed the carpet I was left with this:
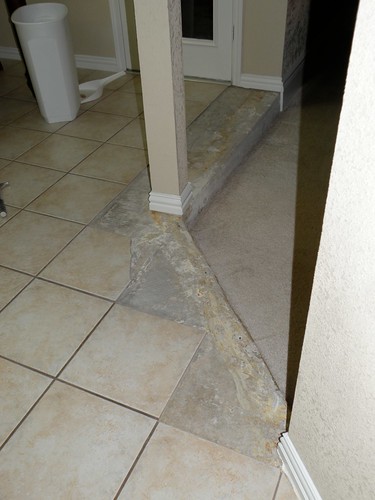
Yikes!
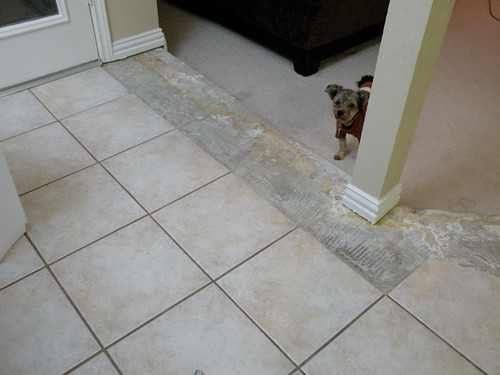
There were several ties that were chipped or were previously cut to fit the carpet so I had to remove those extra tiles. I used a sledge hammer and a pry bar. It was tedious work and I had to be very careful to not break or chip any full tiles. While I was removing the extra tile pieces I came across this – at every single corner:
What is that? Let me look closer…
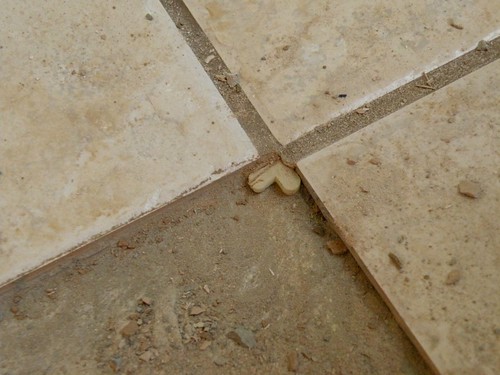
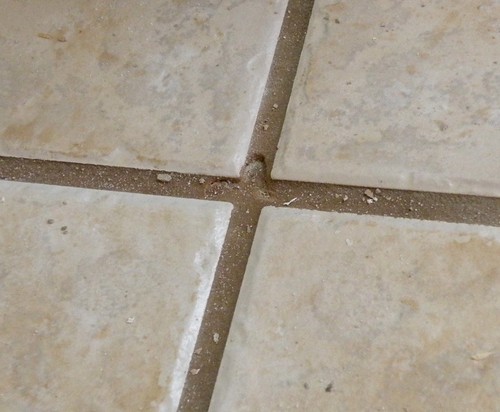
This is NO JOKE! The previous owner used the plastic tile spacers the wrong way. I’m assuming that once the tile glue was set those little spacers were imposible to remove so they just grouted right over the top of them. If you look closely at the grout throughout the entire kitchen floor you can see several places that look like this:
I wish I were kidding.
I’m sure you’re wondering why on earth I didn’t just tear up that crappy floor and replace the entire thing. Well, a few reasons… 1) I just recently added all new baseboards, caulked them, and painted them. If I replaced the floor I’d have to re-do my baseboards. 2) Waaaay too much work. Do you know how hard it is to rip out old tile and prep the floor for new tile? Tiling isn’t the hard part – tearing up the old floor is the beast. 3) I recently found out that we were going to be moving out of our home so the house was going to turn into a rental property. If I could patch the floor quickly why would I bother doing a brand new floor for renters? (I wish I knew this before I sunk $4k into my bathroom).
So, the tile… this is another drama…
How hard could it be to find matching tile? Before I answered that question I had already ripped out the carpet and tore out all the old tile. Then I took my tile scraps to our local hardware store. All I needed was 14 1/4″ ceramic tile in this very generic pattern. Piece of cake, right? Wrong! Tile does not come in 14 1/4″ size. I checked at at least five stores and online. Finally I found something that would work, but it was about $7 a tile, custom ordered. Um, no.
So I went back to Lowe’s and I found a similar texture, color, and pattern. Only problem was the tile was 18″ square. But it was less than $2 a tile so I bought it. I then had to cut every single tile down to 14 1/4″ square. Luckily I saved fifty bucks because my very nice neighbor lent me her husband’s tile cutter. Lucky me!
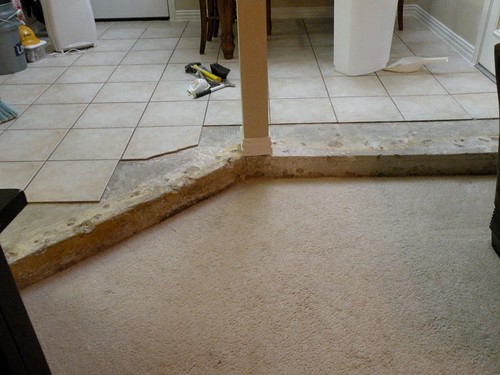
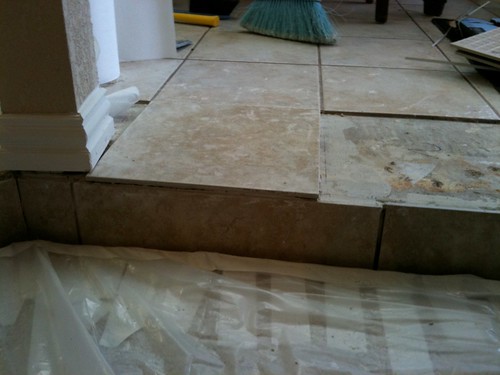
Here’s how I patched the floor:
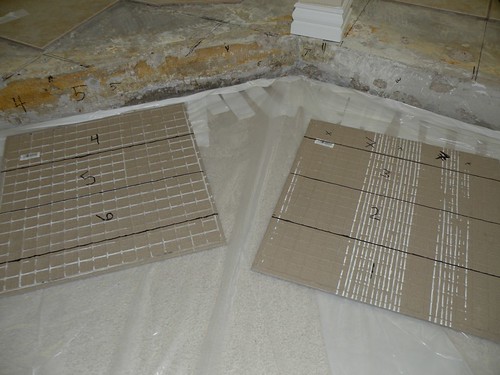
I started with the side of the step. I wanted to make sure when I did the top of the step I cut the tiles long enough, so I needed the step part done first. I measured each piece I needed and then using a sharpie I drew my pieces on the back of each tile. Next I numbered each piece as well as the cement floor.
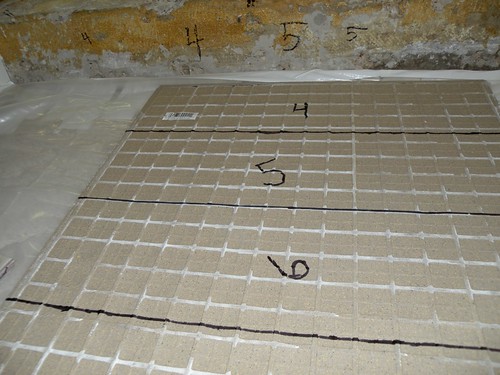
Then I went to the garage and cut a stack of pieces. I’ve tiled a few times and IMHO this way is much easier than cutting one piece at a time. Just cut them all at once! Make sure you use a sharpie though b/c the water from the wet saw will wash away pencil. If you mark the top of the tile with sharpie nail polish remover takes it right off when you are done.
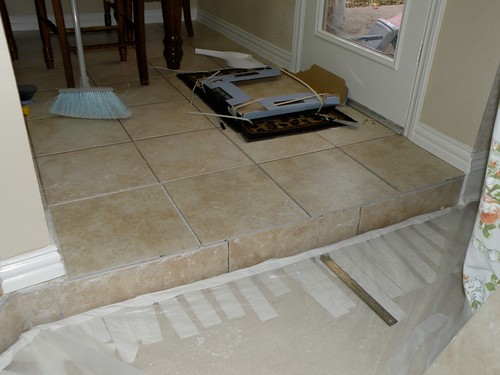
Glue as you go.
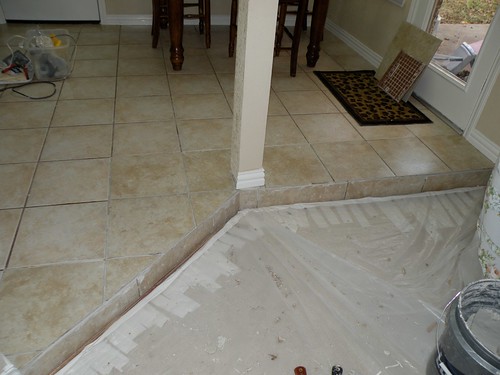
Then just grout it! Easy peasy!
I’m kicking myself because I never took “after” pictures before we moved!!! Grrrr!! Here are two pictures that I managed to hunt down. The first one is from my cell phone and the second is from a party we had just days before we moved.

The tile isn’t a 100% match, but it looks pretty damn good if you ask me. I’ve gotta pat myself on the back for this patch job. I bet if you didn’t know it was a patch you’d never notice it… which is a compliment to me.
You did an amazing job… I couldn’t wait for each new picture appear as I read your work plan.
What an inspiring read! The patched up tiles look great 🙂
I’m facing a very similar situation in my kitchen after we gutted it and installed new cabinets, appliances, bench tops..everything including the kitchen sink!
But after the new cabinets were in place we realized the old tiles were laid AFTER the kitchen was installed and of course the new cabinets are a different shape.
So we have decided to do exactly what you have done.
Your article provided some great advice and gave me courage to try it! What’s the worst that can happen right! While I was digging around I found a great website run by a wise old tiler that taught me a lot about removing the old grout around the tiles and how to grout as well. If anyone needs some advice here a link for you: https://tilersplace.com/best-grout-removal-tools.
Thanks for the great read and advice Allison!