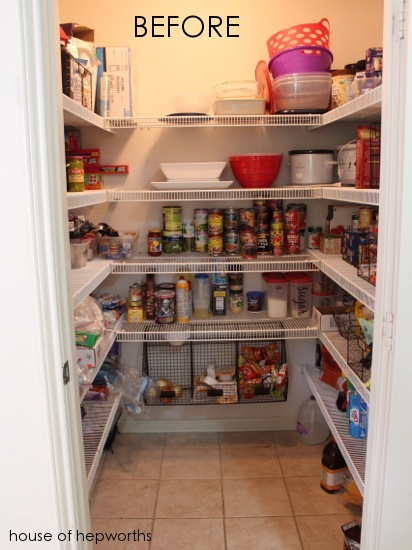
We are in the process of upgrading our dated and not-so-functional pantry. The old, rusted wire shelving has been replaced with wooden shelves in a more user-friendly layout. Instead of wrapping the shelving around the entire pantry we opted to leave the back wall open and create a narrow canned goods shelving system instead.
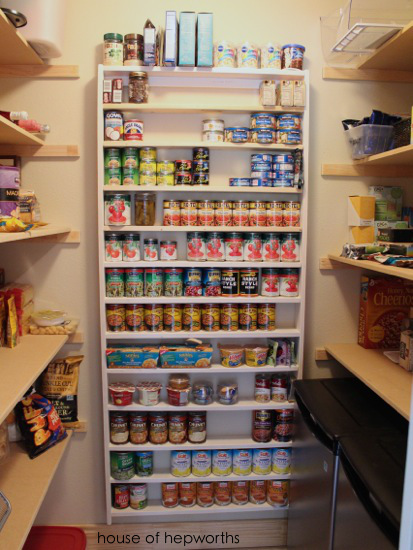
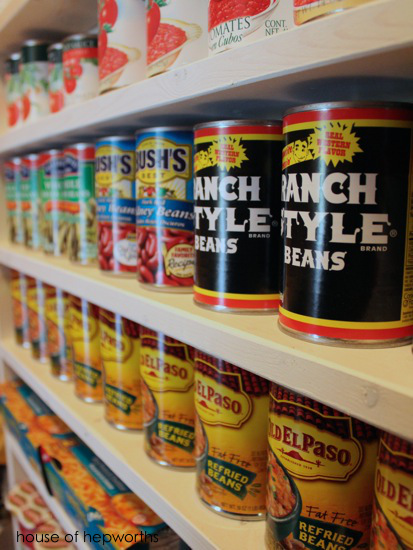
Not only does the shelf hold a ton of cans, it also makes it extremely easy to find exactly what I’m looking for. Another great feature is that it has a very narrow profile – sticking out from the wall only 3.5″! This leaves the entire room feeling bigger and more open, and makes finding all our food a piece of cake.
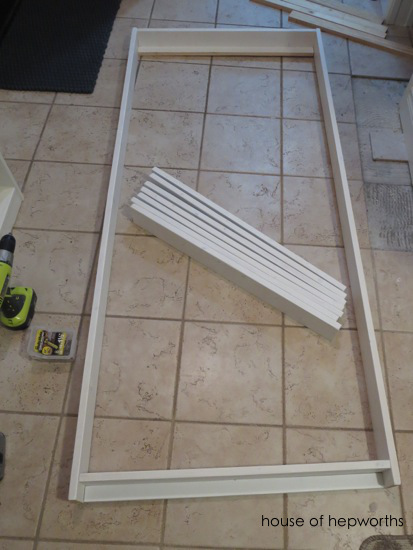
Here’s the before to give you a better idea of where we started:
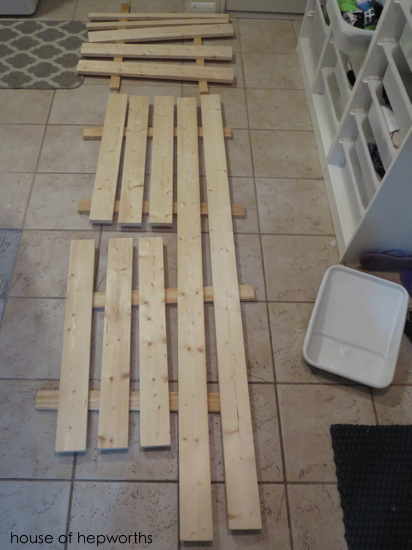
Making this shelving unit was fairly easy, especially since it required minimal measuring. I started by measuring my open wall space and figured out how tall and wide I wanted the shelving to be (6′ x 2.5′). Using basic 1×4 whitewood from True Value’s local lumber yard, I cut all my wood – two 6′ boards and fourteen 2.5′ boards. In addition I also cut two 1/2″ x 1″ cleats so I’d be able to screw the shelf to the wall.
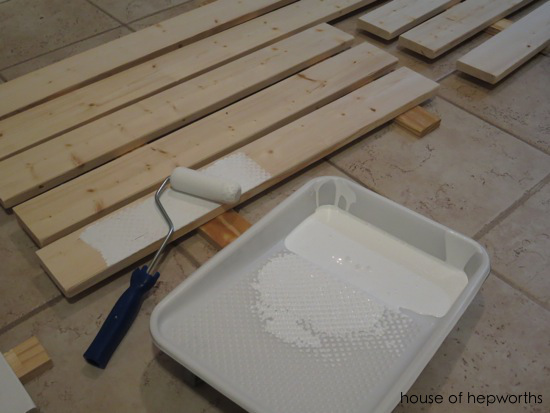
I opted to prime all the boards before assembling the shelf to make it easier on me down the line. I gave each board two coats of Zinsser Bulls Eye 1-2-3 primer to block any knots from bleeding through the paint once painted.
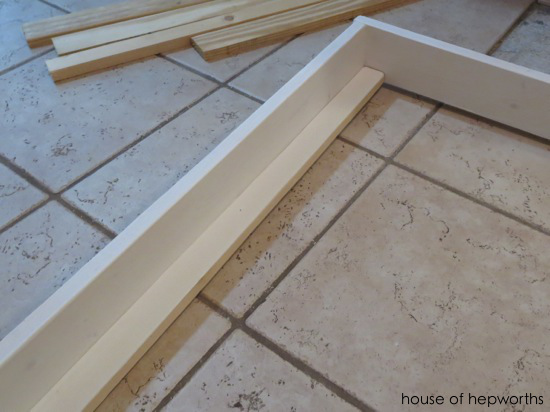
To assemble the shelf I simply attached all four sides with some 2″ wood screws and added the cleats below the top and bottom piece. I did pre-drill each hole with a small bit because whitewood does tend to split easier than other woods.
Here is a close-up of the top cleat so you can see how I attached it. I will use this cleat to attach the shelf to the wall by screwing through the cleat into the wall studs.
Now the fun part – figuring out the height of each shelf. I totally cheated and used actual cans of food to determine how tall I wanted each shelf. Each shelf height is unique and holds specific types of cans. If you measure your shelves using canned goods, make sure you set your shelves about 1/2″ higher than the actual cans for some wiggle room above each shelf.
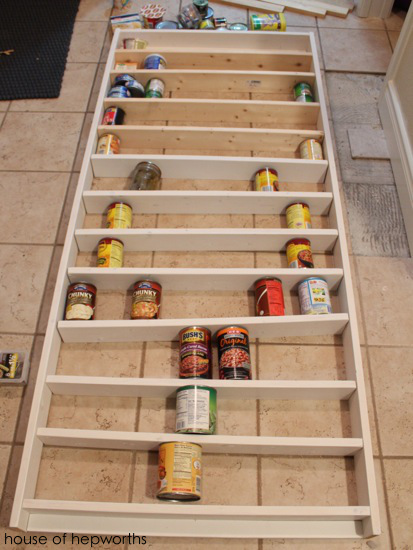
Once the shelves were set, I predrilled holes and screwed all the shelves together making sure to keep each shelf level. Once the shelves were set, I marked my studs on the wall and screwed the top and bottom cleat directly into at least two studs in the wall.
I loaded all my food right away to see how it looked and to test it out. When I finally finish up the pantry and paint everything I will also paint this entire shelving unit using some semi-gloss paint made for trim (trim specific paint is more durable than basic wall paint).
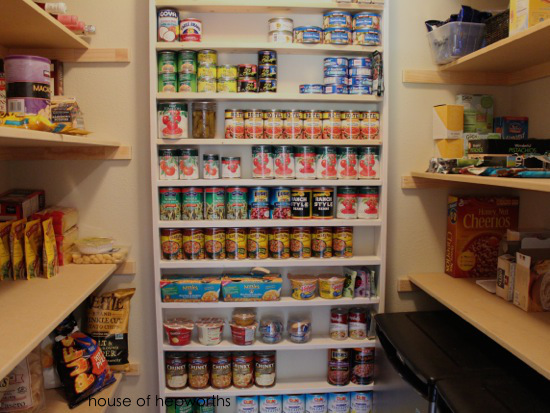
The canned goods used to take up an entire shelf on my actual pantry shelves. They were hard to organize, hard to stack, and hard to find. Now I can easily find what I need at a glance.
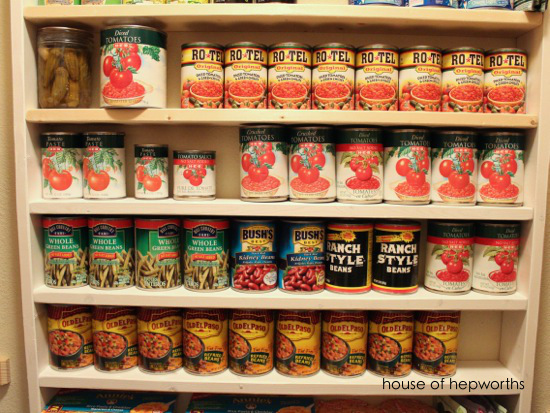
Not only is the shelving unit extremely functional, it also makes all our canned goods look pretty.
For more DIY ideas and tips check out my blog, House of Hepworths. I’ve got tons of great ideas, tips, and tutorials to make your life more organized, easier, and functional.
Can organizer
I live in a tiny apt. I love the look of the organizer. I will be placiining on one of my kitchen walls. My teeenagers have special needs and i would like to put a back on it since I don’t have a pantry and casters to make cleaning easier. Besides securing to the studs in the wall can you think of othrr things to fo for safety?
I really NEED to build this for my tiny farm house, although I cannot see the pics…is there any way you could send the directions with pics to my email? Please. Thank you in advance!
Has this held up well?
I am as curious as kelly herold. How well did your project stand the test of time? Also, what would you probably do different if you repeated the project?
It was great while we lived there. I have no idea how it held up because we sold the house but I’m sure it held up just fine.
We made one from your plans to fit on a wall under the basement stairs. Now we can easily see the extra cans.