
This H was the biggest pain in the rear!
I swear it was the most annoying project I’ve ever done.

Here’s how NOT to make a large block letter…
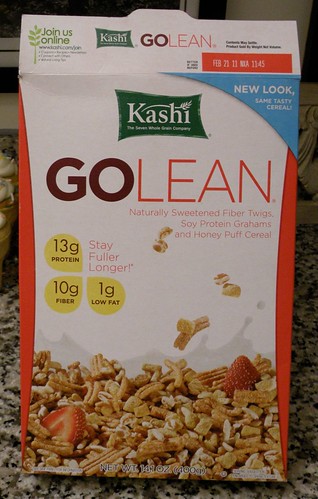
First off, DON’T start with a cereal box:
If I do this again (which I probably will) I’ll use thicker cardboard like Christy did that wont buckle on me when it gets damp. Christy is much smarter than me!
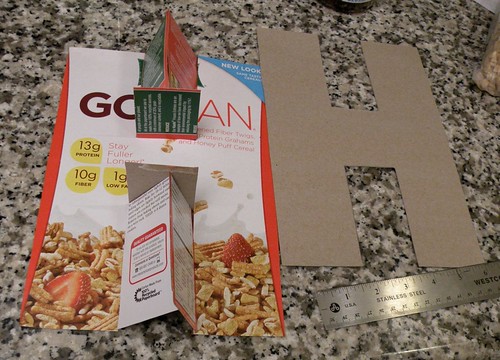
Fortunately for me, the letter H is symmetrical and easy to make. No curves or weird shapes.
So basically I cut out two identical H’s, and then I attached them to each other using rectangle pieces in between taped with box tape.
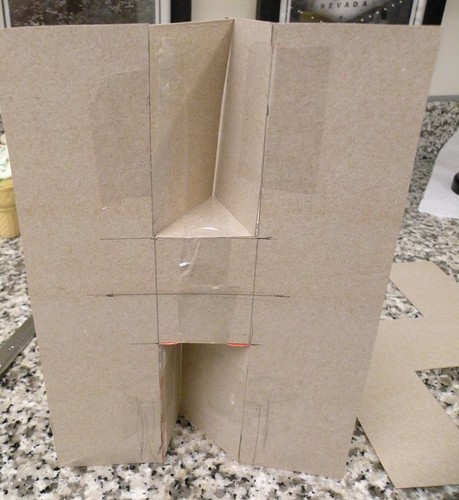
Here’s what it looks like partially taped together.
Almost done. I just cut pieces all the same width, but made each length the length of each side of the H.
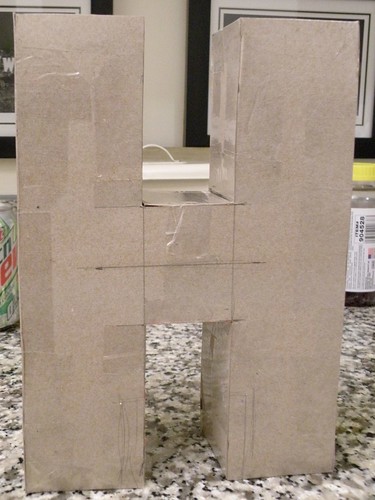
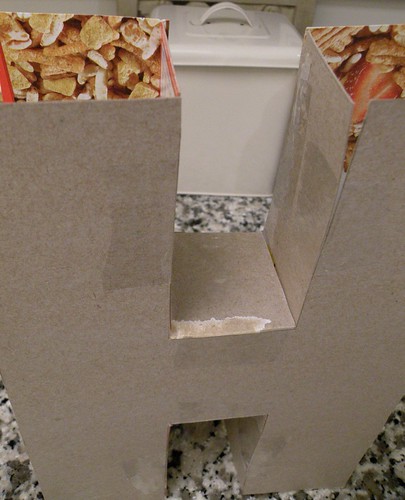
All done.
Next thing I did was the paper bag technique.
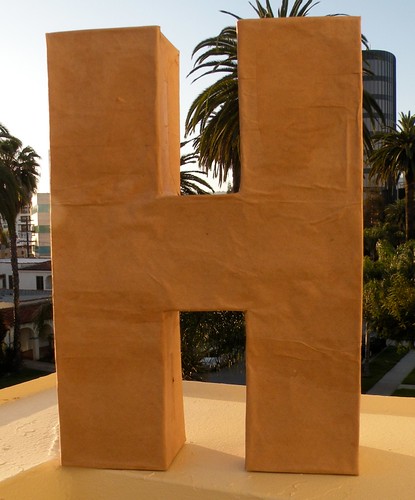
So far so good. I should have just stopped here, but it just needed *something* else. Hmmmm…
The next thing you should NOT do is spray paint it this color.
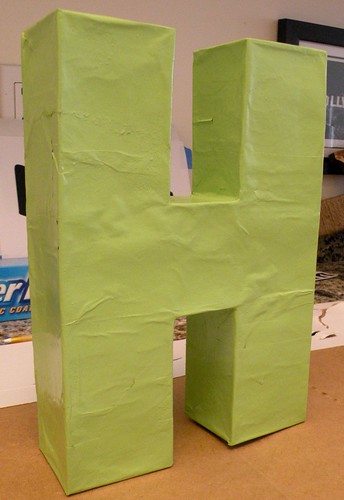
Yikes. Too late to go back. Dang it. What a waste of time! Now I have to fix it.

Between the watery glue from the paper bags and the spray paint, the cardboard was too thin and buckled. Now it looks even worse!
So I traced it and cut out another H.

And then I attached the H with more box tape. This made it a bit thicker on the front and covered up the buckle.
Then I did the paper bag technique again.
I will NOT give up so easily! This H will turn out if it kills me!
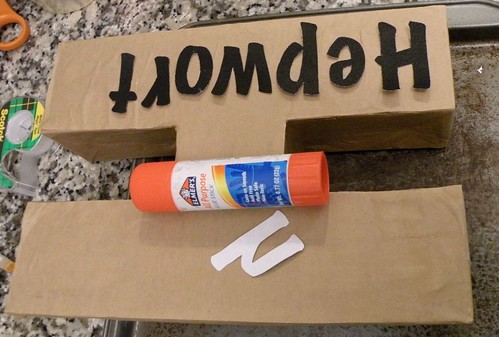
So after the paper bag dried I printed Hepworth from the computer, cut out the letters, and glued them to the H.
I may be able to redeem this thing after all.
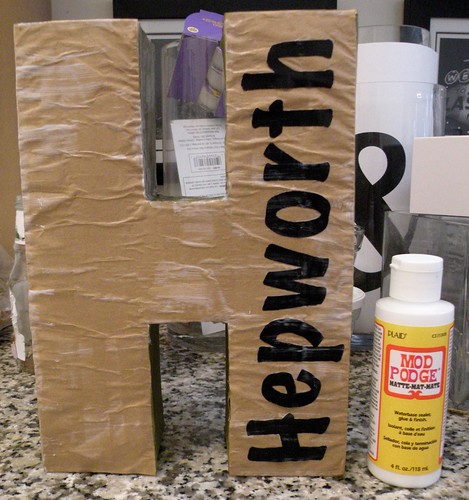
I then coated the entire thing in Mod Podge. This was my first ever attempt at Mod Podge, and now I’m hooked. Love the stuff!
I think I redeemed this H fairly well. The green was just awful, but I’m digging the neutral color with my last name running up the side.
Live and learn, right? I could have done this project in 1/3 the time if I’d used thicker cardboard, but in the end, I’m happy with it.
oh, good for you for trying to save it, allison. you weren’t the only one who had a craft-gone-wrong this week. i wrote about mine on my blog just a couple of days ago. makes you really appreciate when things do go well!
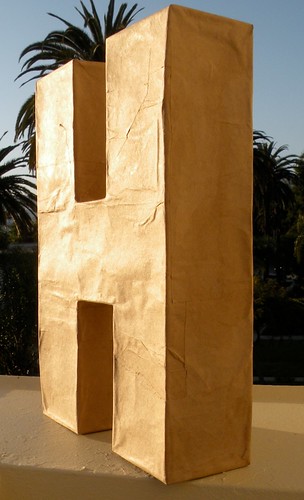
and i agree, that’s a good photo of the H amongst the palm trees and sunshine!
It still came out cute
Oh yes… we all have projects like that! 🙂 But it certainly did turn out great in the end!!
Your “H” turned out very nice!!! I know it’s all about the craft and doing it yourself, but you can get some “already made” letters that measure about 23″ from Joann’s. I ordered mine online, and with the 40% off coupon, I got the darn thing for about $8, including shipping.
I love that in the two closeups (with the palm trees in the back) it look HUGE!
I probably have some thicker cardboard/chipboard you could use.
I used modge podge for the first time on Sunday. Can you spell LOVE!
I really love it and your journey to a finished product had me laughing!
Nothing like the smell of Mod Podge in the afternoon! 🙂 I just used some today on some frames… I can certainly appreciate your frustration with your project, but the end result is very cute 🙂
Talk about thinking outside the box.. I love this. I am going to have to try this one. And mod podge.. I can’t believe you are so crafty and have never used it before. Between that and spray paint. You can re-do anything.
Love ModgePodge! Your H is adorable!
Loving your “H”!! Very cool!
Hugs
SueAnn
Haha — this post totally cracked me up! I love how your “H” turned out though — it looked like you were quite the architect while you were constructing it. 🙂
Calamity Anne hooked me up with this project and she is right 40% Joann’s letter is alot less complicated. I really love how you left it a solid color and put your name up the side. I have another one to do and I just might steal that idea.
I don’t know what’s happening, but the photos on your posts have not be showing up for me lately. They show up for other blogs but not yours.
Good save, wedding singer! LOL! I know that Christy’s Creative Chaos made these letters look oh so easy, but you persevered and made something very cool. Love the paper bag technique. I want to make a big A for my craft room. Note to self-use HEAVY cardboard.
I’m so glad you showed us the WHOLE process – we don’t do that enough on blogs! You did good!
Hee hee, you don’t know how many times I’ve had a wrinkly Mod Podge experience, but keep going, it gets easier. And your H looks pretty darned good from here!
I have SO had projects like that! LOL! It came out wonderfully, though! I love it!
I love that you put your last name on it!
Thanks for sharing @ Anything Related No.11!
{Rebekah}
This post totally cracked me up! I love the finished project though – looks fabulous! I’m a sucker for monograms and family names – fantastic idea! Thanks so much for joining the Sunday Showcase Party! I greatly appreciate it. Hope you are having a wonderful week! ~ Stephanie Lynn
I love the H and the font used for your last name!
I love your “what not to do” tutorial LOL! it’s good to see that you are human like the rest of us and make mistakes too. But look at how gorgeous it turned out! Glad you didn’t give up 🙂
I agree! Mod Podge ROCKS.
Great idea! I like it and I am gonna try it too! Thank you!
Wow! You are so talented to have thought of that! It turned out great! Thanks for sharing! 🙂
That’s crazy cute! That is the most creative recycling I’ve ever seen!!! Great job.
That project is totally the kind of thing I would do…lol…we are a tenacious bunch, aren’t we?
Thanks for linking up to Fab Friday –
Cheers!
This is totally the kind of project I would get sucked into…lol….we are nothing if not tenacious. 🙂
Thanks for linking up to Fab Friday –
Cheers!
I just wanted to stop by and let you know that I linked to this post today from the new Home & Garden channel at Craft Gossip. 🙂 My hope is to share many of the fabulous projects I see everyday with the vast CG audience. I hope you will not only stop by and subscribe to CG, but will tell your friends about the new category! Hope you see some traffic from it!
Your feature will appear in the main Craft Gossip RSS feed, on the main home page and can be found directly here
http://homeandgarden.craftgossip.com/8-fun-letter-projects/
If you would like a “featured by” button, you can grab one here!
http://homeandgarden.craftgossip.com/grab-a-craft-gossip-button/