I am so not joking, my friends. I am DONE with the dining table.

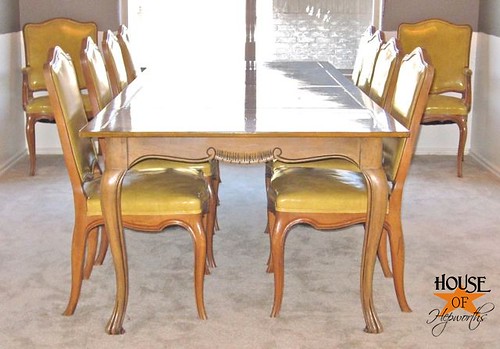
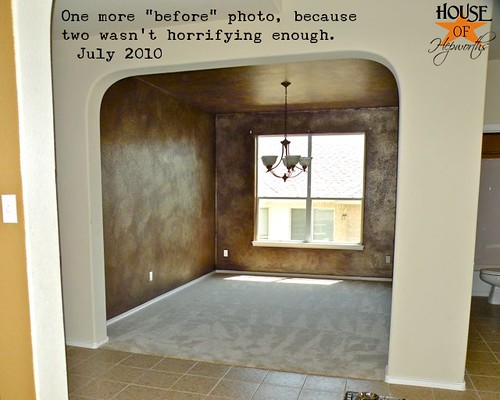
…aaaand a before pic to jog your memory:

I bought this table over TWO months ago. Yes, it’s taken me more than two months to strip and stain a table.
I think I’ve just set a new Allison record for the slowest project I’ve ever done.
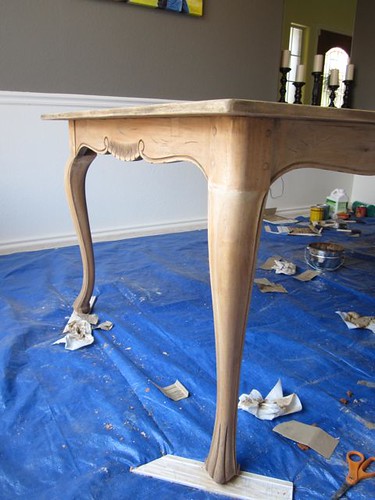
Let’s back up though… Last time I showed you the table I had just finished staining it.

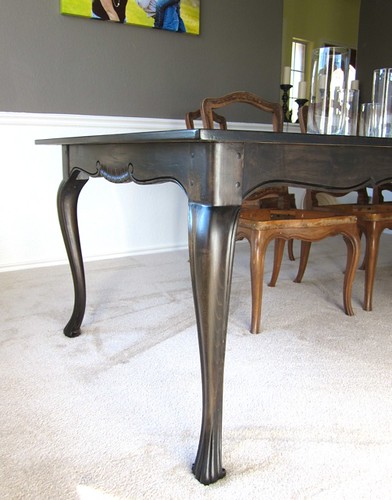
After that I had to add the Poly. I went with MinWax Polycrylic in a clear satin finish.
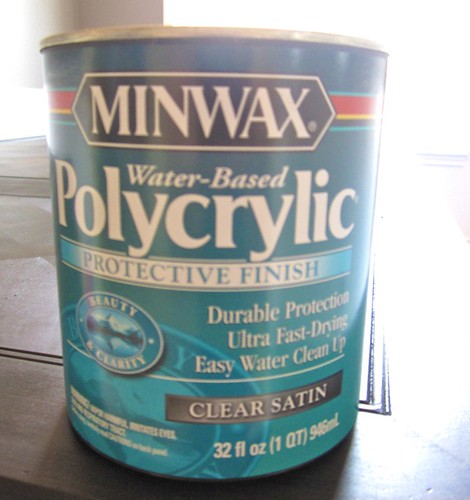
It said to use a good bristled brush, but I used a throw away foam brush and it worked just fine.
The legs got 3 coats and the top got 6. I learned a few things about Poly along the way; any little bubbles will dry crunchy and white. Make sure to smooth the bubbles out as you paint it on. Also, the container says to sand in between coats. I sanded once, after 3 coats using 320 grit paper per the instructions on the back of the poly. It was a disaster. It took most of the stain off and left little swirlie marks on the table. I had to buff the top down and re-stain it. Pain in my you know what! In the end, I didn’t sand at all between coats of poly. The table looks perfect in my humble opinion. So, if you use poly, sand at your own risk!
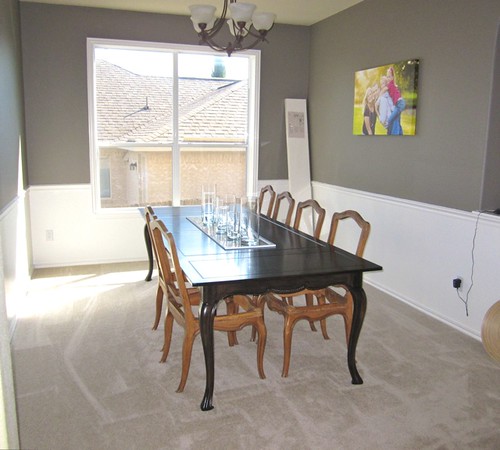
Now for the fun, part loads of “after” pictures, and a few “before and afters” for good measure.

Let me just point out though, I am no where near done with the chairs.
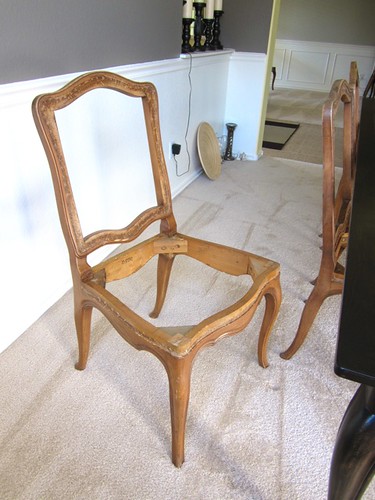
I will give you a full play-by-play on how to remove upholstery in another post. Don’t worry, it’s on its way.
Also, all the “after” pics of the table have the unfinished chairs in them. Now you can easily compare the original color (on the chairs) to the new color (on the table).
Oh meh goshhhhhhhhhh, I’m seriously loving this table. Like, as in, “heart palpitations just looking at it” kind of love.
I also equally love the table centerpiece, which isn’t even finished yet. It’s only half finished. So just picture it about 50x cuter than what’s in the pics.
In an honest effort to “keep it real” for you guys, can I just be frank?
This project was a huge pain in my Derriere. Stripping and staining a table is way more work than I thought it would be. Also, it’s not for a DIY novice. It was hard. Unless you are confident and patient as a saint, I would say either paint it or just buy something else.
Here’s how the top turned out:
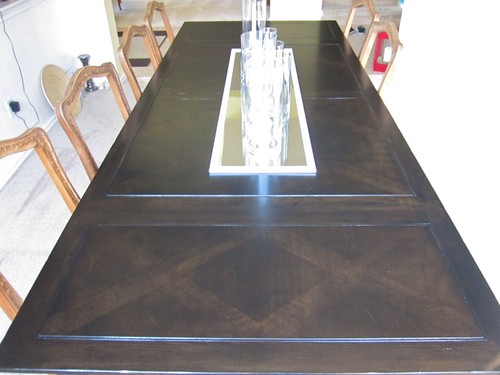
I was originally going to paint the table. I knew staining it would be so much work, and I just wasn’t up for it. But fortunately I have some of the best friends online (you!). You guys encouraged me to stain the table so that the interlay could show through. Realizing I needed to suck it up and stain the table instead of painting it was the best decision I could have made. Thank you!

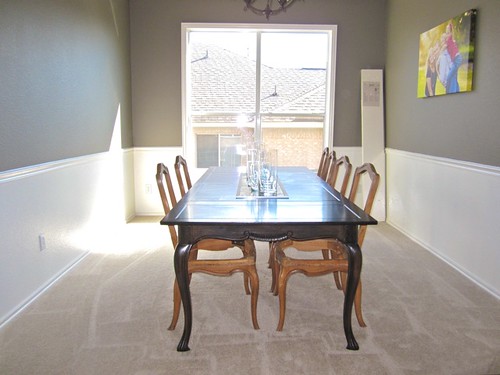
Check out how far this table has come! (And the moulding in the room too!)
Before
After

Before
After
Before & After
And finally, the picture I’m most proud of…

…and when we first moved in:
I’d say that’s a pretty huge improvement! I’m so glad the Barny Room is no more.
Now I get to finish the chairs. 🙂 It takes me about 2 HOURS per chair to remove all the upholstery. All the layers of material, and the springs, and the nails. Don’t get me started about how many nails are in each chair! Oh, and staples. Geesh. Whoever assembled these chairs was hell bent of them surviving the Apocalypse. The only things able to survive the Rapture; roaches and my dining chairs.
In case you are just now reading about the table and want to get caught up, here are all the posts in reverse order (newest post first):
1) Stripping, cleaning, conditioning, and staining the table
2) Stripping the table top, curtain fabric reveal, and a run down on the chairs
3) Adding moulding to walls, + my overall plan for the dining room
4) I bought a dining table!
Also, here’s my House Tour: Dining Room and the play-by-play of painting over the Barney Massacre.
Thanks for following along on my journey. I’m glad I get to share the ride with you.
See all my blog posts with videos here.

Instagram || Facebook || Pinterest || Youtube
Thanks for reading! Have a wonderful week!
Allison, it looks INCREDIBLE!!! And your dining room just looks a gazillion times better than before! 🙂
http://www.iheartmygluegun.com
Alison! I love the table! I need to get my fanny in gear to restain the top of mine… and the chairs.
You’re making me glad I have a table 1/3 the size of yours and only 4 chairs to do!
It looks FABULOUS!!!! I know it was a PITA, but looks way way way worth it!! Looking forward to hearing about the upholstery.
🙂 You ROCK!!
Wow! Looks AWESOME! I’m so glad you still get to see that gorgeous woodgrain! I know that wasn’t an easy job (ha!) but once you’ve had enough time to forget about it, I’ll bet you’ll be SO glad you did it… (It’s like childbirth, right?) 🙂
it looks amazing, allison!!! great work! and now, the chairs…..
It looks Fow-King-Ahhh Maze-ing!!! I LOVE IT!!! When I saw you posted this I was alll excited waiting for the page to open.
Please pat yourself in the back!
Beautiful! Love the dark stain so much better!
Haha the “barney room”! That sounds so cute! Wow, I can’t believe how great the table came out! I’m definitely looking forward to you telling us how to remove upholstery… I have a project lined up I’d like to try but I’m too intimidated! Also, I’m a new follower!
~ http://www.billiemonster.com ~
What a difference! Love the darker stain and I think 2 months isn’t bad at all considering how big a piece that is. We just purchased a new dining table from Craigslist that needs to be refinished so your advice is going to come in handy!
Your table looks wonderful!! I have only stripped/stained one project and I felt the same way… sooooo much patience is needed! It was worth it though 🙂
Connie
Seriously. It. Looks. FABULOUS!! The wood interlay looks incredible in the dark stain. It looks expensive now, too! Oh, Alison, it may have been a lot of work, but it really looks like it was worth it. Nice job and excellent choice. Can’t wait to see the chairs all done.
It looks amazing Alison! Wow, and that table is huge! Very nice, I bet you will love entertaining in there when it’s finished 🙂
Outstanding…it looks beautiful! For years and years to come you are going to be SO glad you took the time to achieve the look you really wanted. Congrats on the big accomplishment!
OMG I AM SO EXCITED TO SEE THIS!!!
So when you said you were going to paint it, I was reading on my phone, via my google reader, and of course, the damn thing would NOT let me comment. And I was going to comment with a fierce “OH NO YOU DON’T GURRRL”. Because there is way too much beauty in that table to paint over! AND I’M SO GLAD YOU DIDN’T!!! I’m sorry it’s a pain in your booty, but you should be so proud! It’s beautiful, and frankly, you got it done probably about 10 months sooner than I would have…HAHA!
Wowzers!!! It is beautiful! But I definitely would have painted it! I am too lazy to do all that staining and sealing. Ha! So kudos to you girl. Beautiful job for sure!!
And the moulding looks amazing!!
Hugs
SueAnn
Allison it’s beautiful! I know you put in a lot of hard work and you’ll really appreciate it when you sit down to your first meal there 🙂 I am working on stripping and staining a table myself now….I feel you pain but I will press on!
All I can say is WOW! Your table is drool worthy!
Your table turned out beautiful! What a fantastic improvement. Well done!!!
love this set. I just sold 4 pieces! It is difficult and tedious work I will have to say, and from now on I will do it only if I am keeping the pieces I buy. BUT I need to know what is that marv color you used in the dining room on the top 1/2?? I have to have it for my rec room. Thanks!
The table looks great!!! I have to agree stripping and staining is a HARD job. I don’t have any patience and a few years ago when I decided to strip and stain some bunkbeds my kids had it turned into trashing the bunkbeds and buying new.
I. LOVE. IT. AHHHHH!!! Swoon.
GORGEOUS! It looks SO good. You are amazing for all that work that you’ve done. I am so glad that you’re happy with the result (I was on team “stain it”). The dining room is going to be stunning once it is all complete.
Wow, double wow and triple wow! What a lot of work you have put into that table! Talk about an heirloom piece! That is such an inspiration, I can’t thank you enough for sharing!
Your table looks beautiful. I love refinishing furniture and cabinets for the joy of watching the transformation.
Instead of sanding with paper I use those green flat Scotch pads that you can buy @Walmart in the cleaning supply section. Most paint stores carry them also in black which isn’t as coarse as the green. The pads work great for those in between coats of poly.
Looking forward to seeing the chairs when they are finished.
Enjoy!!
Your table turned out AMAZING!! Hopefully all these comments will keep your momentum going because I can’t wait to see how the chairs turn out!!
it looks amazzzzzing!!!! great job! be proud!
That looks GREAT! I love it! And I understand what you mean about how much working stripping and staining is, ugh! It took me forever – and all I did was the flat top of a dresser, lol! So kudos to you – your dining room is looking gorgeous!!
~Chelsea
This has truly been a labor of love and it is really paying off. The transformation is amazingly beautiful. Can’t wait to see how the chairs turn out. I can definitely foresee how wonderful it is going to be.
Looks AMAZING! You are such an ACE! 🙂
love it!!!!!!!!
Your table looks gorgeous! What a transformation!
By the way, I only just recently realized you are just a stone’s throw away from me. 🙂 And I also just remembered that you asked me a question about…hmmmm…a chair? I don’t remember. This week has been such a blur. I’ll go back and look right now.
Anyway, beautiful job on the table. Your hard work definitely paid off.
WOW!! It’s seriously fantastic!! SUCH an improvement!!! The whole room is too! I can’t WAIT to see what you do with the chairs! 🙂
Phenomenal job! I really admire your patience! I started sanding my large oak table tonight, so this was an inspiring post for sure!
Love your table, your home is looking great. You’ve come a long way! Can’t wait to see the chairs!
I just happened to find your blog and oh what a happy day that was!! You have inspired me greatly. About a month ago, I purched an old cedar trunk from a yard sale, that has several coats of old stain, muck etc. It will be my first ‘stripping and staining’ project. Thanks for taking the time to share your experience! Can’t wait to get started on this old trunk!
~blessings,
Kelly
The table looks amazing!! I stripped and stained a laquered dining table several years ago, and know it is a ton of work, but you should seriously be proud of how it turned out. I can’t wait to see what the chairs end up looking like (no pressure!).
GORGEOUS!!!!!!!!!!!!!! AMAZING WORK!!!!
Incredibly beautiful! What a work of art, really! Good job
Allison, That table is GORGEOUS!!! WTG!!!
Dude, I meant to comment on this when you originally posted it. It turned out AMAZINGLY well. Looks just gorgeous! I can only imagine the amount of hard work it took to get it done, but boy did your work pay off, it is simply stunning.
Good job *applause*!
Best,
Kimberly
I love your blog! I just killed about an hour reading it. 🙂
When I first saw the picture of your dining room, I thought your chairs were see through. I dug through the archives to find out how you did it, but then I realized that they’re not. Wouldn’t that be cool? If you used some kind of strong plastic instead of wood/foam/fabric? They’d match your finials and be totally unique!
I have been following your blog for a few months and found a wonderful project and how to for painting furniture but I cannot find it again. There was specific info on the Benjamin Moore paint and primer to use and a foam roller. It may have been a link you had. Do you recall? I love your site and wish I had more time to do more of your projects.
It might have been from a previous link party? I have never used Ben Moore paint, so I know it wasn’t my tutorial. I’m sorry, I wish I were more help.
I am about to refinish a similar table. Fortunatly, only the top. I have grooves along the edge of the table – it appears that you do as well. I have young kids and they are always getting crumbs in the cracks. Did you completely seal the grooves with polycrylic? How did you address the grooves? The table is beautiful!
I left the grooves in the dining table. However, my breakfast table has deep grooves and it drives me batty. If I ever paint the table top I’m going to fill the grooves in with wood filler before I paint.
Your table looks great! I’m in the middle of the same project. Stripped and sanded down but now have problems picking a dark enough stain. I started with walnut but it isn’t dark enough. My table has many different shades of wood and needs a dark stain. Can you tell me what you used and the process? How many coats of stain did you need to get to the dark color? I have 4 kids that have been eating off a coffee table for a month now….need my table back!
I used Ebony, which is pretty much a black stain. I think I did 2 coats.
Let’s be honest, you have such a great sense of humor. I might have enjoyed the article alot more than I was suppose to. I’m actually in the process of reupholstering my smaller ottoman. It’s ridiculous how many staples were on there. The flap of fabric to cover the legs had its own set of staples to pry out, the cardboard strip holding that flap had its own, the piping had its own, and finally the fabric covering the overall top of the ottoman also had its own set of staples. I spent 2 sad hours pulling out 4 layers of staples. My right hand deserves a stay at the spa lol.