
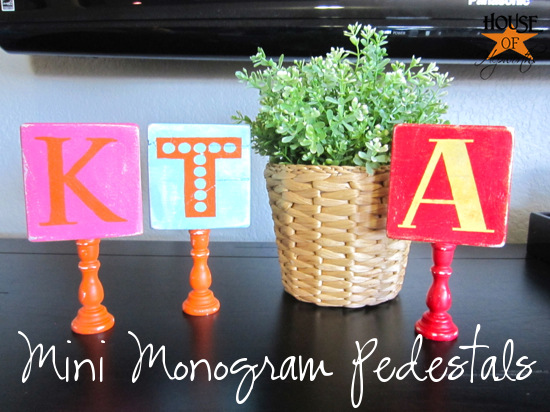
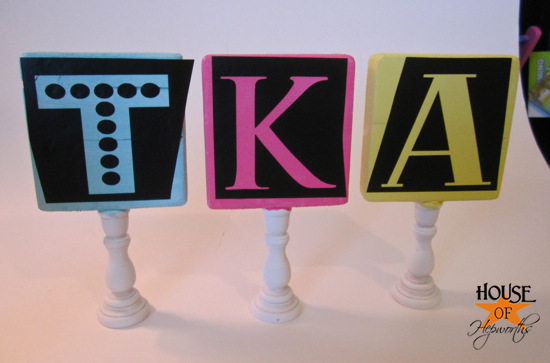
I am so stinkin’ excited about these Mini Monogram Pedestals. I love how they turned out! This is such an easy project and would be a great Mother’s Day gift.

To make your very own Mini Monogram Pedestals you need the following supplies:
Martha Stewart Crafts Supplies:
Raspberry Ice Craft Paint
Habanero Craft Paint
Carrot Craft Paint
Jonquil Craft Paint
Surf Craft Paint
Paint Brush Set
Other Supplies:
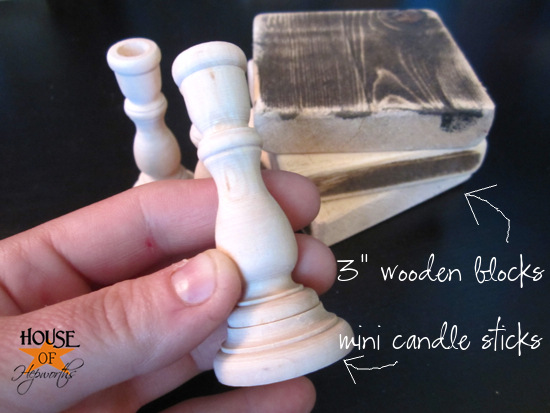
3″ piece of wood (mine are 3″ x 2.5″)
Mini Candlesticks
Strong bonding glue (I used Gorilla Glue)
Silhouette Cameo
Black Vinyl and transfer paper
sandpaper
clear protective finish
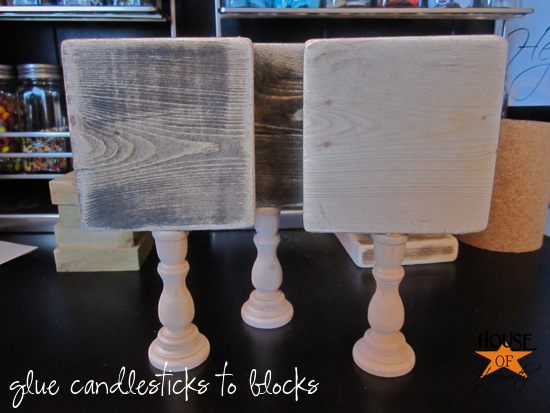
To create these cute Mini Monogram Pedestals you’ll first need to gather your candlesticks and wooden blocks. I found the mini candlesticks in a 4-pack at a craft store and the blocks are leftover scraps from all the custom artwork I create and sell.
Using your strong adhesive, glue the candlestick to one side of the wooden block. Dry fully before moving on.
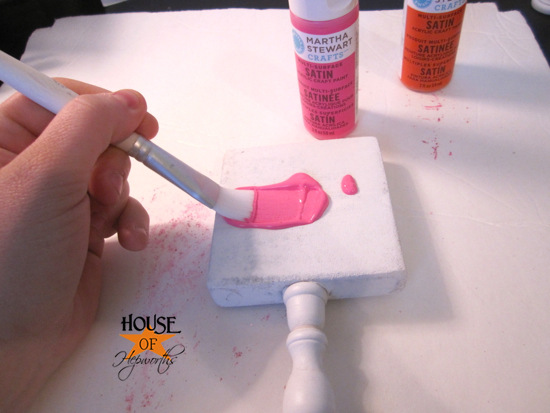
I primed my pedestals with spray primer, but it’s not necessary. Now it’s time to use these vibrant Martha Stewart Crafts craft paints! I hate wasting paint, so instead of squirting it out onto a plate and risk wasting any, I added drops of paint as needed directly onto my pedestals.
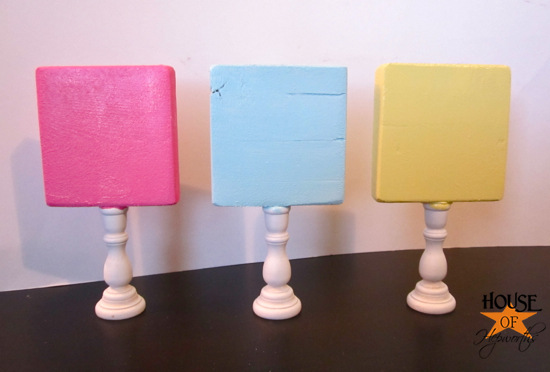
Once all your pedestals are painted allow for them to dry.
Meanwhile, I used my Silhouette CAMEO to cut out three different Monogram Letters. I peeled the letter away leaving just the negative space.
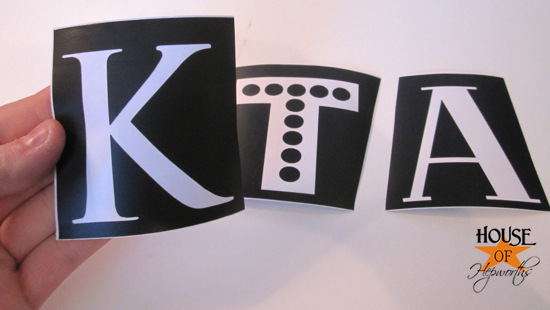
Apply vinyl to your pedestals. If you don’t have a vinyl cutter you can easily free-hand these letters or print them on the printer, trace them onto your wood, and then paint them.
I added the next color of paint inside the vinyl…
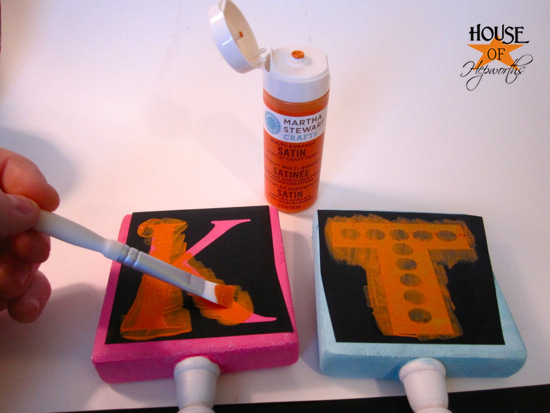
…and waited {impatiently} for the paint to dry. Watching paint dry is about as fun as watching water boil.
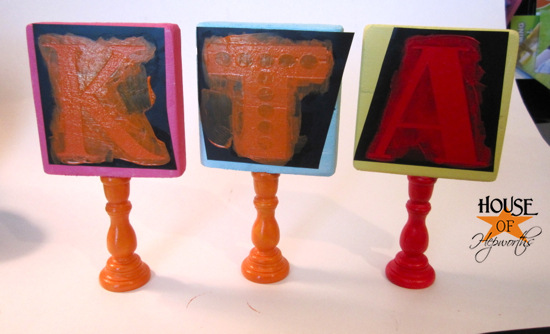
Once the paint was dry I peeled the vinyl off then used a small paint brush for a few touch-ups here and there.
I already love them but I think they need something else… Distressing! I very lightly sanded each one using extra-fine sandpaper.
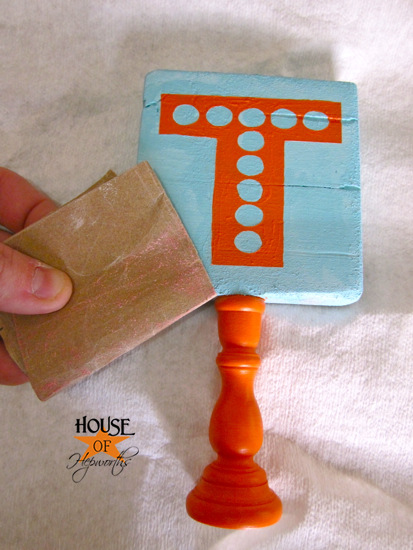
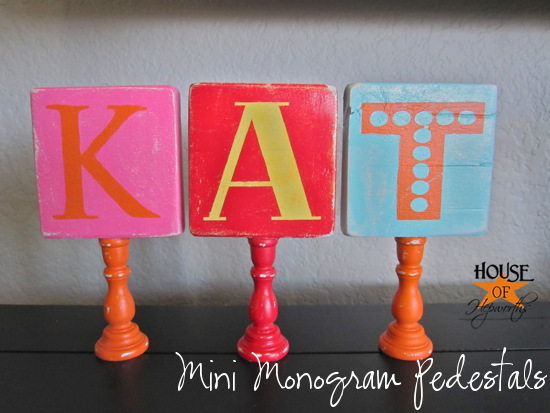
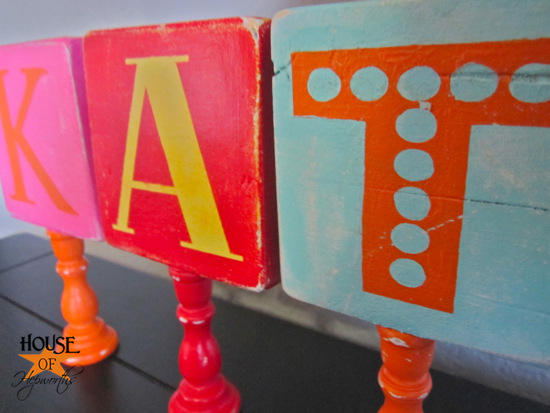
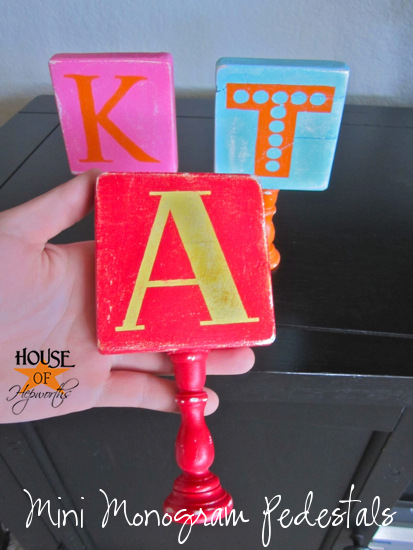
Once sanded I sprayed each pedestal with a Satin finish Clear top coat to protect them. The end result? A cute Mini Monogram Pedestal that will dress up any shelf or desk.
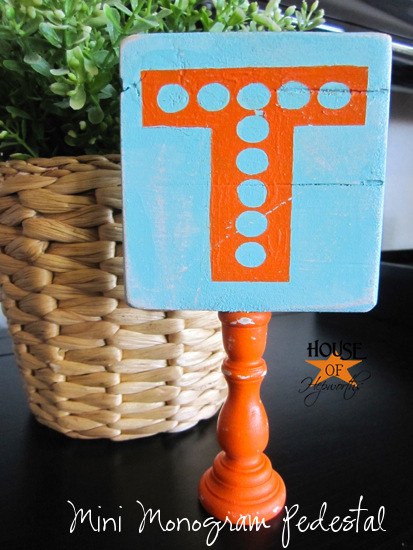
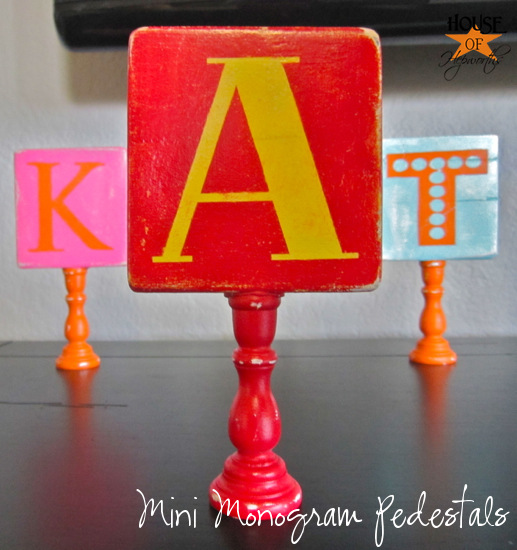
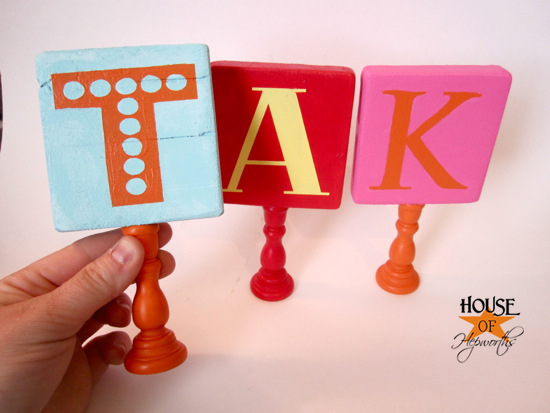
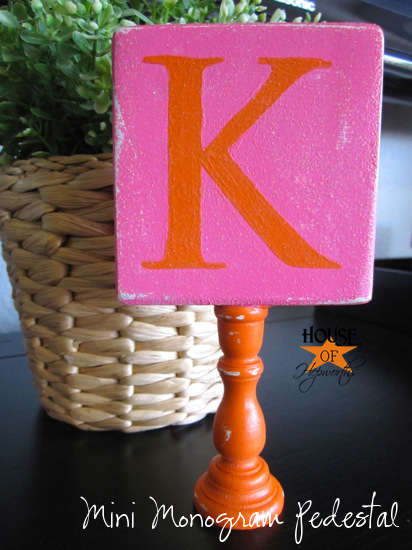
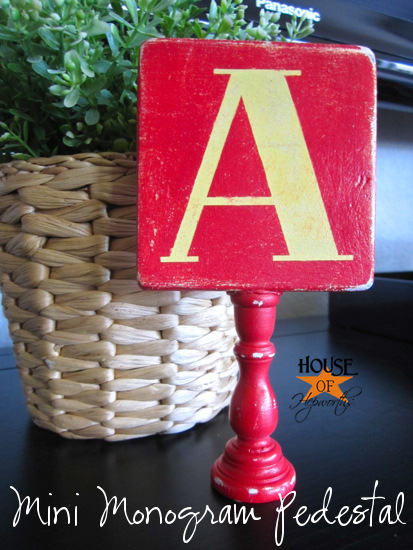
I tried a few different color combinations and I really love the contrast of each one.
I think the “A” is my favorite. It’s so classic in Habanero (red) and Jonquil (light yellow). I love the big Pottery Barn font letter.
These were so fun to make I think I will make a few more.
I am going to make some without the candlesticks as well so I can spell out fun words to hang on the wall.
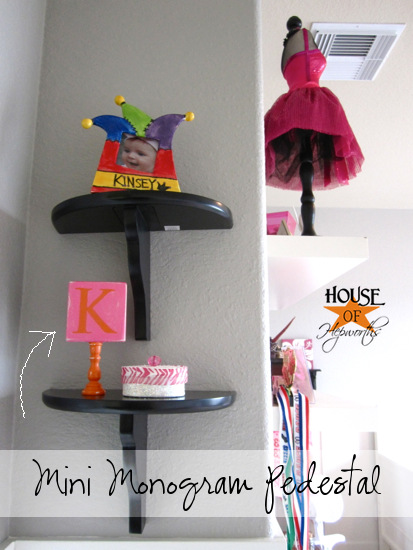
I made the “K” for my daughter. Here it is in her {no where near finished} bedroom.
That’s all there is to it!
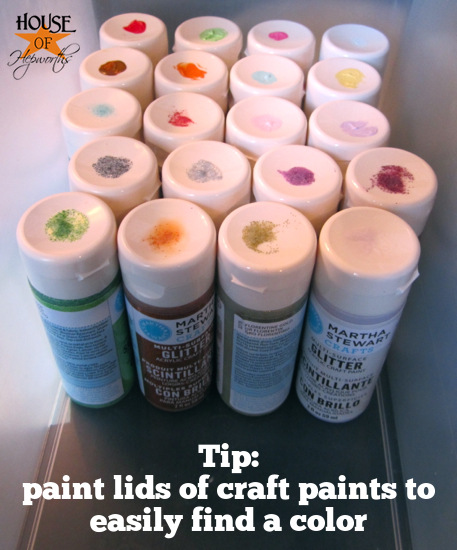
I want to leave you with a quick tip about storing craft paints. If you’re like me and store your paints upright in a container, add a blob of paint to the top of each lid to easily identify the color!
**edited to remove all expired promotional info**
Cute project!!! LOVE your paint container tip!!! Awesome!
xo,
Shannon
What a box ‘o fun! That could keep me entertained for hours. This project turned out great. Can’t wait to see the others!
These are so fun, Allison! I love the bright colors and the distressing. Great paint tip, too!
Those are adorable! I’m going to add the paint dab to the top of my paints ASAP.
those are so cute! I would die if I got a box full of fun stuff like that!
I thought these would be cute painted with chalkboard paint. The possibilities could be endless …I love the idea! Thanks for sharing.
love these miss smartie pants! Def going to try them! Thanks for your continual inspiration!
Oh man! You made out like a bandit! I’m green with envy!
What a cute idea! I like how it has endless possibilities with fonts and color choices.
Very cute Allison! These color combinations are great!
These are so cute!! I love the monograms and the color combos are so fun!
SUPER CUTE!!! Love the colors you chose.
I´m a little bit jealouse, would love to get a package like that in the mail! Lovely idea as well! I love to follow your blog and I get lot of inspiration but I rearly leave a comment, I struggle with the english writing.
Hugs