
Last week when I showed you the Mini Monogram Pedestals I mentioned I had made two more projects using my Martha Stewart Crafts supplies.
I had so much fun crafting I ended up creating three separate projects and then chose my favorite to go with the Plaid promotion.
Well, here’s the 2nd of the three crafts I made… Are you ready for it?
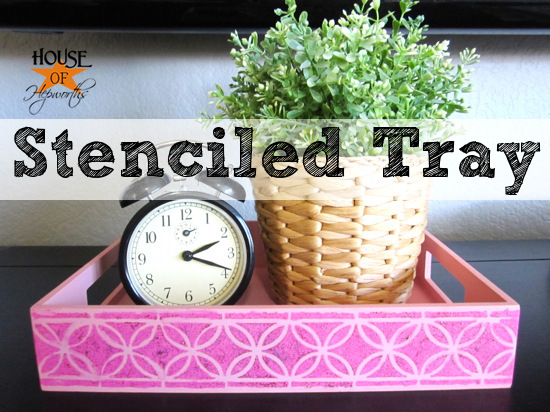
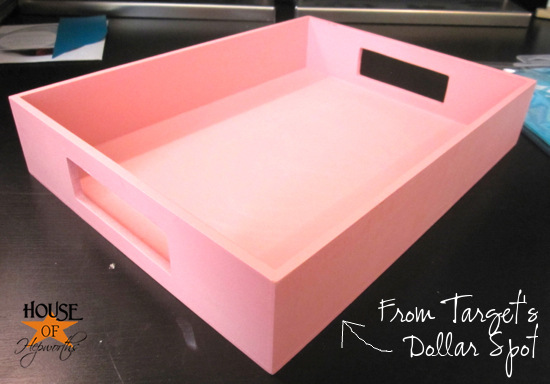
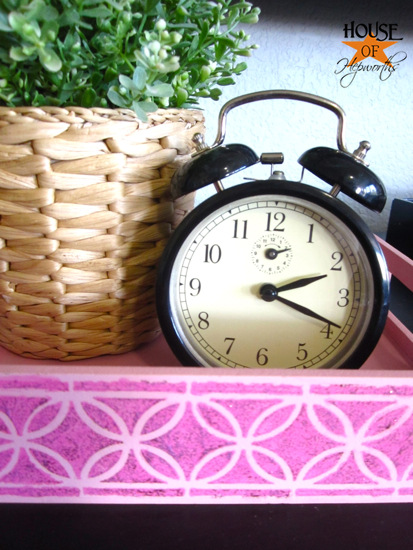
I found this tiny pink tray at the Target Dollar Spot (I think it was $2.50) and thought it was so cute! It’s just perfect for my daughter’s room to house all her little lotions and perfumes.
I used some Spray Adhesive for Stencils on the back of the stencil to help hold it in place. Worked great but next time I’ll probably spray outside instead of in my office! lol.
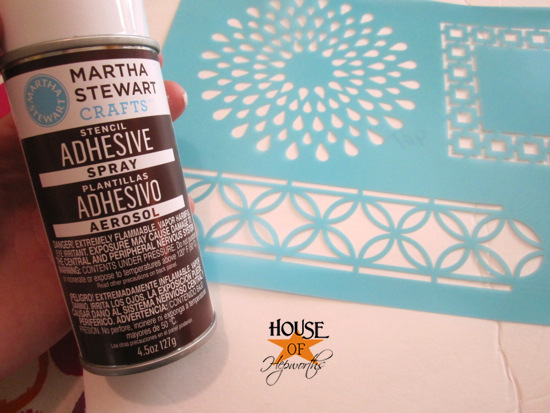
The stencil stuck to the side of the tray so I wasn’t fussing with it and worrying about it slipping and sliding all over the place.
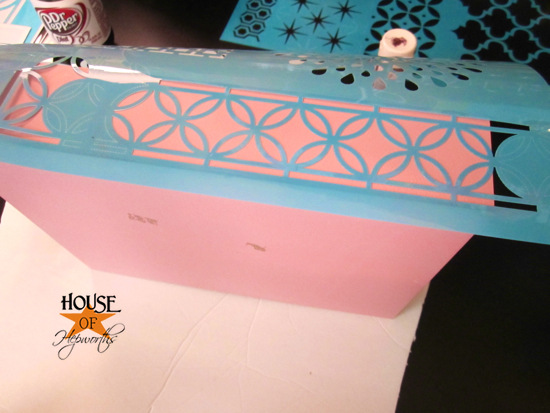
I used a sea sponge to dab the paint onto the stencil.
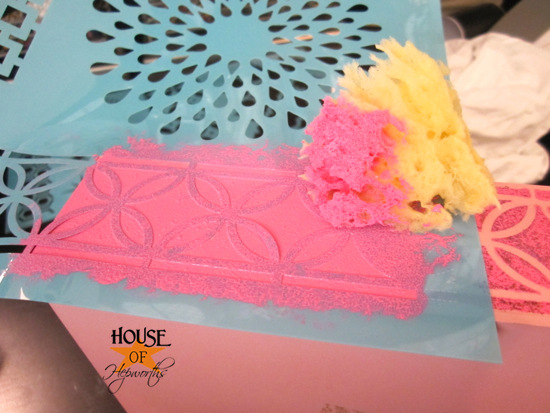
Then I took some glitter paint and used my finger to dab it all over the stencil.
I used the pink paint first because the glitter paint was transparent with pink glitter in it and I was afraid you wouldn’t be able to see the stencil pattern.
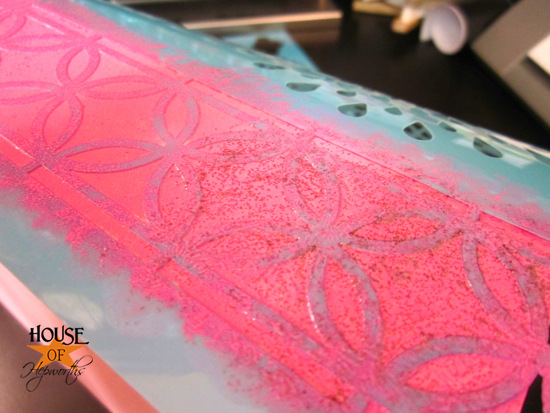
The end result is a pink-on-pink glitter tray perfect for a 7 year old.
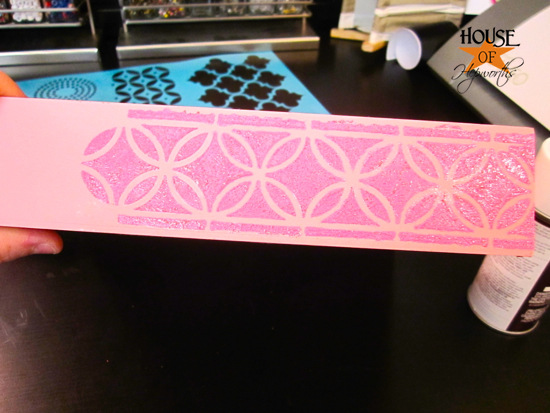
The stencil didn’t turn out perfectly (probably operator error) but I think it adds to the charm of it. I only stenciled one side because the process took patience (which I seriously lack) and I was pretty much ‘over it’ by the time I finished the one edge.
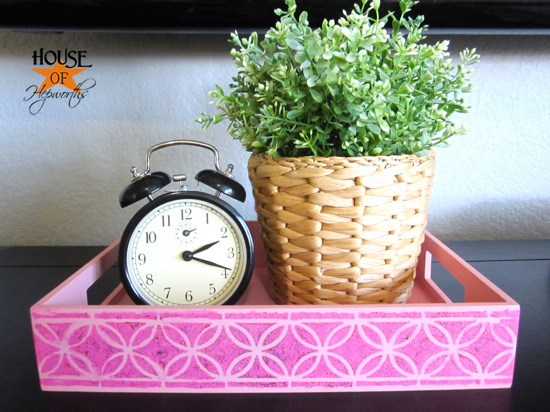
I still think it’s cute though and I would still use stencils in the future. I just need to practice being more patient.
I’ll share craft #3 tomorrow. 🙂
Did you see these trays at Target? Fess up. Did you buy any? It’s okay if you did. They are cheap and cute!
I love the glitter – a perfect sparkly touch for your girl.
I got a similar tray from Target and re-did it for the pinterest challenge that Sherry and Katie hosted back in March – http://familylovehome.blogspot.com/2012/03/pinterest-challenge-complete.html
Oh, how cute! I do have to go to Target tomorrow…maybe I’ll check and see if they have any trays left. lol. Thanks for sharing. Wishing you a grand evening. Toodles, Kathryn @TheDedicatedHouse
So pretty! I have never used adhesive either (this would explain the items to be “re-done” that I have tried to stencil and it slipped) love reading your posts 🙂
Wow.
This looks easy and is certainly a nice idea for a children’s birthday.
Thanks and greetings from Germany.
I love this – so feminine and pretty. I’m your newest follower.
Hi there! I’m your newest follower, found my way over from Organizing Made Fun. Your blog is lovely – can’t wait to explore some more! 🙂
I haven’t seen this at my Target, but when I do, I’ll definitely be nabbing one (or more if they have different colors)!