I love big pieces of art. However, big pieces of art are very expensive! Today I’m teaching you how to DIY your own huge 4-foot wide wood mirror made from, you guessed it, wood shims! Yes, the same wood shims you buy at the hardware store and use to level construction projects out. They are inexpensive and solid wood.
This mirror cost me less than $40 to make. A mirror like this in a custom shop would be several hundred dollars.
It is huge. And it is swoon worthy.
When I started the project I wasn’t really sure where I was going to hang it. I was leaning towards putting it above my bed. However, I also wanted to make the mirror as huge as possible, so when it clocked in at 4-feet wide, it became too big to put above my bed. This huge bare wall in my dining room fit the bill perfectly.
This dining room wall used to house my orange color-backed bowls which I still love, but wanted a larger statement piece on that wall.

I still love these orange-backed bowls, but they always seemed a little small for the massive expanse of wall. Replacing them with the big honkin’ shim mirror seemed like a smart change. Plus, the mirror matches the table and brings more of the darker wood tone into the room.
I purchased a full 4’x8′ piece of 1/2″ MDF and had the hardware store cut it in half for me (for 2- 4’x4′ pieces). By doing this, when I trimmed it into a circle, I made it as big as I could; into a 4 feet wide mirror.
Also, I used 12″ shims and just cut them in half so I had a huge pile of 6-inch long shims.
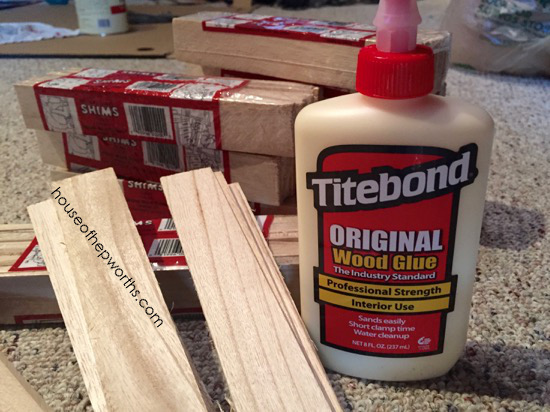
After drawing a grid on the board to keep everything centered, I glued each shim on in my desired pattern.
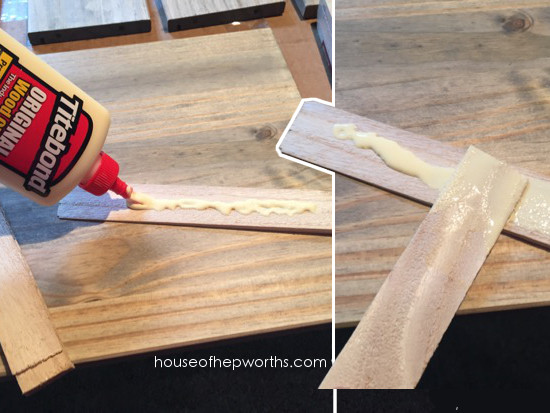
I found the exact center of the board, used a pencil, nail, and string to draw the circumference (see a few pics below for a picture of this). I also started gluing the shims starting at the center point instead of the outside. This ensured that I would have the same amount of shim squares on either side of the actual mirror.
Because my shims were 6 inches long I opted to make each of my shim squares 6 shims wide.
Once all my shims were glued on I cut out the huge outer circle with my jig saw and gave the edge a good sanding with some 60 grit sandpaper and my palm sander. This is the exact sander I own and use.
To cut out the smaller center circle I used the nail, string, pencil technique to make a jumbo compass and traced a new circle. Make sure you measure this against your mirror so your mirror fits!
When the center hole was cut I gave the inside edge another good sanding then did a quick once-over on the top of all the shims. Now it’s time to stain! I used the color Minwax Dark Walnut 2716 which is generally my go-to stain color for a rich dark brown finish.
I had a few spots that wouldn’t take stain because I got some wood glue on the shims, so when the stain was dry I hit those spots really well with the sander, then re-stained them.
I let the mirror frame dry for a few days in the garage. It’s already looking so good! Eek!
To finish it off, I gave it several thin coats of my favorite clear top coat – Rustoleum Painter’s Touch Ultra Cover 2x in a clear matte finish. I pretty much buy this by the case-full and use it on all my art projects.
Now it’s time for the mirror! I flipped it over once it was totally dry…
And glued the mirror on with some Liquid Nails. Then I used some heavy paint cans on top to hold it in place while it dried. *I used Liquid Nails for paneling because that’s what I had on hand.
As for the mirror, I had a really hard time finding one big enough! I looked at Hobby Lobby, Michaels, our local hardware store, and even Target for a mirror and there were none. Finally it dawned on me to try ikea. Of course they totally came through and I got this Kolja perfect sized vanity mirror for only $15. (Most vanity mirrors at other stores are a lot more expensive than that!)
And that was that. A french cleat on the back and she’s ready to go!
I really love the texture. The shims start big at one end and get smaller at the other, so when you alternate them all over the mirror it creates a really awesome rustic texture. I also really like the color and how each shim really soaked up the stain differently from the other shims.
Before and after:
![]()
Price breakdown:
3 packages of shims – about $12
1/2 sheet of MDF – $13
Mirror – $15
Stain, glue, etc I already had
Grand Total: $40
Shopping List:
wood shims
Rustoleum Painter’s Touch Ultra Cover 2x in a clear matte finish (top coat)
Minwax Dark Walnut 2716 stain
wood glue
Liquid Nails
french cleat
jig saw
palm sander
mirror (IKEA)
MDF (hardware store)
A mirror like this would sell for hundreds of dollars!
If you love wood shim projects, check out this wood shim dresser I made using an IKEA dresser!

Instagram || Facebook || Pinterest || Youtube
This post contains amazon affiliate links
Thanks for reading! Have a wonderful week!
Shabang, that is AWESOME! Seriously impressed Allison.
Allison, it looks AMAZING!! I love how you stained it such a rich, dark color. It’s perfect in your dining room! Beautifully done! (And thanks so much for the shout out!!) 🙂
Love this! Love your orange backed bowls too but the size of your mirror looks much better on that wall. I believe I pinned Kristi’s wood shim mirror also a while ago. Know I purchased a bunch of shims but they’ve been sitting in the garage.
Allison, it looks wonderful! Great work! Loving that dark rich stain! The mirror blends very well in your dining room. 🙂
Stunning piece! I really have to pin the original tutorial because I would love to make one, too =) Thanks for sharing!
You are so right, that is totally awesome!
It turned out great! I’m impressed that you remembered a pin that’s over 2 years old. ha!
So very cool…and much better for the space. You have inspired me and I thank you for it.
Talk about bang for your buck! I looks great on that big wall. I think it’s time I get on the shim bandwagon!
I will be making this for our dining room!! It turned out so awesome!
ahhh. amazing!
A-MAY-ZING! That looks so super – I love it!
Great job!
Emily
Talented and so stunning!! Great look for the dinning room. Thank you for listing your tutorial.
Allison- you just revealed a void in my life that I was completely unaware of until this morning. Thank you. Now I MUST make this too! 🙂
Big smiles!
-Shayna
this looks incredible!
I definitely want to make one now.
Thanks for sharing the link to the tutorial, too.
It looks GREAT in the dining room – like that wall was made for it!
This is brilliant! I love the pattern, great idea!!!
GORGEOUS, Allison! I’ve seen so many awesome projects with wood shims lately – I love this one!!
This is gorgeous Allison!! Pinned it so I can make one (may be two years for me too but that’s ok!)
xo, Tanya
May I just tell you how awesome you are? May I? Because you are! Kristi is also awesome, I follow her blog as well, and she is a home dec/renovation DIY QUEEN! She has so much inspiration on her blog, it’s mind-boggling. You did an amazing job with this mirror, it is the perfect addition to the dining room (which, BTW, has undergone an amazing transformation from its former glory as the room in which Barney was so brutally hacked to death!). I thought the orange backed bamboo bowls were nice, but that mirror – WOW! It’s like one of those high-end decor items you see in those fancy-schmancy glossy shelter magazines. It’s gorgeous, the room is gorgeous. Well done!
AWESOME! I love it!
Awesome mirror! I’m impressed you cut a perfect circle too. Mine always come out lopsided.
Wow! I love the mirror. I looks amazing in your dining room. Great job! I’m so jealous of you crafty, DIY people. LOL!
WOW…WOW…WOW great job.
LOVE LOVE LOVE this huge mirror!!!! It looks so great!
xo,
Shannon
This looks AWESOME! Absolutely in love with it =)
LOVE IT. We’re making one right now after falling hard for yours. How did you hang yours?
this is fabulous! i love big statement pieces in homes, and love your step by step!
This is amazing. I love DIY!
Great job!!
I love how it adds another texture to your dining room.
Question, where did you get those drapes?
I have been looking at curtains all over the place and found some nice ones at http://www.CurtainShop.com
I have been thinking about buying some plain ones and stenciling them.
Anyone tried it? How hard is it?
Girl YOU NAILED IT!!!
LOVE IT— ? this may be dumb, but I’ve never messed with cutting a mirror- what did you use to cut it w/o just having it crack up? (I know this is probably a silly question, but I have no idea?!) Thanks!!
Haven’t hung mine yet, still have some touch up to do (painted it black, then teal on top of the black)Thanks for the inspiration! This was a lot of fun!
Great job!!Did you paint your own cupboards? Sand, prime & paint them?
No, I did not paint my own kitchen cabinets.