Hey guys! I’m back to share the FINAL part in my 3-part series about refinishing hardwood floors. If you are just tuning in, you can go back and read Part 1 and Part 2 first.
Up until now everything was moving forward flawlessly. There had been no hiccups, no issues, no setbacks. It was too good to be true. Literally. Part 3 turned into mayhem and tears. Lots of tears. In the end though the floors are now finished and beautiful. All our issues were resolved and we are happy with our final product. I’ll get to the drama soon. For now, let’s just start where we left off.
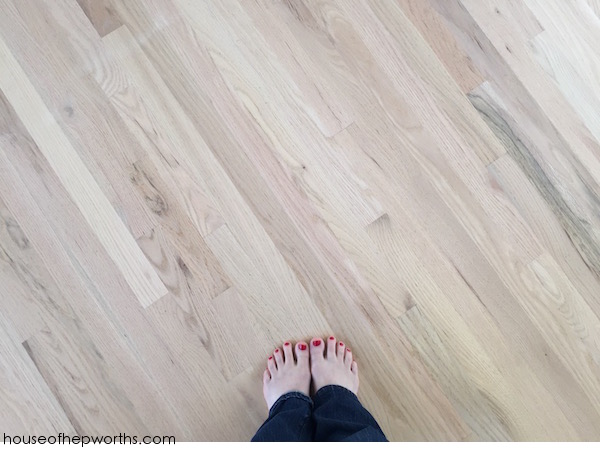
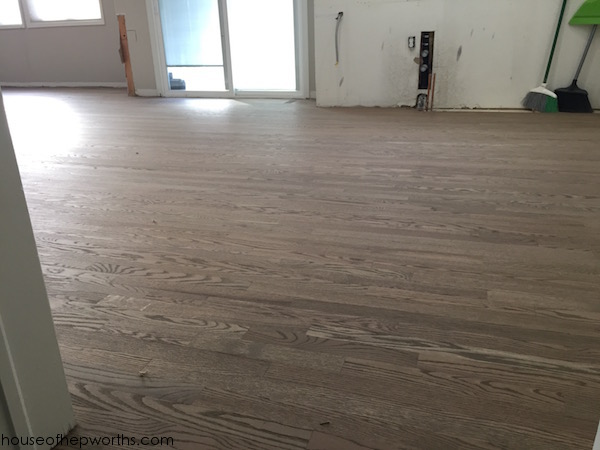
In my last post we left off with the floors freshly sanded. They looked beautiful.
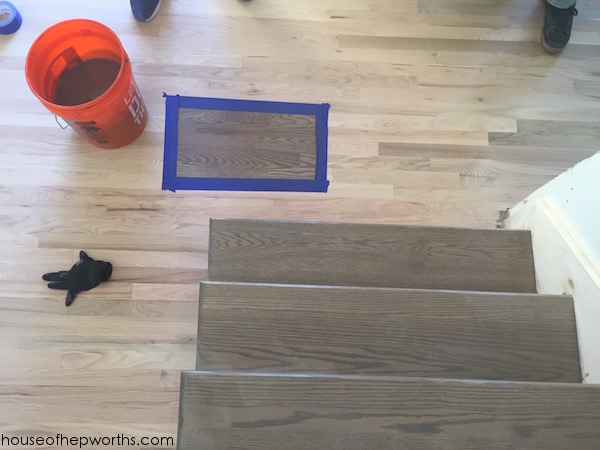
Now it was time to pick a stain color. I didn’t have an exact formula, but I was adamant that they mix brown and grey. The crew thought I was insane. They tried to talk me into plain ol’ brown because “they’ve never added grey to a mix before” and “that sounds like it would look weird”. This was my first sample.
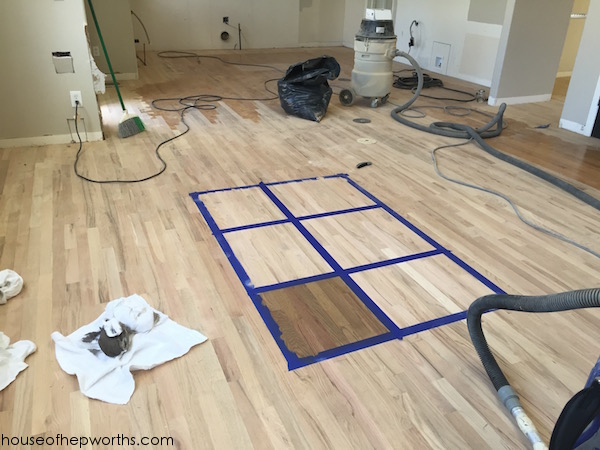
No. Just no. Too brown. You see, I want grey added because if you are staining red oak and you add brown, the red undertones (warm) really shine through. I DO NOT WANT RED FLOORS. I want medium brown floors. I knew by adding some grey (cool) it would cancel out that red undertone for a more true cool brown color. So they reluctantly added grey.
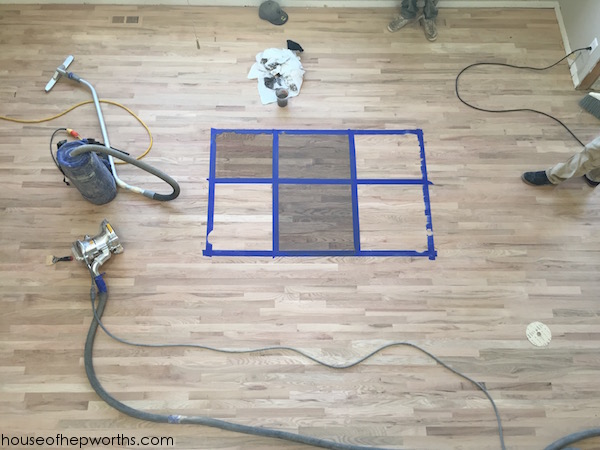
Yes. Yes.yes.yes. Yaaaaaaaasssss. Those two greyish squares? Bingo. I guess I was specific enough about what I wanted that they were able to nail it on the 2nd try.
I signed my life away, agreeing that if I hated it when they were done it wasn’t their fault – I chose it. Talk about nerve-wracking! But I signed and they stained. I left for the day and came back later that afternoon for a sneak peek.
Love. Absolute perfection. Exactly what I imagined in my head.
Here’s where tragedy struck. And it just keeps getting worse and worse, so hunker down and grab some popcorn. My drama will be your entertainment!
I could not get a decent picture of what I’m about to explain to you, so use your imagination. In our kitchen, when the original floors were installed 25 years ago, they put them in raw, added the cabinets and island, and then sanded and stained the floors. When we pulled the cabinets out the floors were unfinished underneath; this is how we know. Well, when you sand the floors, it takes a bit of the top layer off making them slightly less tall. Where the island and cabinets were sitting originally, the floor hadn’t been sanded down so the floor bumped up ever so slightly.
The crew knew this and they thought they sanded well enough. Unfortunately for everyone involved, they didn’t. They didn’t get it sanded level enough. You couldn’t see any humps until the final coat of finish was on the floors. At that point the light reflected off it and made it SUPER OBVIOUS. Yes, you could still see those humps. We could have let it go, but we were putting in a new island with a different footprint and you would be able to see this hump forever. It looked very noticeable.
To remedy this they tried to sand down just the hump area and re-stain. The problem with this approach though is that you will be able to see where you added the new stain vs the old stain, so they got out a hand sanded and sanded back entire planks to minimize how noticeable the stain seam would be. They thought if they stained each individual plank it would be not as noticeable. This entire plan seemed super sketch to me, but I went with it.
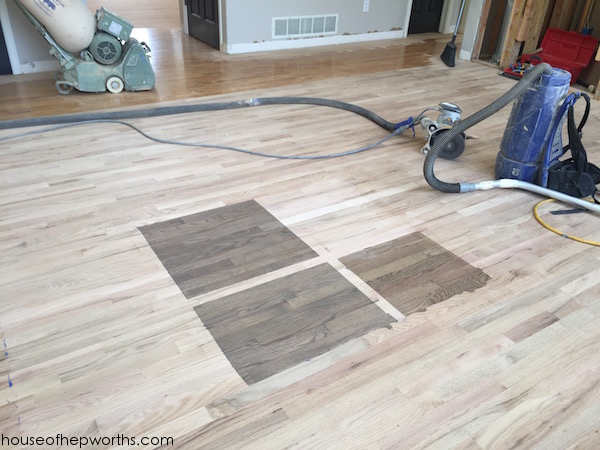
Here’s the final product of that plan:
Looks okay enough, right? Well, you are looking at a tiny photo. Here’s some close-ups. Look closely at each individual plank:
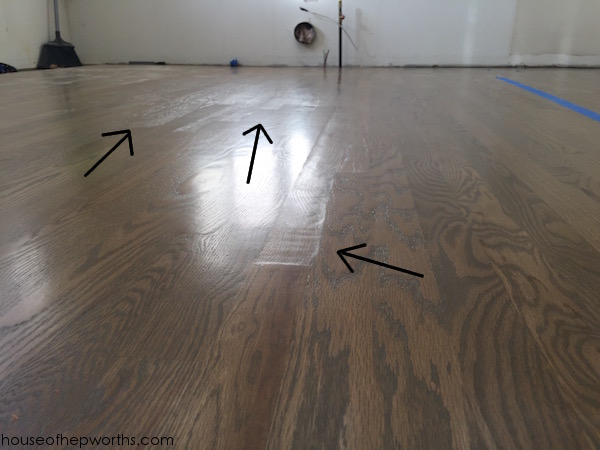
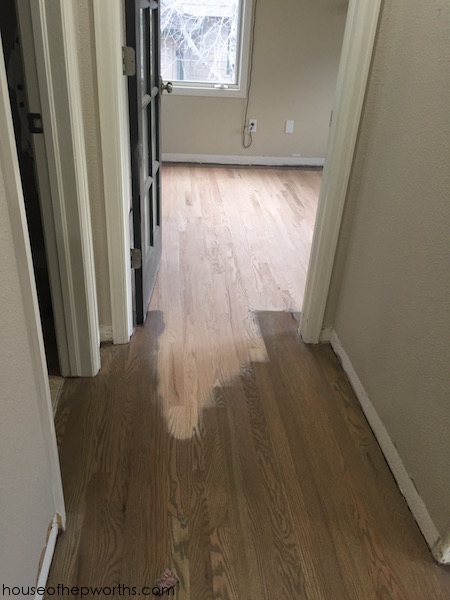
Can you see it? It’s basically the inverse of the original problem. Instead of having a hump, it now is concave. It dips lower than the rest of the floor. Honestly, it looked awful. In addition to it dipping lower than the rest of the floor, because they used a hand sander it had little ripples all over it and wasn’t ice-smooth. The pictures don’t even do it justice. I just started crying right then and there and called the company in a panic.
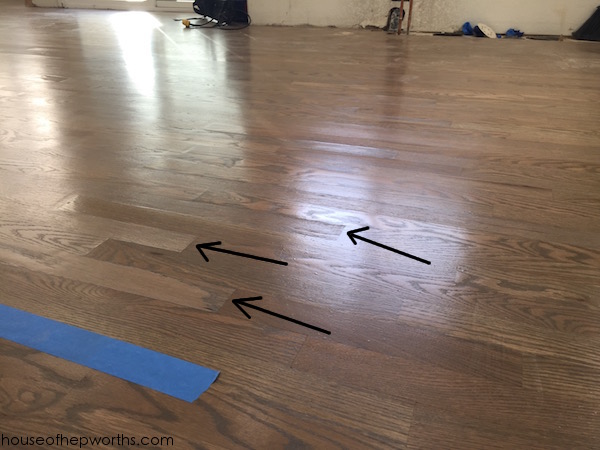
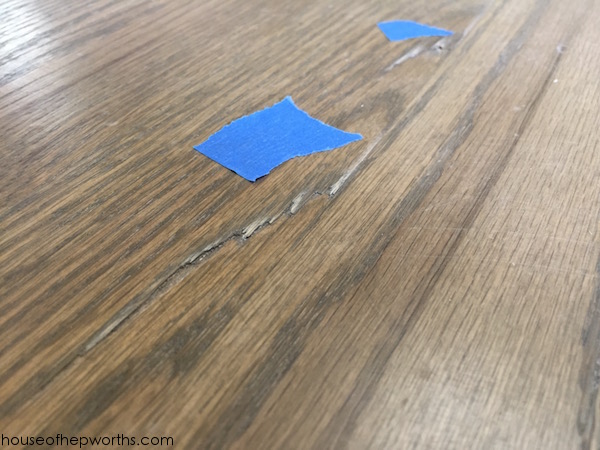
Well, in addition to this issue, the flooring also had a few areas where the wood didn’t cooperate like it should have and swelled and splintered.
The owner personally came to the house to see the kitchen area. He stood in the kitchen for several minutes completely silent, just looking at the floor from several angles. I was bracing myself for an argument. Clearly in my opinion the floor needed to be redone again. After what felt like hours, but was probably like 10 minutes, he turns to me and says,
“Yup. This is terrible. We need to refinish your entire first floor again.”
The owner was honest and tackled the problem head-on. He didn’t try to cut corners. He did the right thing.
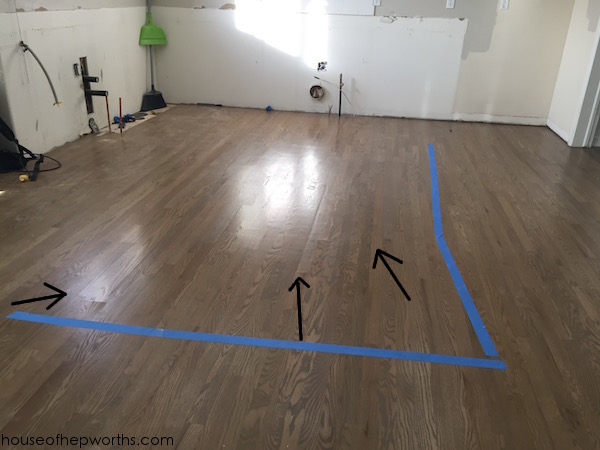
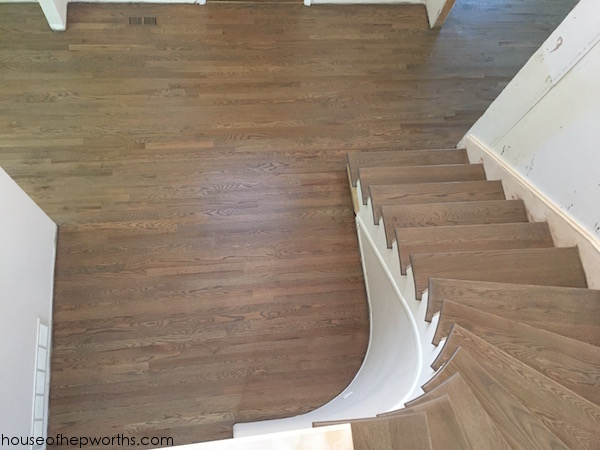
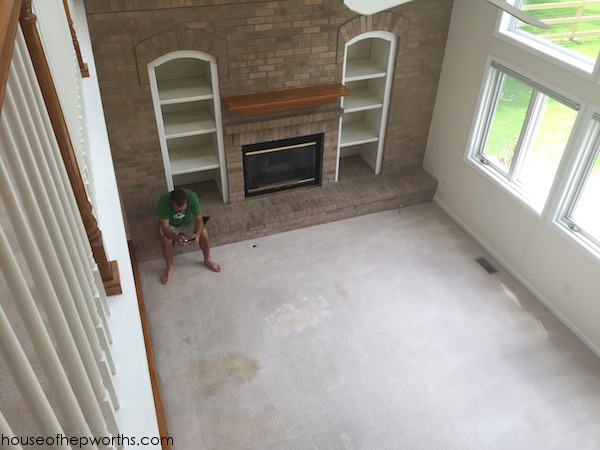
So next issue; if we refinish just the kitchen area, we would run into the same exact issue – a difference in elevation between rooms. Since all the flooring in my entire first floor was connected, they agreed to start completely over, re-sand EVERYTHING, and give it another go. I’m talking everything: kitchen, family room, office, dining room, board game room, and foyer. Everything. They were able to leave the treads on the stairs because they didn’t connect. They assured me the new coat of stain would match the stair treads perfectly.
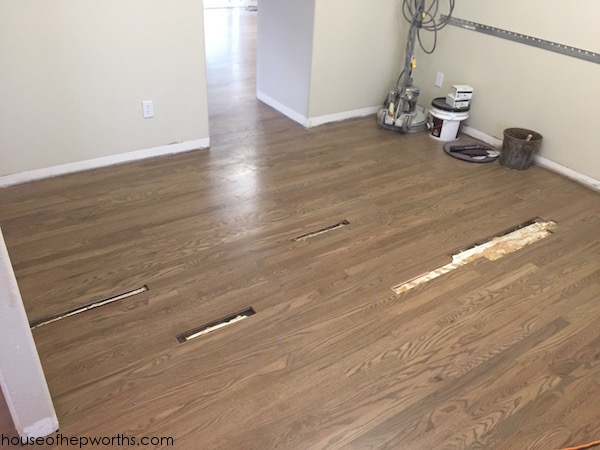
And so they started hacking away at my brand new floor – they pulled up every split board:
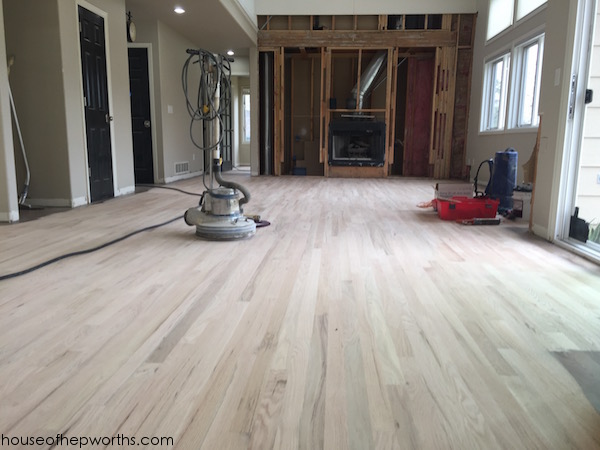
…And they started sanding all the beautiful new finish off…
If you count the small sanding patch job they attempted, they are now on sanding #3. I almost lost my shit living through this, but I was very grateful that they were taking the time to get the job done right.
FINALLY they were done sanding for the 3rd time and we did another test of the stain to make sure it matched the stairs. I told the crew if it didn’t match then they would be sanding a 4th time. No one liked that idea.
You can see in the above photo a pretty true color. I’m not sure why this following photo looks more red. I think it’s the light bulbs in our foyer.
That door is next. I’m going to stain it black I think.

A beautiful new floor, finally finished!
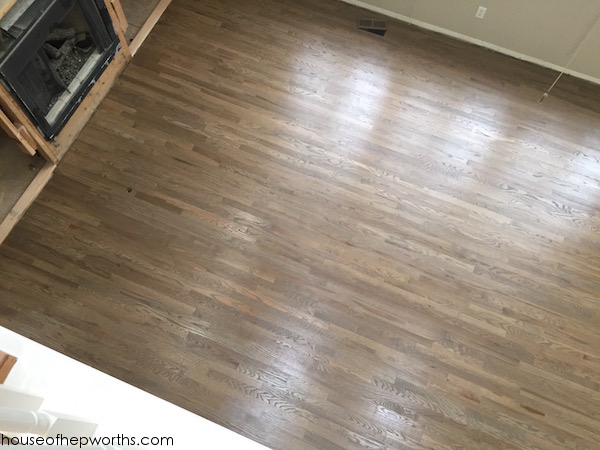
Here’s a pretty true color of the floors:
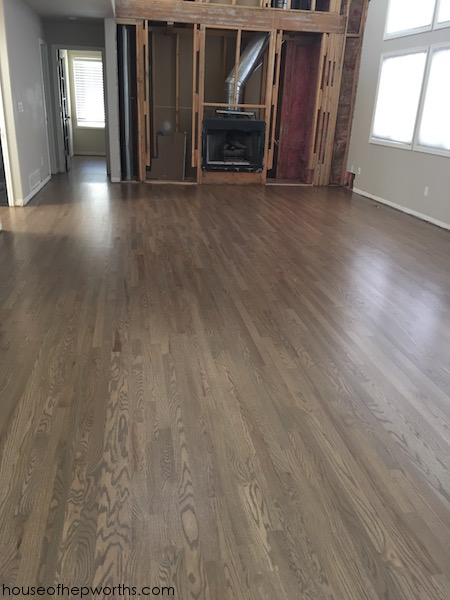
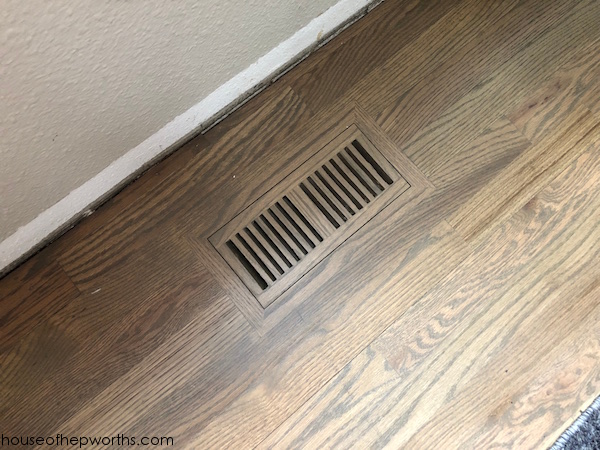
Beautiful flooring for days! And the vents. I love the vents!
I’ll share some current pictures with furniture in the rooms in the next post.
Everyone loves a good side-by-side comparison so here’s a few of the day we bought the house and now with the floors done:
before:
after:
before:
after:
If you made it this far you are a real trooper! I know this post was very word-heavy. Hopefully it was full of helpful info! At the end of the day, the floors are beautiful and we are very happy with them. There were a few missteps along the way but the company stepped up and took care of the problem.
Oh, the stain is a mix of medium brown and grey. We also paid extra for a high traffic water-based top coat in a satin finish. The “high traffic” is supposed to prevent scratches from pets and unruly teens. So far so good. Also I chose a water-based top coat so that it doesn’t yellow over time and I chose a satin finish to keep the glare and shine to a minimum. Also, we mop them with Bona floor cleaner.
If you have any other questions just ask in the comments and I’ll answer.
Thanks for reading! Have a wonderful week! Check back Monday for another riveting post!

Thanks for sharing your experience. I want to get my floors refinished in the next few years so this is helpful info. I especially like the recessed floor vents that you mentioned in the previous post. I’ve enjoyed your blog over the years and hope you get back to posting regularly again!
Amy, thank you <3 Yes, I've been MIA a lot the past few years. I went through some stuff, but I'm on the other side of it now and finally back to my happy old self. I'm honestly really glad to be back and I don't plan on abandoning you guys again.
Beautiful! I have air vent envy. I may just snuggle up with one next time I’m over and say naughty things to it.
Don’t be hittin’ on my air vents. Get your own air vents! 🙂
Just beautiful! I’m glad you trusted your gut and went with the gray, I love how they turned out!
Thank you Katie <3 I love them too!
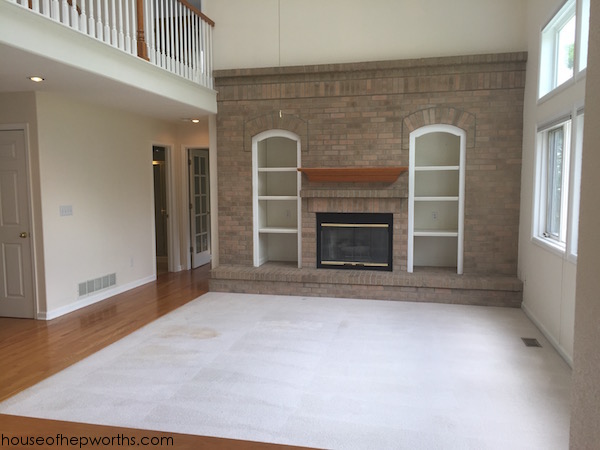
Amazing result. Love the color and it makes the place look so much bigger and open. My goodness you are doing so much work! Can’t wait to see the rest.
Thanks Nora! Coming up next – the KITCHEN! So many awesome posts. I can’t wait!!!
SO beautiful!!! Almost worth the wait and worry, huh? : ) Haha! Your stress levels must have been UP THERE for a while! So worth it to get those results though! Can’t wait to see it filled up! I’ve picked up so many pointers for my floors from you, thanks!!!
My stress level was crazy. I’m good now though! I’m gearing up to blog all about the new IKEA kitchen next!
Great Post Keep sharing!!
Do you know what colors they mixed?
Your new floors are gorgeous…exactly the color I’m looking for in our floor refinish for the exact same reasons! Did you go with a satin or matte finish? That’s my next big dilemma.
what stain product did you use? I know you don’t have the formula but what 2 colors did you begin with. Did you use oil base or water base?
I love your floors!! Could you tell me the brown color you used and grey? What was the ratio brown ?grey.
Thanks
Just looking at changing mine. Love taupes and thinking white wash but carpets are browns so..maybe something similar.
Irs gorgeous
And maybe ill go little lighter
Hi there, Can you tell me what two stains you mixed together?
i love the color of your floors. thanks,
Hi can you please share the exact formula of your mixed stains? Duraseal or Bona in medium brown and classic gray? I am living this exact nightmare! Lol
I absolutely love your floors. Can you please share the formula? The brand of stain and ratio of colors would be so helpful. I have tried different combinations of gray with brown and your floors are superior.
If I remember correctly it is 3/4 brown, 1/4 grey.