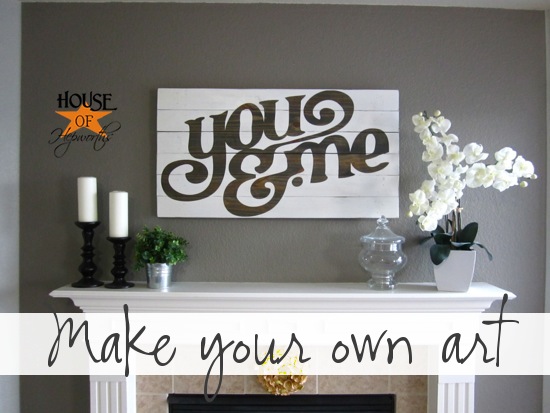
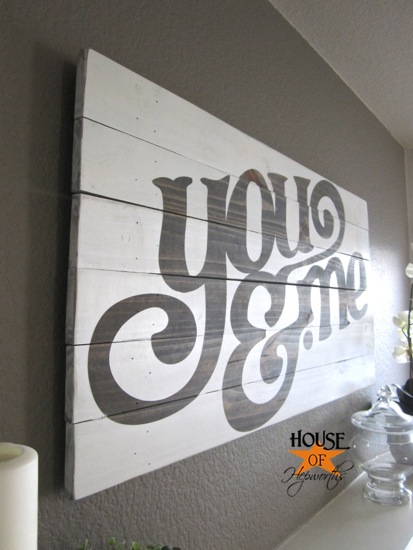
I made a piece of Farmhouse artwork! I love my “Start Being Awesome” sign so much that I decided to make another huge piece of wood plank art! I’m going to give you a step-by-step tutorial so you can make your own art too!
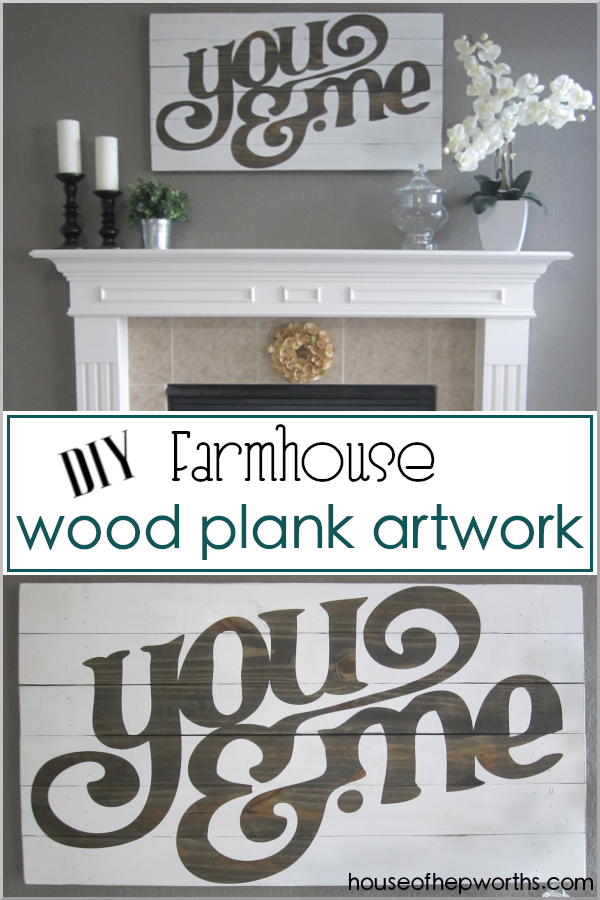
This time I stained the letters with a dark stain and made the background white. I love how it turned out!
It’s so simple yet has such impact in the room. Do you want to know how to make one of your very own?
Make your wood plank board
Using this tutorial here, make your wood planked board {I’m actually out of fence posts, so I just buy 1x4s and cut them down to 40″ long each.} I started by staining my board. Wait for it to dry.
Add your vinyl
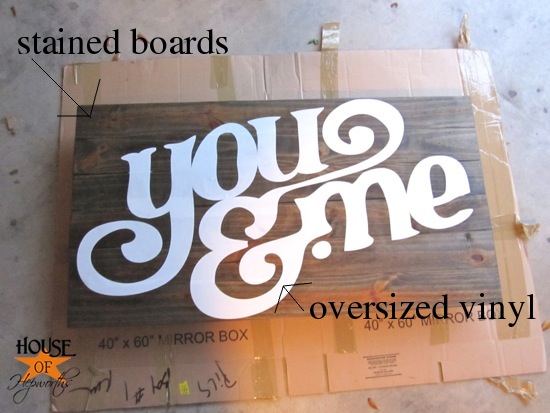
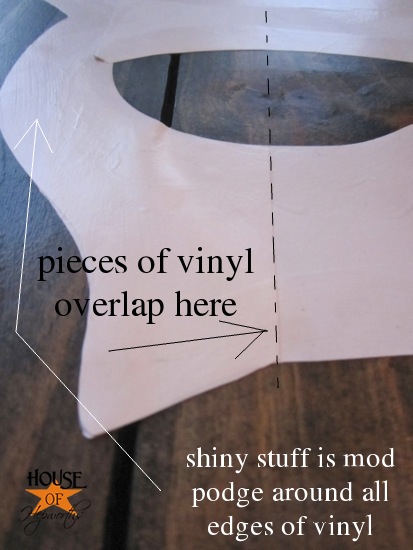
The vinyl is actually bigger than my Silhouette machine can cut, so I had to cut it into two sections and piece them together.
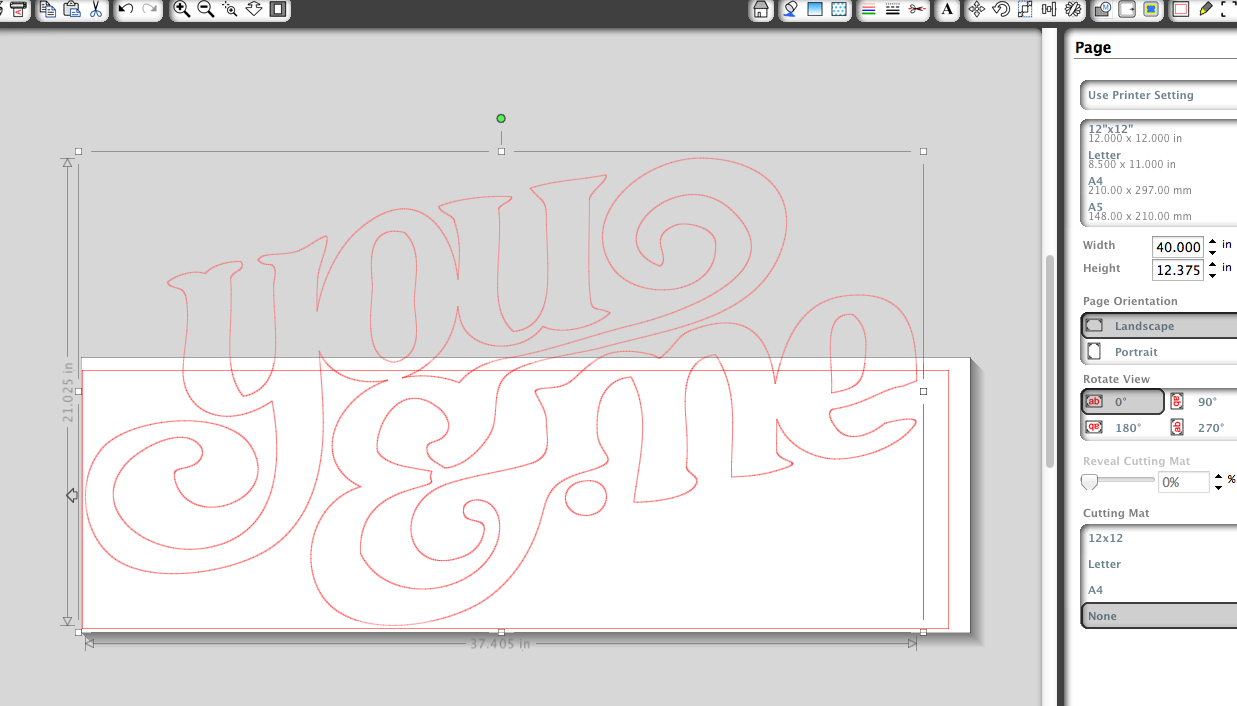
I used an image from the Silhouette Studio software and store called “Vintage You & Me”. I enlarged it the size I wanted it, then I cut two pieces like this:
1st piece:

2nd piece:
It wasn’t the easiest thing to get the two huge peices of vinyl attached to the board so they overlap in just the right places, but with some patience I had them lined up.
Add Mod Podge & paint
From there I added Mod Podge to all the edges of the vinyl. Then I painted the entire top of the board using a can of eggshell paint in SW Alabaster.
Carefully remove vinyl
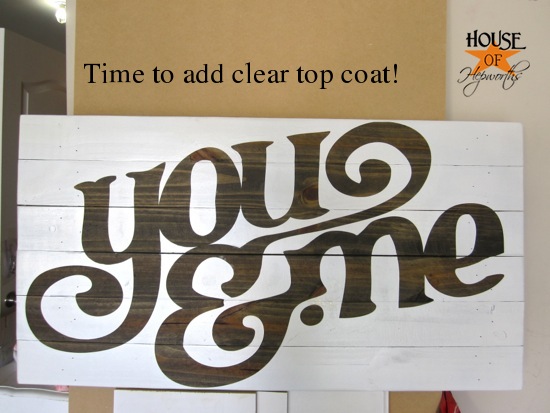
After the 2nd coat of paint, while the paint was still wet I removed all the vinyl to reveal my new sign!
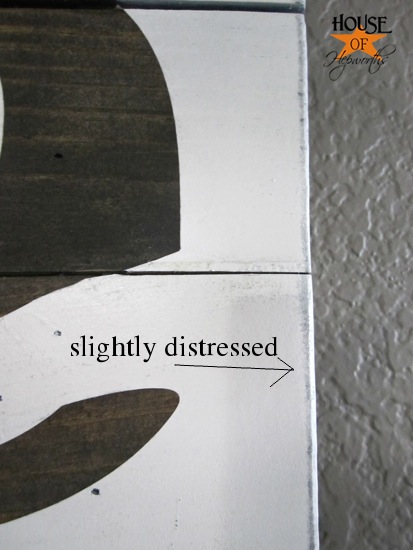
Distress
A little bit of distressing & a clear top coat and the sign is finished!
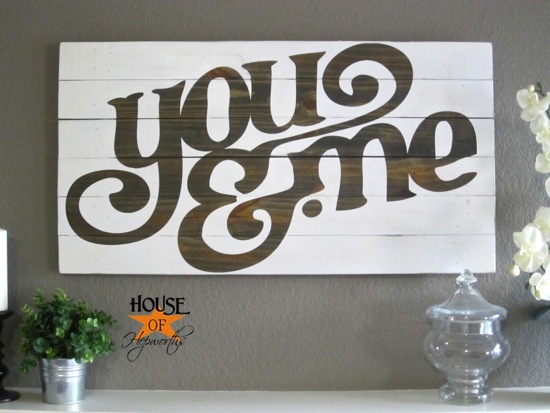
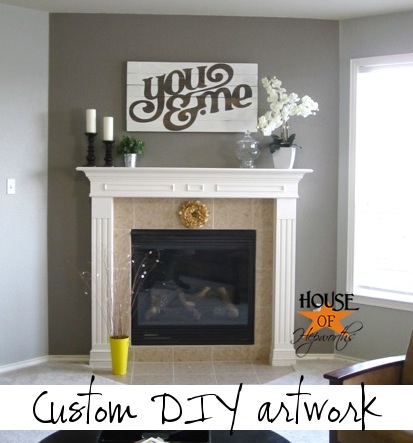
The sign is 40″ wide by 20″ tall and is every so slightly distressed.
Finished! Enjoy your new custom one-of-a-kind farmhouse artwork!
Shopping list:
Find a very thorough tutorial for farmhouse artwork here.
Here are even more pieces of custom artwork you will enjoy:
- Wood artwork sign from a gift bag
- HIMYM Start Being Awesome farmhouse plank wood artwork
- “I am my beloved’s” huge farmhouse plank artwork
- Huge Farmhouse mirror made from wood shims
- Buddy the Elf quote on wood artwork
- Huge telephone artwork
So, are you going to make one too? I’d love to see any of your artwork if you do!

Instagram || Facebook || Pinterest || Youtube
Thanks for reading! Have a wonderful week!
That’s amazing. You’e so talented!
**you’re
Just a little spelling error!
“You’re” is a contraction for you+are. Therefore, “your” was correct here.
Oh Alison! This is why I wish I had a vinyl cutter. Your sign is so pretty!!!
I LOVE THIS! Ive been debating on getting a Silhouette but this has made up my mind!
love that new sign allison! great job!
gail
I love this…I have a request though…I don’t have a vinyl doo-hickey so I think you should sell different words/sizes so we can order one from you and then custom make the rest!! Please! Thanks for sharing, HOH rocks.
This looks so amazing! I seriously need to get myself a Silhouette.
I love this sign. It is so cool looking. Love the over sized letters.
Hey, I was just at Walmart and thought of you..ok not because I was in Walmart silly!, but because of what I saw when i was in there. A slap bracelet {is that what they are called? you know the kind that are hard and you slap it against your wrist and it wraps around it} that just said “awesome” on it. It was in the Easter section, in case you want to go get one and slap one on.
This is gorgeous! I have a Cricut, but I’ve been wanting a Silhouette for a while now. Great job on your color and font choices!!
This looks really great, Allison! I think I will create a version of this for our bedroom. I absolutely love the font! Thanks for sharing – Julie from http://ten51design.com/
Just a little heads up, you may want to take a quick peak at the Commercial Use Policy under Silhouttes Terms of Service. My mom came across it when she was considering using her Silhouette to make greeting cards to sell.
Beautiful piece by the way. I think you are super talented and creative and I really enjoy reading your blog.
I LOVE this sign Alison! You’re so talented! Have a great weekend!
Beautiful! I’d love to make one of these for our bedroom!
I absolutely love this one and would love to make one for our bedroom!!
I wish I had a Silhouette and could do this myself! Any chance I can pay you for the vinyl cutout?
ok this… this is stinkin’ adorable! Way too cute!
Samm
http://www.LittleHouseintheBigD.com
Love this! I think it’d be perfect in our master bedroom… I’ll start working on the husband so to see if I can purchase one 🙂
hey, i couldn’t find that font on the silhouette store site? was it a font or an image and you bought just that saying? i love your sign and really want to make one. i had no idea the possibilities of my silhouette!! so thank you!
I love this and I’ve been inspired by your previous can-do-it posts to make my own signs. I didn’t have tremendous luck getting a sharp edge (ie., no bleed) with the vinyl. What does the Mod Podge do to fix it?
LOVE this!! So great! My goal this year is to do a big sign like this. Thanks for the tutorial!
I love this!! The font is so fun, and I love the distressed look.
I’ve made a couple smaller signs like this, but since I don’t have a Silhouette machine, I cover the whole piece in painter’s tape, print the design out on regular paper, stick it over the painter’s tape, then use a little scrapbooking cutter to cut out the design in the painter’s tape and peel off the parts I don’t want. Like this LOVE sign: http://heartmainehome.blogspot.com/2012/02/valentines-day-decor-part-two.html
Cheap dollar store contact paper or shelf paper works great and cut with exacto knife
Thanks so much! I have been thinking about making a big wooden sign, and now I have the perfect tutorials to help! Your signs are wonderful – I mean awesome :)! I have also been thinking about cutting machines, so it was great to see what one can do. Can yours cut any font or shape you design, or do you have to buy the fonts?
Note to self-get a vinyl cutter so that I can start being awesome like Allison.
Nuff said.
I love this and I’m seriously considering making one for my master bedroom over my bed. I’m just concerned about how to get it secured to the wall so it doesn’t fall and hit us on the heads! Any suggestions for the best way to hang it securely? I think a french cleat might work, but I don’t know how to make it work with the sign design. Any tips on how you hung it would be awesome! Thanks!
I love the sign! Just wondering what font you used?
I love your sign, it’s gorgeous! You put together great posts too – very well done! I have this linked to my wooden signs post too today, for inspiration!
Wow… Just had a “why didn’t I think of that?” lol
LOVE it! I am always on the lookout for a new way to use vinyl and this looks like my next project! 🙂
Jacinda
Wow…I just love this. So simple and just so gorgeous. Thanks for the tutorial. Think I’ll make one with my hubby’s and my name on it. The typography i awesome by the way 🙂
Have a great day
Annika
I have the same question as Erin… Does the ModPodge around the edges give you a cleaner edge?
The Mod Podge makes sure that no paint seeps under the vinyl. I’ve done it without the Mod Podge as well and they both work about the same.
The reason why you can’t find this typeface is because its custom lettering my Mats Ottdal. Not only is it ruined with the curves being completely messed up, but the fact that you want to sell it as your own is absolutely disdainful.
http://www.behance.net/gallery/Typography-Projects-3/645615
(About the middle of the page.)
Hi Mandy! Thanks for your comment and your concern. Just to clarify, I have never passed this off as my own. I purchased it through the Silhouette store and have never taken credit for it. Silhouette now allows images to be purchased for business use. In fact, not only have I never taken credit for the creation of the image, I actually give a full tutorial so that you can make your very own sign if you have a Silhouette machine. All you have to do is go by the image file for $.99. The only reason I sell the sign at all is because some people prefer to not make it for themselves and would rather I just make it for them. They know I am using vinyl to create the sign and that the image is a pre-made image purchased from the Silhouette Online Store.
I hope I have clarified things for you. Again, thanks for your concern and thanks for the cool link.
Hi Allison! I cannot find the image on silhouette! Is there a trick that I am not aware of?? I love this signs so much! Great work! Thanks for the amazing tutorial! 🙂
This art on Silhouette turned out to be copyrighted by an artist. That’s why I don’t sell them anymore. Silhouette was unaware that one of their artists had ripped someone else’s work off. Once the artist found out I assume Silhouette pulled the art from their shop.
It’s hard to find, but it’s there. Lovely piece!
http://www.silhouetteonlinestore.com/?page=view-shape&id=22145
Do you sell the You & Me sign? I would love to do this project for my room but am not a crafter and have no access to one.
Thanks
Please please please come back to Etsy so I can purchase this!!!!!!
Did I see somewhere that you sell this you and me sign. I thought at one time I had seen it. If so, will you please direct me to where I can purchase one?
Thanks!!
This is WAY COOL!!! I’m in love thanks for sharing this awesome tutorial 🙂 michelle
Hi, I love the You & Me sign, and want to make one of my own. However, I can’t afford the vinyl machine. Is there anyway I could pay to have the printed vinyl sent out to me so I can make my own wood canvas? Thank you so much for your time.
Nick
I’m in love with this! You should make me one… About us 🙂
Taylor
Hi Allison! I linked back to your blog on a similar project! You can check it out here http://decoratemylife.com/how-to-make-a-wood-sign/
Thanks for the inspiration! Love your blog 🙂
Hi there!
Thanks for this great tutorial! Really simple and useful!
I have one question for you : where do you take your vinyl? Is it from the Silhouette Store?
Cheers!
I purchase all my vinyl and images from the Silhouette store.
Hey Allison!
I am going to be attempt making this sign this weekend and had a couple questions for you!
I don’t have a silhouette machine or anything so I’ve drawn it up in CAD and printed on my work plotter to 24×36 on regular paper. My plan is to trim it out and use similar to how you used vinyl… I am unfamiliar with mod podge, so I’m wondering if there is a way to use it in a similar fashion on regular paper or if that won’t work? Do you have any other suggestions for how to hold down the paper so I can paint around it and achieve the look you did? Or do I have to do the reverse and just use the outside portion as a stencil and spray paint the inside? I really like how you did the wood look on the inside of the letter but I’m not sure how to achieve it with regular paper! Let me know if you have any tips! 🙂
I would buy vinyl paper and cut it out on that, then peel it and stick it to your sign.
I LOVE this and am working on making one for myself. I have the image cut out but first need to stain the boards. Can you tell me what stain color you used? Thanks!
I have no idea. It was a dark brown color – maybe walnut?
I have this exact piece
What is the mod podge for?