Hey guys and gals! We are neck deep in building our own custom IKEA kitchen! If you want to read all about our on-going IKEA series, start here. Today I’m going to talk about one of the ways we are taking our box IKEA kitchen and making changes to it so it’s more custom and fits our specific needs.
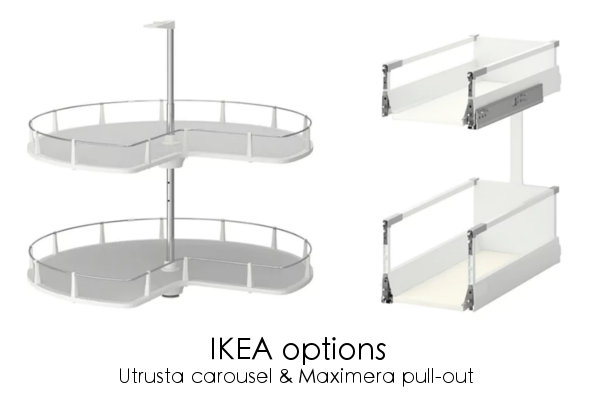
Instead of the basic insert options that IKEA offers, we decided to take it up a notch and install higher quality, more heavy duty inserts to accommodate our hard-working family. Here are two of the IKEA options that we scrapped for more industrial strength and aesthetically-pleasing options:
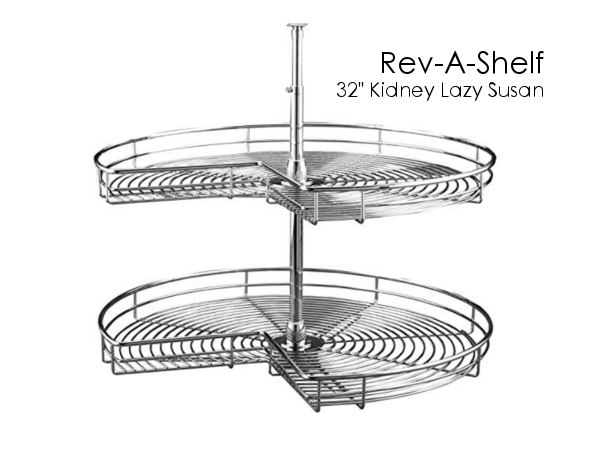
All three of our major insert upgrades are by a company called Rev-a-Shelf (this is not a sponsored post but I will link each product to an amazon affiliate link).
Here is our new Rev-a-Shelf Lazy Susan:
We installed this exact same Lazy Susan in our old house and were so impressed with it that we bought it again.
The Lazy Susan that IKEA offers is plastic and doesn’t hold much weight (26 lbs per shelf to be exact). We sprung for this metal Rev-a-Shelf one to help support the weight of our cast iron that we prefer to cook with. (This upgraded one can hold up to 84 lbs per shelf).
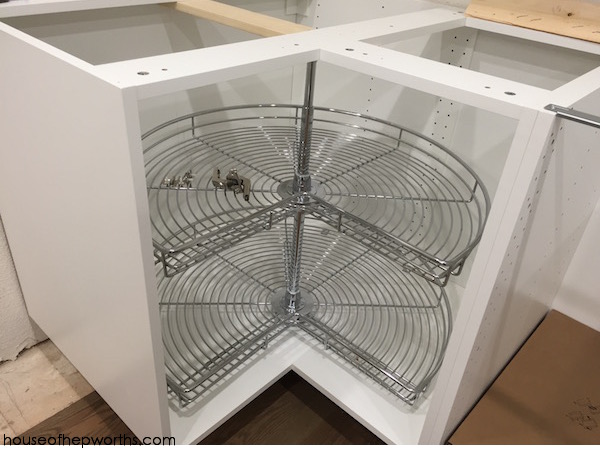
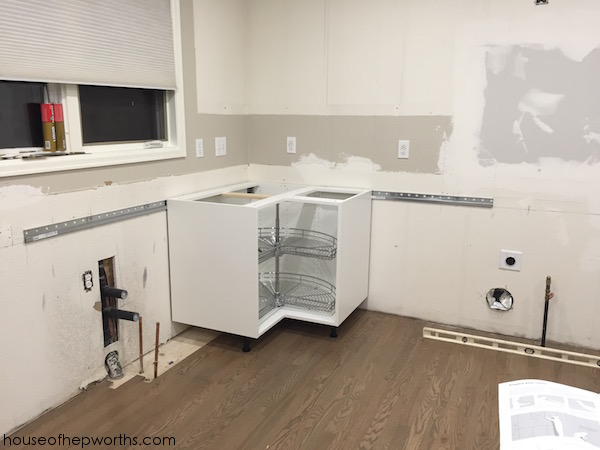
This Lazy Susan comes in a few sizes, so I purchased the largest one that would fit in the IKEA corner base cabinet. The exact center of the base cabinet on top does not line up with where the cross pieces are, so we had to get creative and install a 1×4 across the center for the new lazy susan to attach to.
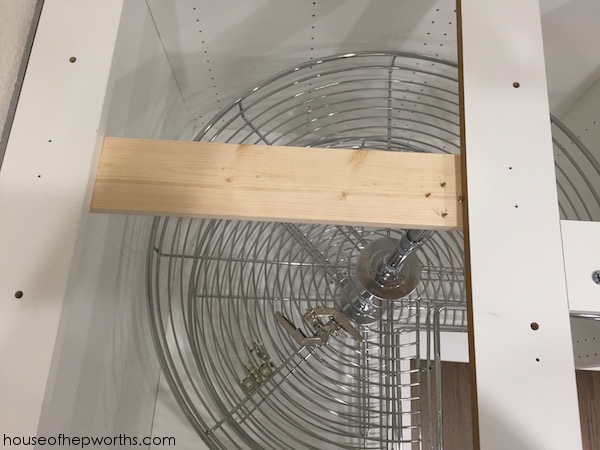
Though it is possible to install after your kitchen is complete, it’s much easier to install while you assembling your cabinet boxes. Our corner cabinet and lazy susan were the first things we assembled and installed when we began our IKEA kitchen cabinet installation.
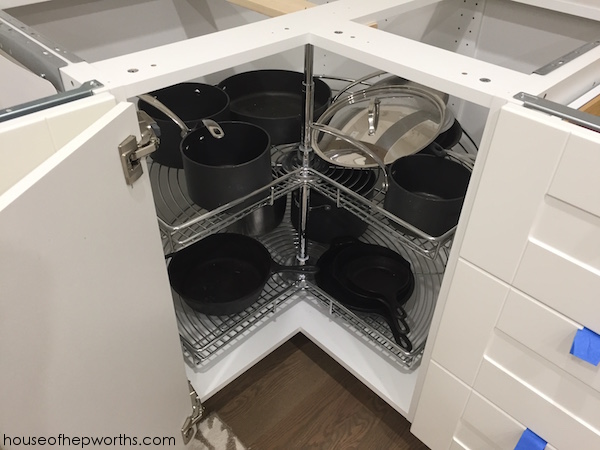
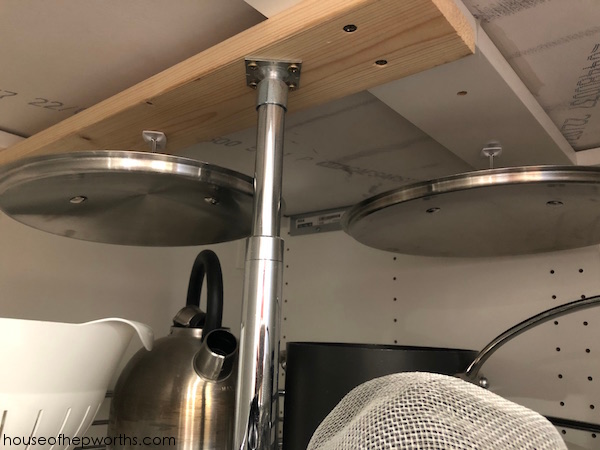
Here’s our new Lazy Susan in-use. We’ve got a couple pots and pans with lids and the lids tend to be cumbersome and annoying to store.
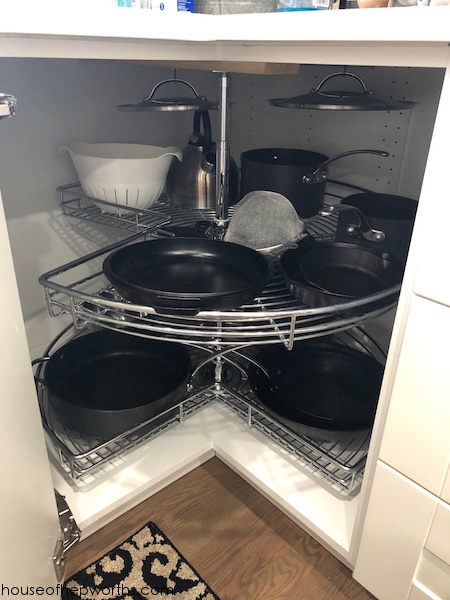
I took some Command Hooks and stuck them to the underside of the top of the corner cabinet and hung the lids from them. Now the lids are easily accessible yet out of the way.
Our next upgrade we made from the basic IKEA pull-outs were custom pull-out base cabinet organizers.
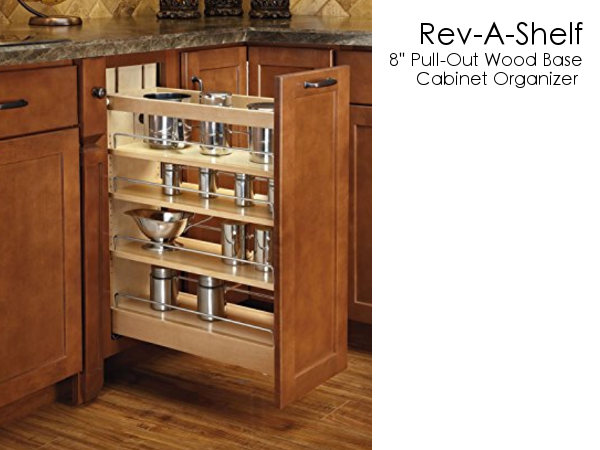
We upgraded to some heavy-duty wooden pull-out organizers to be used for our spices.
Our cabinet boxes are 12″ wide. When I ordered these pull-out organizers we hadn’t yet assembled the base cabinet boxes, so I ordered the 11″ wide pull-outs. Well, once the boxes were assembled I realized that the inside of each box was less than 11″ wide and our pull-outs didn’t fit. Rev-a-Shelf easily exchanged them for us and we got the 8″ wide pull-out organizers. They fit perfectly.
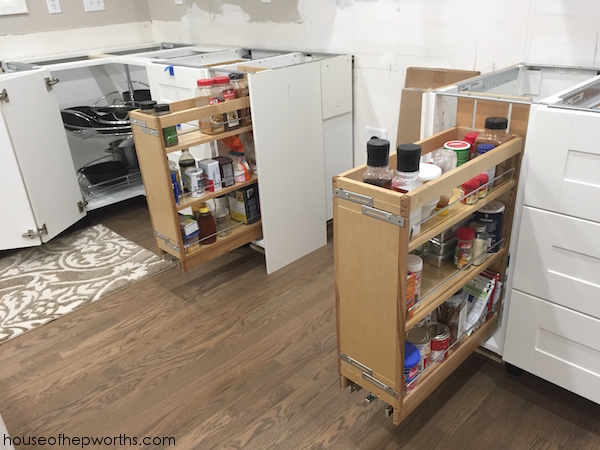
Installing these pull-outs is straightforward and easy enough. They come with a template that spells out exactly how to install them. They come fully assembled and require only a handful of screws to install.
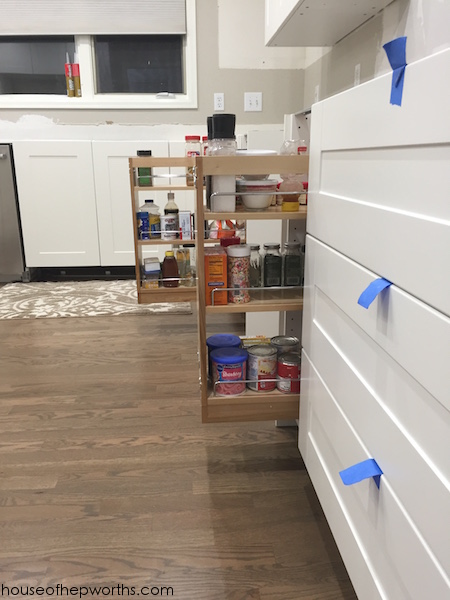
Having all of our spices and baking supplies ready and available right next to either side of our stove is amazing. It makes cooking so much easier. We *try* to generally keep the baking supplies on the left side and the cooking spices/supplies on the right side.
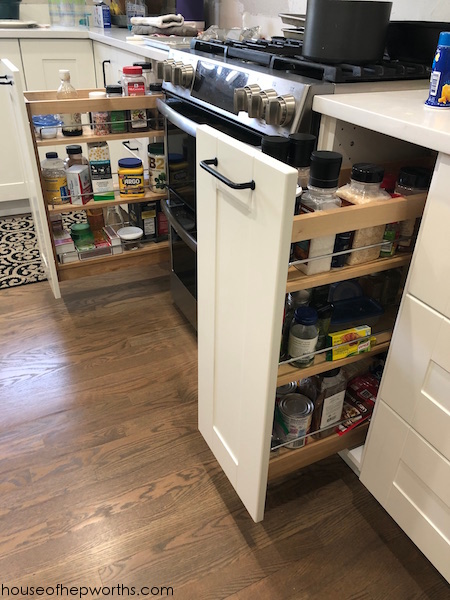
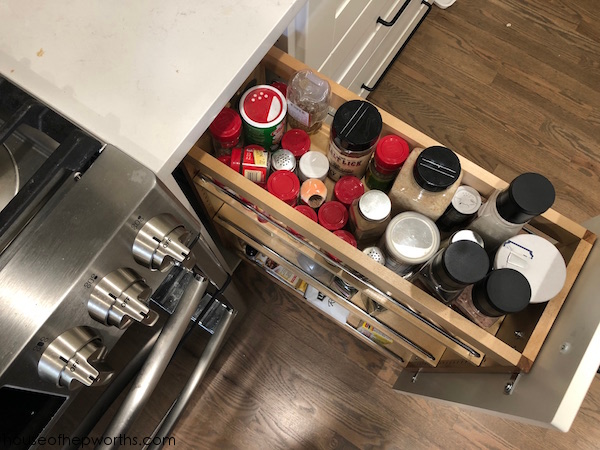
I love that the top is wide-open. I put all our most used spices such as pepper, salt, garlic powder, etc on the top shelf so when we pull open our pull-out organizer they are super easy to grab.
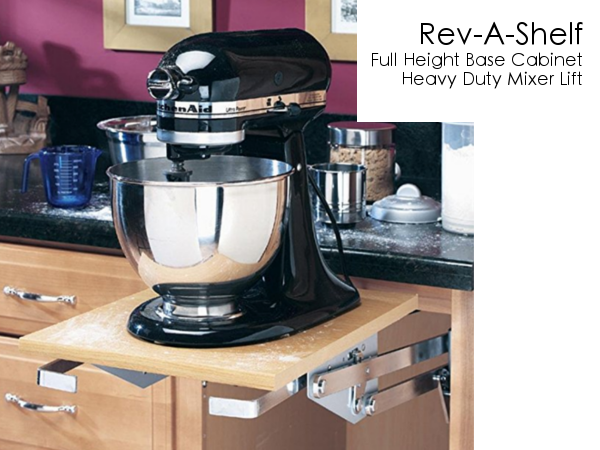
Our final Rev-a-Shelf upgrade in our new IKEA kitchen is probably my favorite – an Appliance Lift!
This was a fun splurge and I am so happy we bought it!
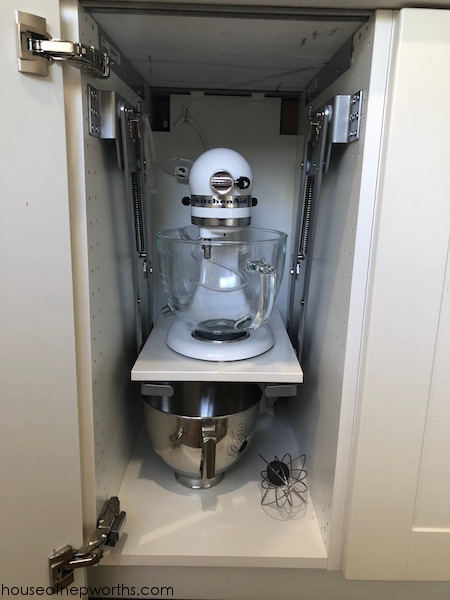
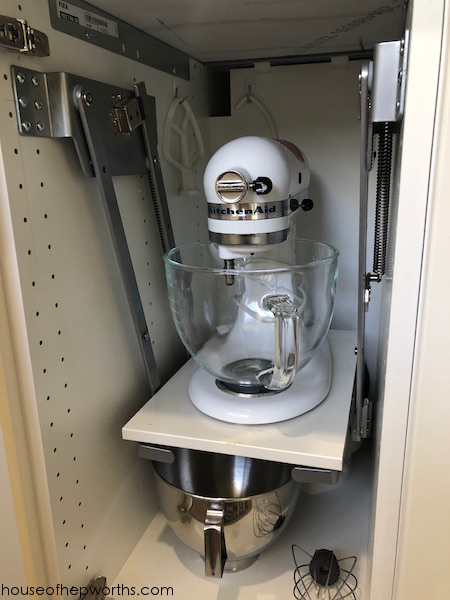
This appliance lift allows you to keep your mixer (in our case our KitchenAid) off your counter when you aren’t using it. Two great things about this appliance lift are 1) it stores your mixer in the cabinet but makes it super easy to access it when you need it, 2) you add your own top to it so you can install it in pretty much any size cabinet.
The appliance lift was a little more confusing to install, mainly because the one we bought didn’t come with any instructions. I googled and found a pdf online with the install instructions though so that was pretty much a non-issue. It is screwed into the cabinet with multiple screws and feels very secure.
Once we lift our KitchenAid, we just plug it right into the plug outlet next to the cabinet. This is one reason we installed it in an end cabinet. We opted to not install a plug outlet inside the cabinet and leave it permanently plugged in because I’m weird about stuff like that and it seemed like a fire hazard.

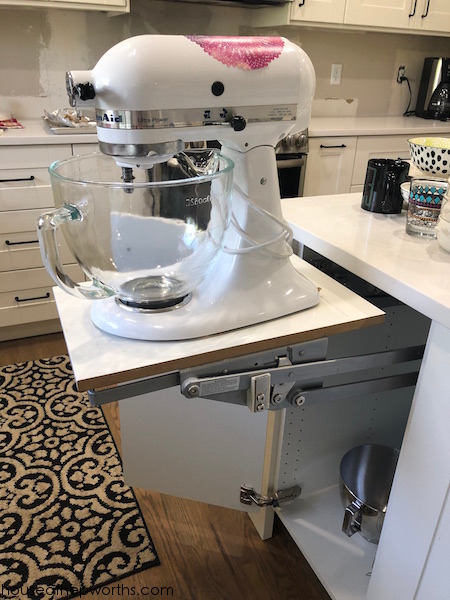
We are going to add a nice butcher-block top to our Appliance Lift, so this white top is just temporary. Also, you may notice screws behind the back of the mixer. If the mixer shifts further back than this, it hits the counter as we lower it back into the cabinet. When we add our new butcher block I’ll add little blocks or something just to make sure the mixer doesn’t shift too far back and potentially crack our countertop. Other than that, this lift is perfection. Just make sure your mixer doesn’t shift too far back on it.
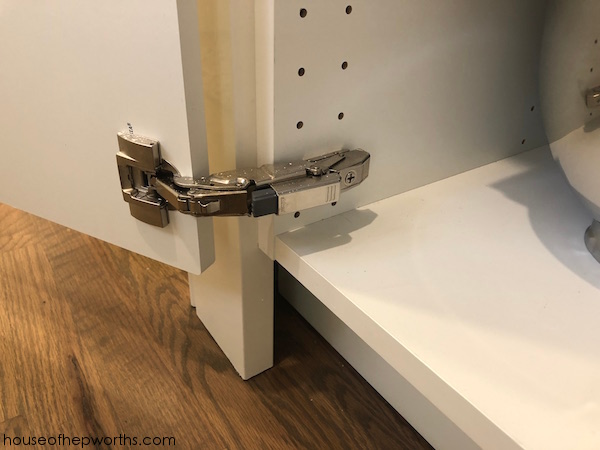
I was worried about how the IKEA hinges and the lift were going to work together, and luckily the Appliance Lift installs lower than the IKEA hinge. We did have to swap out basic hinges for the 153 degree hinges so that the door opens further out to accommodate for the Appliance Lift when in use.

Also, one additional small change we had to make on the IKEA hinges was to install the door damper on the bottom hinge instead of the top hinge. This has not made any difference in the performance of the cabinet door.
Those are the three Rev-a-Shelf upgrades we made to our new IKEA Kitchen. We love that they are a lot more durable and also give the kitchen a more custom feel. If you want to check them out, here are links:
Rev-a-Shelf pull-out base cabinet organizers
Here are all the posts in our IKEA kitchen series:
Building your own custom IKEA kitchen || the planning & ordering process
Assembling and installing IKEA Sektion kitchen cabinets
Adding plug outlets inside IKEA pantries || IKEA sektion renovation
Pull-outs & Lazy Susans || Custom Organization in our IKEA Kitchen
Everything you want to know about building a custom IKEA kitchen island
Create Custom Canned Goods Storage from IKEA Cabinets
Creating a wrap-around cabinet & moving the dishwasher
Run Cables in-wall with a PVC Cable Drop
Installing IKEA quarts countertops – Frosty Carrina
How to install hardware like a Pro – IKEA kitchen renovation
Installing new pendant lighting in our custom IKEA kitchen
Start at the VERY beginning of our WHOLE-HOUSE renovation:
New to this series? Click here to start at the beginning!

This post contains amazon affiliate links
Thanks for reading! Have a wonderful week!
Here are links to all our products:
SO cool! I have drooled over those lifts for YEARS. Probably decades. I’m pretty sure they won my heart as a teen still living with my parents. SOME DAY …someday I’m Going To Have One!
What size IKEA cabinet did you use for your mixer lift?
This is the exact lazy susan I needed to replace the lame plastic Ikea one we have in our cabinet! Now I’ll be able to store my heavy standing mixer. Thanks so much!
Truly love all the fine tuned products added. Really takes Ikea Cabinets to the next level.
Very impressive,
Bill