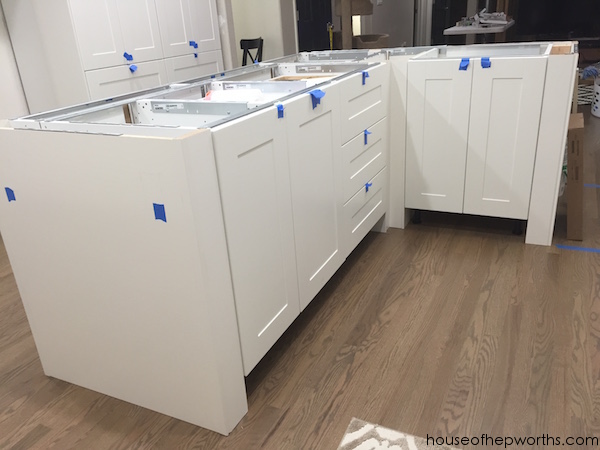
Happy Monday! Can you believe June is almost over? Time really does fly when you are having fun. On Friday I shared with you our process of building and customizing our new IKEA kitchen island. We wanted a very custom island that looked more like a piece of furniture than an actual set of kitchen cabinets and achieved that look in unconventional ways by using toe kicks and panels.
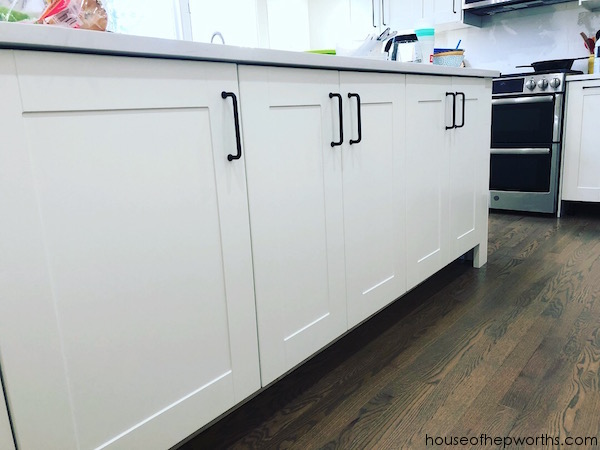
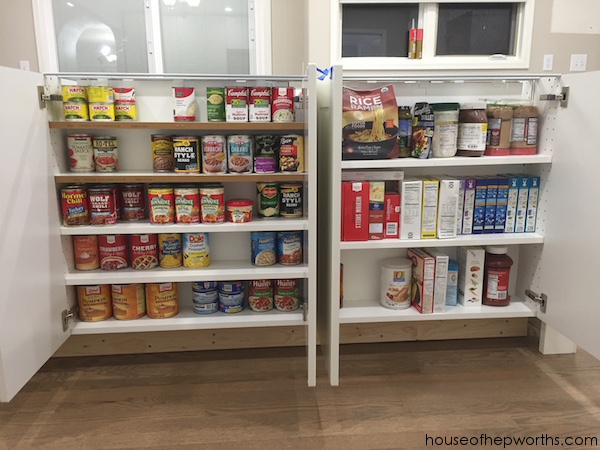
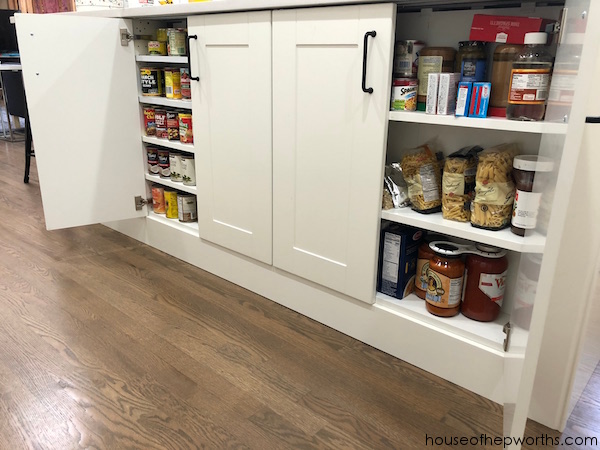
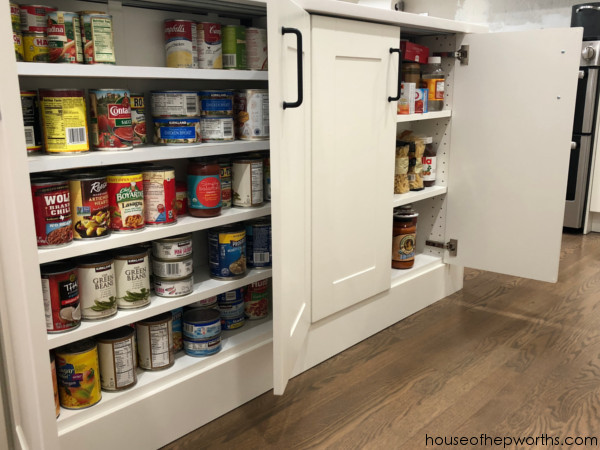
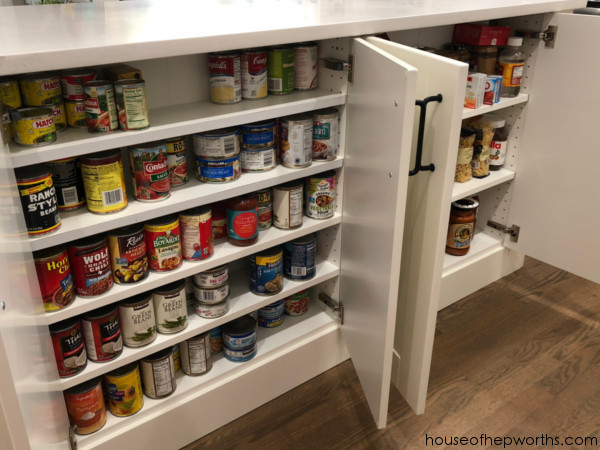
One additional change we made to our island to really customize it and take away some of that off-the-shelf feel of IKEA were custom 7″ deep cabinets to store canned goods. When the doors are closed you assume they are just a normal cabinet:
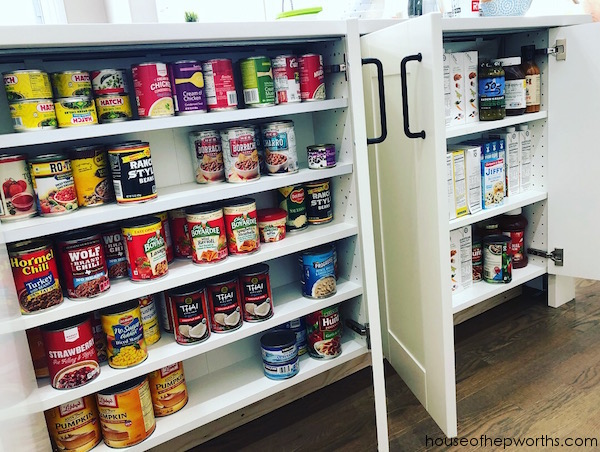
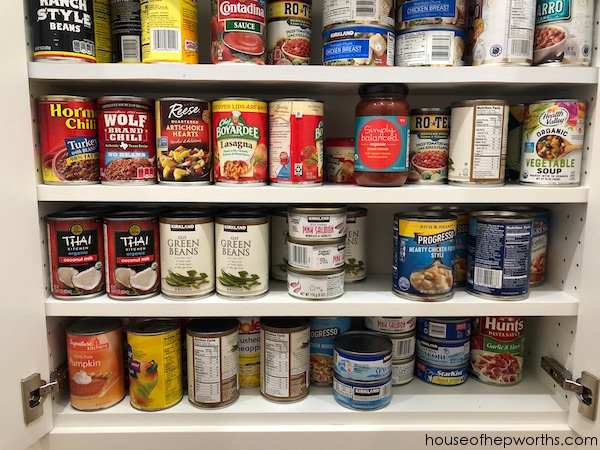
But when you open the doors you are surprised by tiny cabinets deep enough to hold canned goods, spaghetti sauce jars, and boxes of pasta!
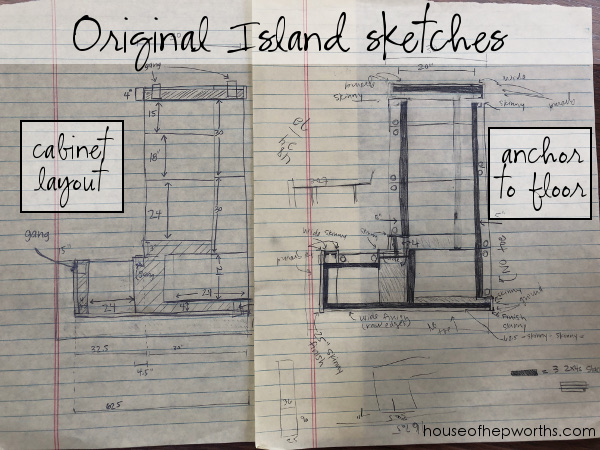
In order to achieve this we had to get creative with IKEA’s basic cabinets. Here’s our original sketches of the island (below). You can see on the sketch on the left, we’ve got three cabinets that are 16″, 18″, and 24″. Those are full-depth (24″ deep) cabinets. Those cabinets hold our mixer stand, garbage cans, and silverware. Behind those cabinets are two cabinets labeled “30”. What that means is that they are 30″ wide. They are only 7″ deep though!
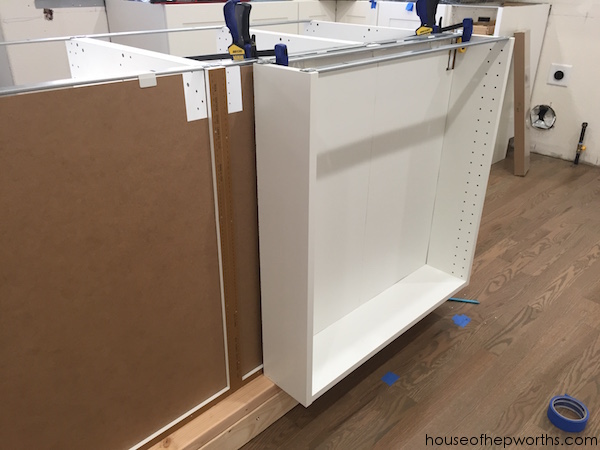
We started with basic lower cabinets and cut them to size before installing them. Because IKEA cabinets come flat-packed, I was able to run each piece through my table saw and cut the back off. I started with cabinets that were 15″ deep (IKEA sells cabinets both 15″ and 24″ deep), set my table saw for 8″, and cut the back off each of the 3 pieces.

Once each piece was cut, I assembled them as usual but ended up adding my own screws as well. Because they are so narrow they were more fragile until the back panel was attached. Attaching the back panel was the only major difference in the process – usually they slide in through a ridge, but since I cut that off, I used my nail gun and attached the panel directly to the back.
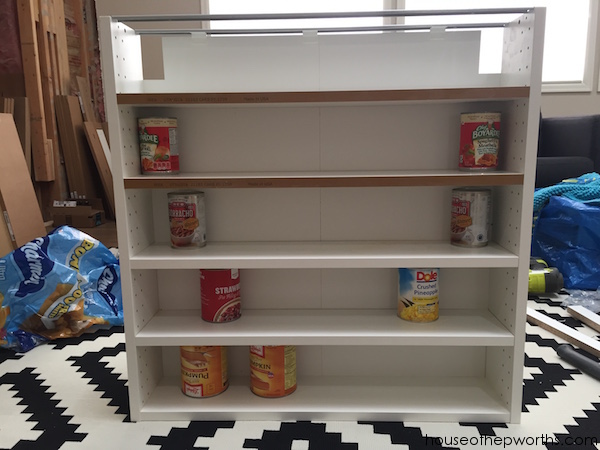
I also ran each shelf through the table saw and permanently attached them with screws. They are not adjustable. My plan was to use the front half of each shelf and the back half, but when I got home and started the project I realized the back half of the shelf was finished with a brown strip, not white (see picture below). Because we live far from IKEA and I needed to screw the shelves into place before attaching to the main island, I had to just go with it and use the brown front ones as well. My solution? White electrical tape. It worked like a charm and no one is the wiser!
Once the cabinets were assembled and the shelves were permanently attached with screws, we set them in place. This was achieved by clamping them exactly where we wanted them and then using some flat brackets to hold them to the large cabinets behind them as well as screwed directly into the 2x4s below.
You can see in the following picture how the two custom cabinets will line up with the front of the larger cabinet closest to you:
Once they were screwed into place and secure, we tested them out! So exciting!! The cabinet on the left has more shelves to hold canned goods while the one on the right has fewer shelves to accommodate taller items like spaghetti sauce, pasta boxes, etc. When we were figuring out what heights to attach each shelf, I used actual canned goods and pasta boxes to figure out where I wanted the shelves. It was not a happy accident that everything ended up fitting perfectly.
And now, a series of photos of the finished cabinets. This is one of my most favorite features of the kitchen. Instead of having wasted space along the back of the island, we have tons of custom storage!

Here’s another great way I came up with for storing canned goods. In our last house we had a blank wall in our pantry so I built a custom shelf to hold all the cans. It was awesome. Check it out here.
Here are all the posts in our IKEA kitchen series:
Building your own custom IKEA kitchen || the planning & ordering process
Assembling and installing IKEA Sektion kitchen cabinets
Adding plug outlets inside IKEA pantries || IKEA sektion renovation
Pull-outs & Lazy Susans || Custom Organization in our IKEA Kitchen
Everything you want to know about building a custom IKEA kitchen island
Create Custom Canned Goods Storage from IKEA Cabinets
Creating a wrap-around cabinet & moving the dishwasher
Run Cables in-wall with a PVC Cable Drop
Installing IKEA quarts countertops – Frosty Carrina
How to install hardware like a Pro – IKEA kitchen renovation
Installing new pendant lighting in our custom IKEA kitchen
Start at the VERY beginning of our WHOLE-HOUSE renovation:
New to this series? Click here to start at the beginning!

This post contains amazon affiliate links
Thanks for reading! Have a wonderful week!
Wow, the kitchen looks amazing! So smart using dead wasted space. How did you conceal the seam on the end of the cabinet where the two cabinets butt up to each other?
We framed out the ends of the cabinets to make them more custom looking. Check out this post: https://www.houseofhepworths.com/2018/06/22/everything-you-want-to-know-about-building-a-custom-ikea-kitchen-island/
Hi Girl! I love these! What a great idea. And they came out terrific.
If the electrical tape wears or falls off, I have a solution. We found strips of iron on edging for finishing shelves when we added extra shelves to our pantry years ago. You iron it directly onto the front of your shelf. We just used it to finish the cut edges in our new shelves in the closet recently.
I love reading your posts! Thank you so much!
That is such a great idea!
So clever. I have deep cabinets and constantly lose things in there. These shallow shelves are the best. I like looking at other peoples groceries too 🙂
You are funny. What is it with snooping through other peoples pantries? I love seeing what kind of food other people buy.
Well done!!! Such a practical use of space that gets wasted if you don’t do your own design! Can storage tends to be pretty messy. Not here! Those little empty spaces in houses and kitchens BUG ME. Excellent planning and execution!
Thanks so much! Yes, I hate wasted space. This was such a practical application for that dead area.