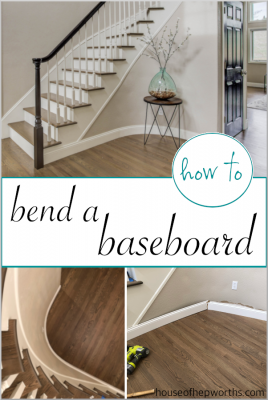
Today I'm sharing how to bend a baseboard around a tight curve. We have a curved staircase which is … [Read more...]
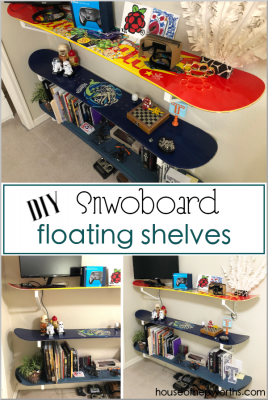
diy SNOWBOARD shelves: an easy tutorial
Making your own DIY floating shelves from snowboards is really easy and makes a fun statement piece! … [Read more...]
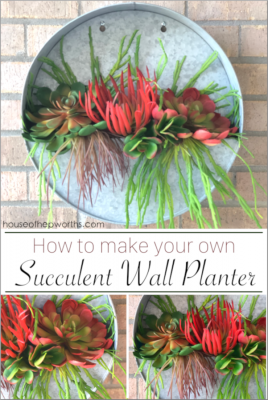
Make your own succulent hanging wall planter
After scoring the cutest hanging wall planter and some faux succulents on major clearance, I made … [Read more...]

20+ amazing FARMHOUSE counter-height barstools
The day has finally come for us to shop for counter-height barstools! We recently renovated our … [Read more...]

Recipe: The most amazing CHICKEN SALAD!
Chicken Salad is a staple at our house. Today I'm sharing the most amazing Chicken Salad recipe you … [Read more...]
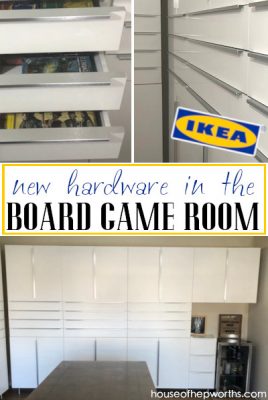
New IKEA hardware in the Board Game Room
Our formal living turned board game room is coming along nicely with the addition of new Ikea … [Read more...]

Our favorite appliances for our new kitchen (Bosch, LG, GE)
Choosing new appliances can be nerve-racking! There are so many options to choose from, each one … [Read more...]

20+ ways to upcycle thrift store decor to decorate your home
Today I’m sharing over 20 different ways to upcycle thrift store decor items to create fabulous home … [Read more...]
- 1
- 2
- 3
- …
- 127
- Next Page »