
I am totally loving the framed skeleton keys, so go figure, I made one for myself!!
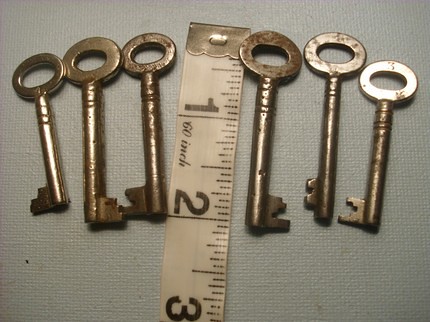
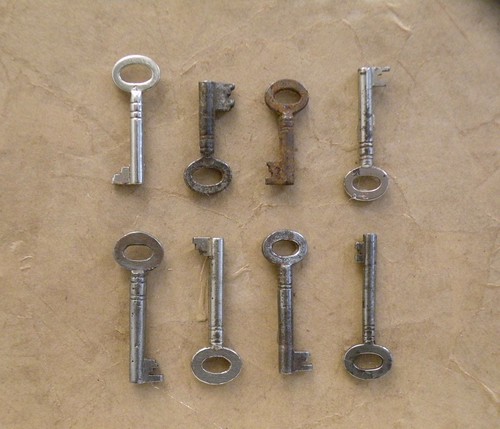
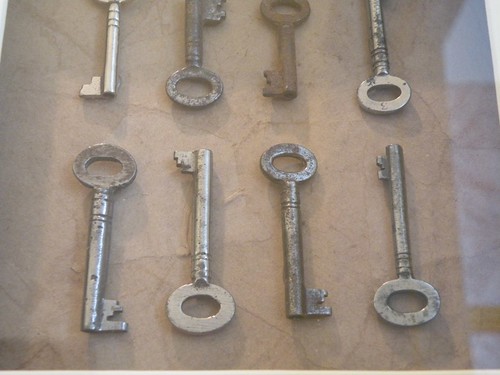
I went to Etsy.com and did a search for “skeleton keys”. I finally found some that were the right price and the right size. I paid $6 for this set of 6, but when the seller sent them she threw it two more for free, so I ended up with 8. Perfect!
I sat on these keys for at least a month before I found a frame I liked. I bought it at a thrift store for a few dollars (it was 1/2 off day!).
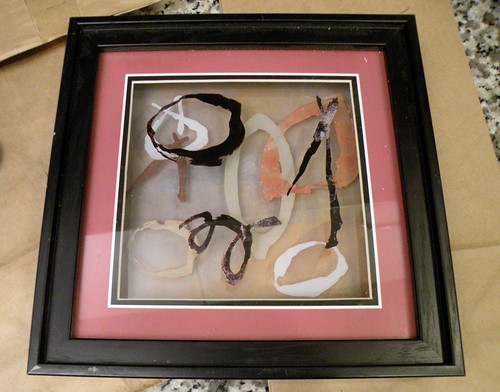
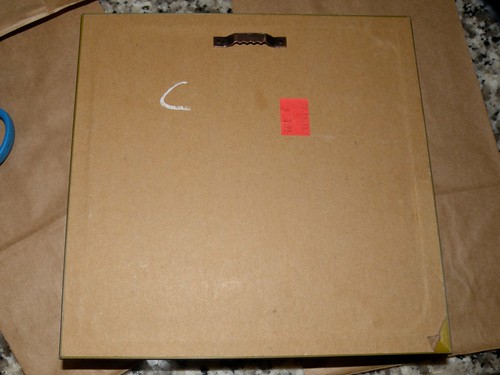
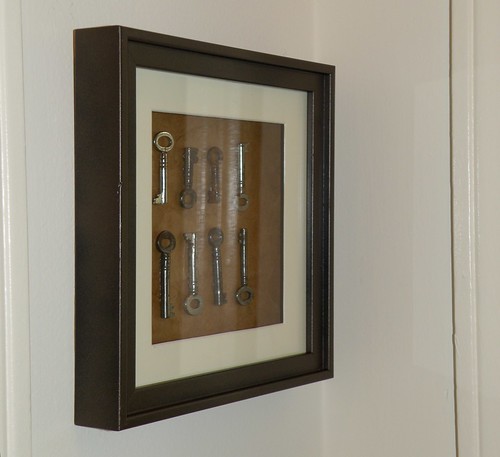
It’s hard to tell, but this frame is thick like a shadow box.
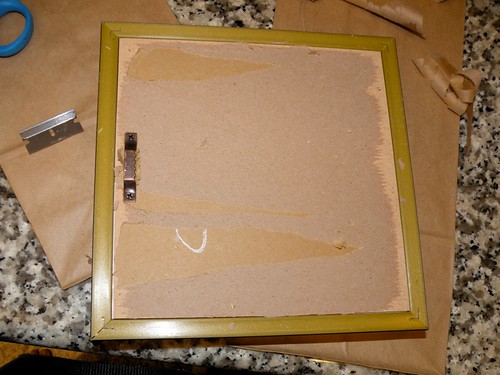
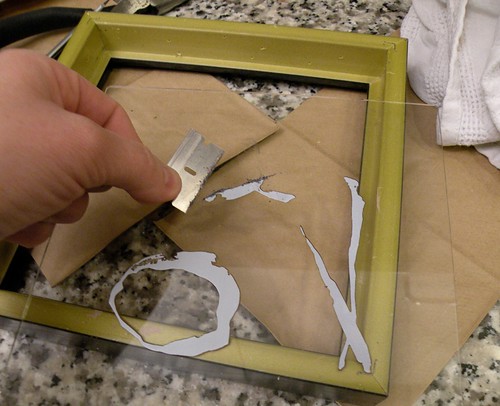
So the first thing I did was flip it over and rip the paper off. I didn’t bother taking the picture hanger off. I just worked around it.
Once I got the frame apart I took a blade and shaved the image off the glass. Then I just cleaned it really well with Windex.
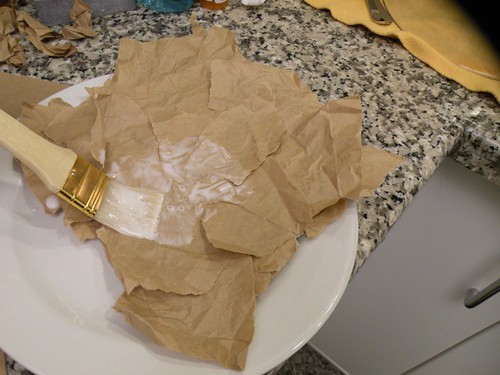
So next is my favorite part of the entire project. I did the same paper bag technique as the one I did on my large dice decor.
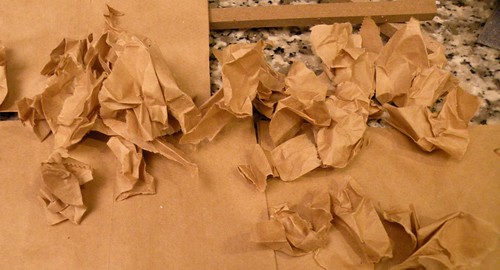
First, take a paper bag and tear it up into random pieces. Then crumble them all up and flatten them out again.
Next I took a school glue/water mixture and painted it right on the front side of the back of the frame.
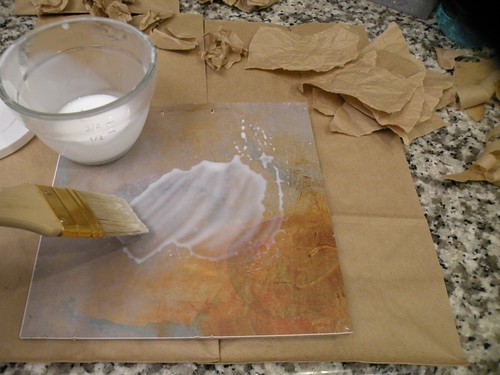
I just stuck the torn up paper all over the glue. Trust me, this is going to work!
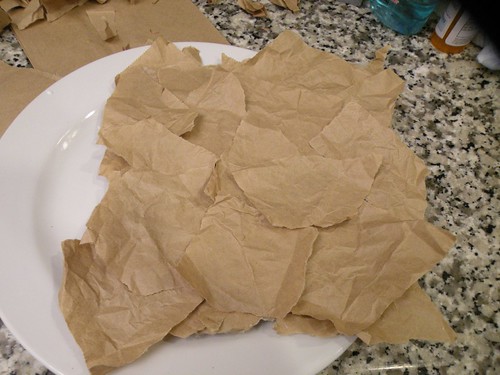
Take your glue mixture and paint it all over the top of the paper now so that it all sticks down nice and flat.
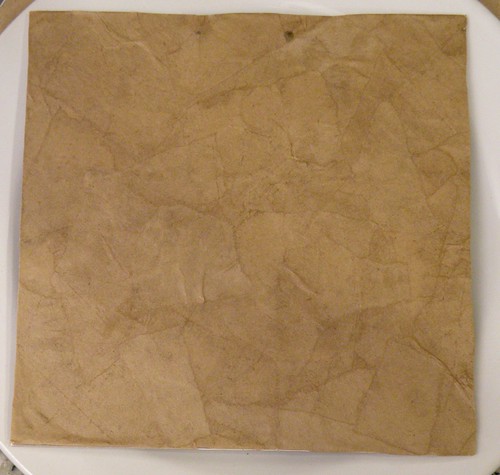
I left it over night to dry. This is how it looks once it’s dry. Isn’t it looking better already?!

Ok so obviously you don’t want all the extra edges, so I took a blade and just carefully sliced them off.
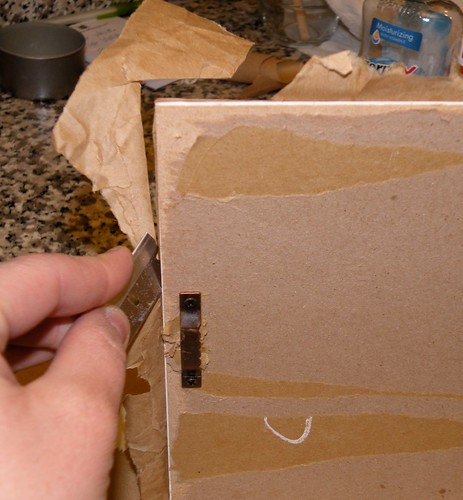
Now my mat is ready for the keys! I seriously LOVE this paper bag technique. I guess it’s like paper mache or mod podge.
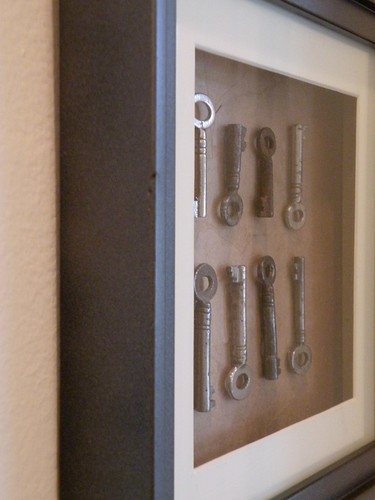
I messed around with the layout of the keys for awhile. Finally I settled on this arrangement. I put a dab of hot glue on the back of each key to hold them to the mat.
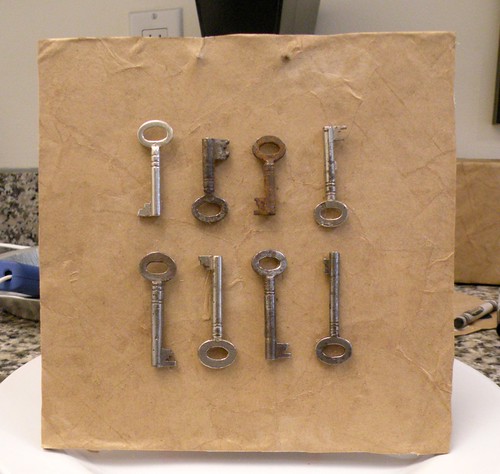
Don’t the keys against the paper bags just look so fab?!
In addition to the mat and the keys, I also spray painted the frame a brown metallic color and spray painted the top mat with heirloom white. Now it’s time to put it together to see how it looks!
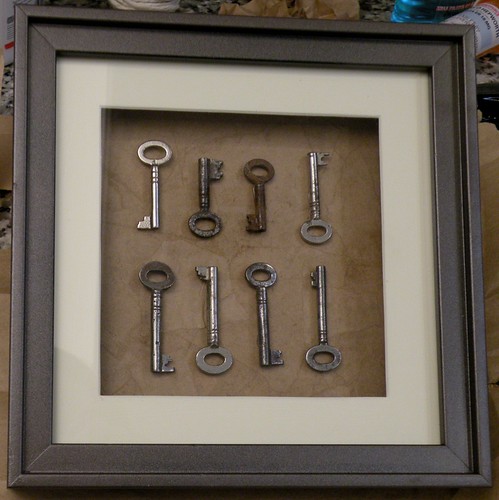
OMG, I seriously am so in love with this.
Having the back of the frame look good isn’t a priority of mine, but I was in an ambitious mood so I decided to finish out the back. First I attached the back mat to the frame with some hot glue. Then I just squirted school glue all over the back of the frame.

After that I just put brown paper on top, smoothed it out, and then cut the edges off with a blade.
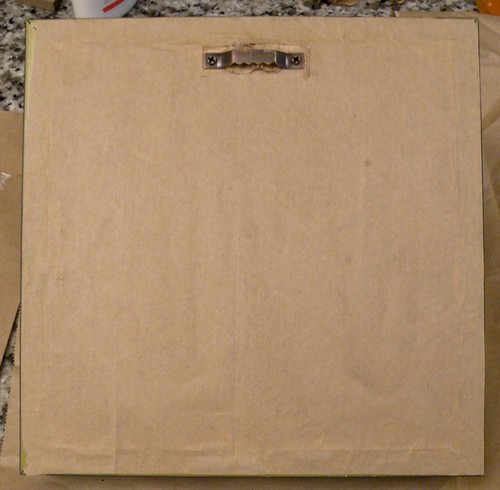
Done.
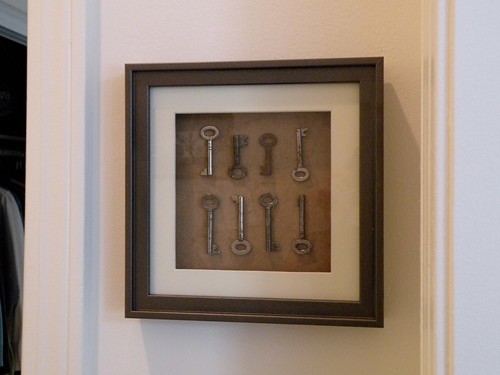
This frame is little, so I chose to hang it in a very small space in my hallway.
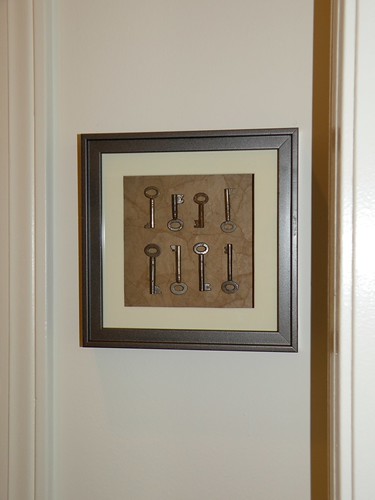
It’s so hard to get a good photo of a frame with glass in it! Either my reflection is in it, or there’s a flash on it.
This turned out so much nicer than I pictured it in my head.
I just love it when projects seem to come together effortlessly. I try to start with a loose idea and work with the project, not against it.
I knew I wanted framed skeleton keys. After that I really didn’t have a plan. As I browsed thrift shops, I tried to picture each frame with the keys inside. When I found this one, I just knew it was “the one”.
It still amazes me how much cheaper it is to make your own projects as opposed to buying them retail.
I hope this tutorial has sparked some of your creativity and given you a good starting point to create your own projects!
That turned out really nice good job! I love the skeleton key’s
Love key art as well. In the middle of my own key art.
Thank you, thank you for posting this! I’ve had some skeleton keys for like 5 years and have always planned to put them in a shadow box (I even bought a shadow box too), but I couldn’t figure out how to attach the keys or what to use as a background. I’m copying this one! Thanks again.
Looks good! I like it!
And seriously, this commenter just told me my comment was too short. Lame!
This is great. I, too, have had skeleton keys laying around not sure how to use them. Theyre actually originals to the doors in our home! What a great story huh?
Id seen Kristin make one of these with a single key but have not yet found the right frame to mount mine in. You scored perfectly with this shadowbox.
Love your ideas:)
Oh wow! That turned out fabulous. I love it. I’ve been hoping to find some skeleton keys somewhere so I wouldn’t have to order them, but now I don’t want to wait anymore.
Great job!
Thanks!
Ashley
LOVE it! Looks so great! Awesome job 🙂
Fabulous!! And I love the frame!
Hugs
SueAnn
Who knew it would turn out so well?? Very cool.
that looks really great. i really like how you did that.
SO pretty! I’m also really into keys lately, but I haven’t hung any up in my house yet. Great inspiration!
What a great looking piece! Love the look of this and it fits perfectly in your space. Thanks for sharing the step by step instructions. ~ Sarah
This looks awesome! Great job!
That does look fabulous! I would love to join your party on this week, hopefully I will remember:)
So cute! I do love the brown paper behind the keys, they work perfectly together!
I love it!!! Great job! Might have to start looking for those skeleton keys myself now!! :O)
I love this…I have a handful of skeleton keys, I will definitely be trying this one!
I would so hang that on my wall. I really like it.
So cool!! I love it.
Looks awesome! I have a BOX of old keys like this that I have had for years…now I may have to do something like this with them! Thanks for linking up to Mad Skills Monday!
Ginger
SSB
I love this! My boyfriend just moved into an 80 year old house and there are rings and rings of keys in the garage that I have already expressed interest in. 😉 I had something like this in mind, and I really like the paper bag idea. Looks really great!
Wow! I love this! Have seen you around at numerous “blog parties”. I love all of your stuff, this one is brilliant. May have to start collecting keys! 😆
I am your newest follower…. stop by sometime and check out my blog!
Have a good week!
So cool! Thanks for linking up to Making Monday’s Marvelous!
Allison – I love this! Super fabulous!!!
Hi Allison,
I love, love skeleton keys..I gather them up with my hand painted ribbons and hang in different places…you can never have too many keys!
You did a terrific job…I know you’ll be doing more too. :0)
I’m visiting for Three or More Tuesday…do stop by when you have a chance.
Have a wonderful day…
Hugs,
Stephanie ♥
OK I am seriously about to fall out of my chair that is so dang cute!
I am just putting the final touches on mine and hope to post about it later today,linking back to you of course:)
I LOVE skeleton keys! This is BEAUTIFUL!!!!! I LOVE it! Thanks for sharing at Anything Related!
~Bridgette
I have an obsession for old keys – love this project!
I have a thing for skeleton keys also. I did a project a few weeks ago. I love yours and the background is so perfect for the keys.
Brooke
I love this! What a great job recycling an old frame.
I do love it! What a great frame for this project, too! Love the colors you did the frame and mat ~ really works well with the color in the keys.
you have some beautiful crafts…so glad I found you!! will have to look through your archives and shop when I get a chance:)
LOVE, love, LOve this!!
LOVE, love, LOve this! I love anything vintage and these keys are awesome!
Love it! Looks so great!!
love this! I have some large brass skeleton keys that I’m pretty sure my mom got from Home Interiors in the early 70
s. I’m still deciding what to do with them but I like this one! thanks for sharing!
SOLD!! OMG, that is just soooooo “ME”!!
I can’t wait to try this! I’ve done tissue paper on my walls before but never thought to use brown paper bags for a smaller project. You’re such a Smarty Pants, I luv it *Ü*
These look better than commercial key shadow boxes that I’ve seen!!
This looks amazing! I would totally buy it if I saw it in a store. Or better yet, be inspired to make it myself. 🙂 Great work, and thanks for the how-to!
This looks incredible. Anyone would swear you spent a fortune.
Thanks for linking up!
LOVE this! I am going to figure out how to incorporate this, even though I don’t have any keys! I can find SOMETHING that needs this technique!
I’m totally inspired just by your frame refab!!! Amazing results and love those keys!
I love this idea! It turned out great!
Love it… love how you crinkled the paper for the background… it really added great texture and made for an awesome project.
OMG! I am seriously in love with it too. 😀 Fabulous!!!
we live in an old house and when we bought it from the 80 year old owner she gave us at least 2 dozen skelton keys…that don’t fit any of our doors! haha
your idea would be perfect for all my extra keys!
Love the framed keys and the paper bag background. It looks a bit like leather. I wonder how it would look with a bit of Polyshades? You know, stain and polyurethane sealer all in one? Have to try it. You are one clever cookie.
😛 ❗ 😳 😀 😯 😕 😎 😆 😡 😈 🙄 😉 💡 ➡ 😐 😥
Another great wall decor piece from HOH!
Thanks for linking up with Sugar & Spice.
I like the photo where you show the depth to the case/frame.
This could look good with more modern keys as well.
This is super cute – love the paper bag idea
WOW! That is really cool and for so little $$$! Awesome.
I am SO loving this! I have this post bookmarked … have been looking for skeleton keys. One “antique” store wanted $10 for ONE key! Thanks for sharing!
i love the keys and thank for the idea i have been looking for skeleton keys now i will try online. the paper is cool to.
Sigh…swoon…my heart is going pitter pat.
I love keys! This is so vintage and very cute, I love it! Thanks for sharing!
your key picture box is stunning!
Very cute and crafty of you! Thanks so much for linking to my party and I hope to see more or your awesome projects next Thursday!
Have a great weekend!
tere
This is really cute and I especially like that you matted it in the paper bags!
Such a cool idea!
This turned out great. All of the elements suit one another perfectly.
I am LOVING the background! Love the rustic nature that marries so well with the antique keys, and a wonderful departure from all things burlap. Nice change! Thanks for linking it up to SNS!
FJ Donna
I just wanted to let you know that I featured you here:
http://firefliesandjellybeans.blogspot.com/2010/05/sunday-spotlight-soys-27-favorites.html
This is fabulous! 🙂
I featured you again. 🙂
http://thespeckleddog.blogspot.com/2010/05/weekly-faves_16.html
I adore that paper bag technique. What a gorgeous colour to highlight your keys. Love it and may just have to copy it!
Of course you did awesome!! I love the way this turned out…it does look fab!!! Thanks again for linking up!!!
😀 LOVE it! I did one recently as well and I still love it! You idea with the paper bag is FABULOUS!
Love it!!! Making some key artwork is on my list of projects I want to make! Yours looks great!
Love it!!! Making some key artwork is on my list of projects I want to make! Yours looks great! 😀
Hah. Take that Pottery Barn/Ballad overpriced wall art.
Thanks for linking up to the Mad Skills party!
What a great idea!! It looks great!
Love the key art. I love that you used paper behind the keys, it looks fabulous!
I’m in love with this project too… A whole lot of style for very little moola.
DI
I LURVE this! I have some skeleton keys that I bought just b/c I thought they were cool, but haven’t done anything with them yet. You have inspired me to DO something with them! Thanks!
Love this little project. I, too, recently acquired a few skeleton keys and hadn’t thought of how to use them yet…I may steal this idea. Here’s a little tip..in case you don’t already know it. When covering the back of your frame with paper, use a spray bottle and mist the paper with water. Then use your hairdryer to dry the paper and it magically smoothes out the back and makes it nice and tight.
Stopping by from TLC. I too adore skeleton keys. Every time I go to a flea market (I live in Europe), I scoop up a few keys, the rustier the better. I have framed a few and get many comments on them. Yours look great!
Hi- I’m a new visitor : ) I love all of your creative projects! I think I am going to try this one. I bought an old home and when I closed on the house the realtor turned over a huge key ring of skeleton keys! We have since replaced the doors, but I have saved all the fabulous keys. This project is perfect for them! Thanks for the great idea!
I love the framing idea and will have to try it with the keys that I have left. I had lots of keys from my husbands grandpa so I decorated a trinket box with them. See what you think:
http://rustic-crafts.com/?p=105
My mom did something very similar to this decades ago.
She used a more ornate frame and put the keys on red velvet. The keys were from my grandmother’s house after she passed away. Nice memories.
I love your blog. I was thinking about what to do with some skeleton keys and came across it! I may snag this idea. Saving it in Evernote for sure. Thanks for the tutorial!!
WOW!! My son was in the Secret Garden at a local playhouse. We have the large skeleton key that was used in the play. It’s been waiting for years for the perfect display…. this is it!!!!
Thanks!!!
Amazing! I have the keys to my Grandmothers house and was looking for a way to honor them! You provided the answer! Thank you!
Just wanted to let you know that your skeleton key piece inspired me to make my own, and I linked to this post on my blog (my post is http://oncekitty-kat.blogspot.com/2012/07/framed-skeleton-keys-and-quick-vase.html if you’re interested in seeing my take on the key art!). I wanted to pin your image to my Pinterest “I made it!” board but your images are all unpinnable 🙁
I LOVE LOVE this idea! After my grandma passed away and we went thru her things, I have a BOWLFUL of skelton keys. I randomly hang some unique ones on hooks I have on shelves or leave in bowls thru out my house. I am going to take some keys and try this project! End result is so chic!
I Loved this idea. Went my grandmother passed recently, we found some interesting items while clean out her house. Some of the items were an old tin photo of her grandparents farm house and the keys that when to the house. I made a beautiful piece using your method. However, I’m finding that the hot glue isn’t holding the keys in place and they keep falling to the bottom of the frame. Is there any other suggestions about how to keep the keys in place?
Have you tried tying them on with a very thin wire?
I honestly LOVE the finished product. I think I’m going to make to smaller frames of them to put in our tiny hall. Thanks for the awesome inspiration and the great tutorial!
P.S. I found your blog through a pin from The Pinning Mamma called 10 More Blogs You Need to See to Find Inspiration for Your Silhouette Cameo. Your going on my quick links!
I have a large collection of old keys and I have always wanted to make this kind of pictures but what I don’t know is how to fix the keys? Is it using glue or some kind of hook?
I don’t want to damage them.