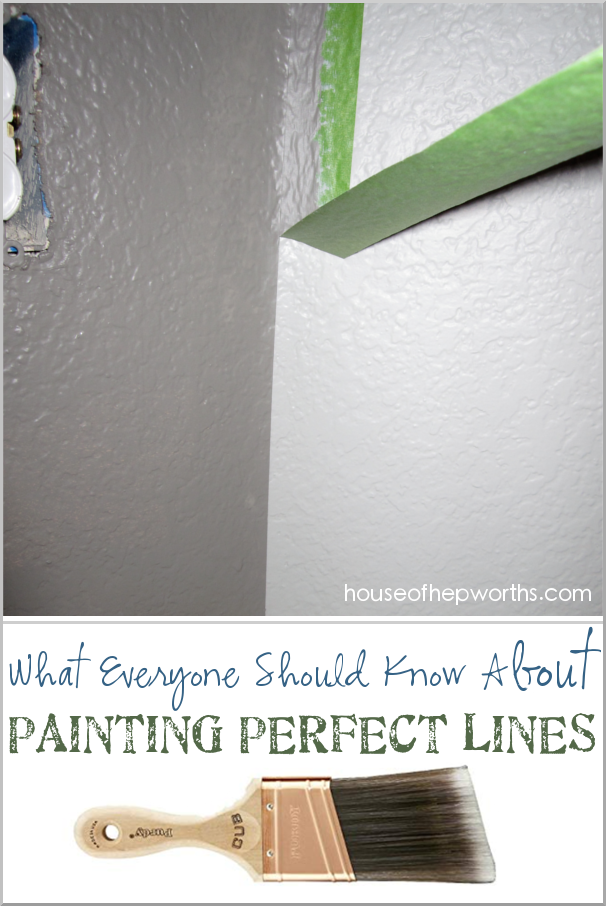
Have you tried painting perfect lines on your wall only to end up with a disaster? No matter what you try, do your painted edges always look bad? I had the same problem until I discovered this trick!
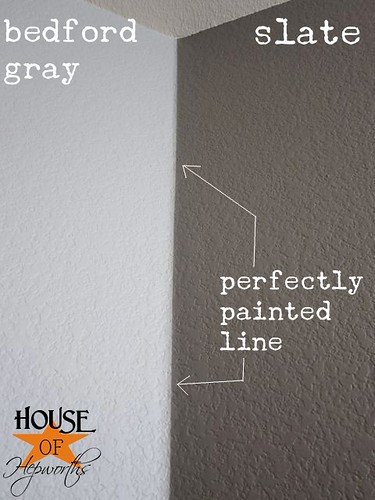
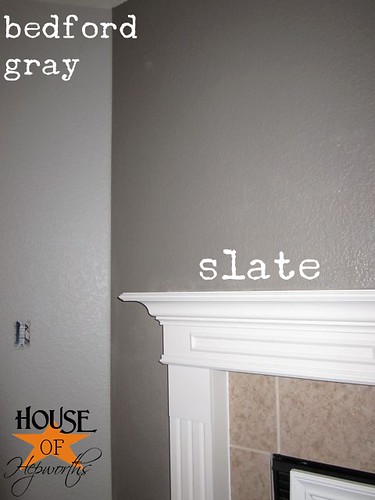
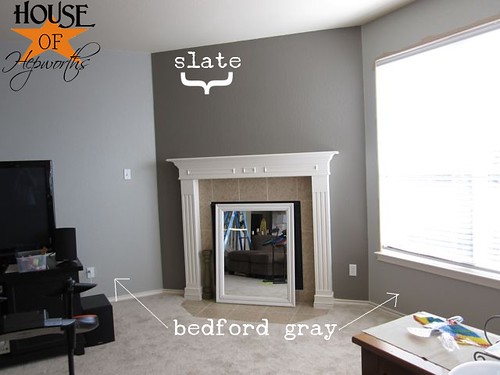
Look at how crisp and great the two different wall tones are around the fireplace. This is what painting perfect lines is all about!

Do you get frustrated when you try to paint two different colors and you can’t get your corners to look straight?
Interior Designers are NOT the only people on this planet that can paint stripes on a wall that look like (and probably cost!) a million bucks! Follow this super easy step-by-step tutorial and you can have million dollar walls as well.
The line where two colors meet can be the most stressful part of painting. Here’s an easy step-by-step tutorial on how to make those crisp perfect lines that everyone longs for.
Before you begin, make sure you have good quality supplies. I recommend these:
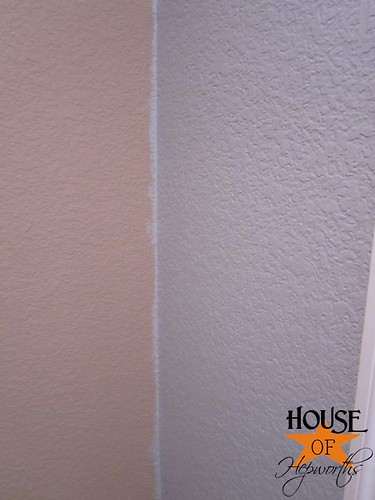
If you try to free-hand your line chances are you’ll end up with a line that isn’t as much of a line as it is a “wave”.
If you tape off your line, you’ll usually end up with your paint bleeding under leaving an ugly mess!
But there really is an easy way to paint those crisp lines. Check it out:
First off, your going to need a good paint brush. Also, you’ll need your paint, preferably in a smaller container. Lugging around the gallon container of paint is no fun.

Okay, now let’s get down to business.
Here is exactly what you need to know for painting perfect lines.
I wasn’t planning on doing a tutorial on this initially, so my pictures are of a few different walls and the colors seem to flip-flop between photos. I apologize in advance if they are confusing.
Step 1:
Take your 1st color and paint OVER the edge that you want a crisp line on. In this photo, my new color is the light gray on the right. The tan on the left is the color I’m painting over.
Step 2:
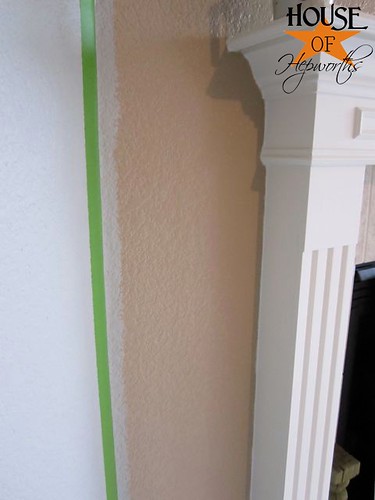
When your gray is dry you are going to tape off where you want your crisp line to be. I prefer to use Multi-purpose Frog Tape. Make sure you put the majority of your tape on top of your 1st color (light gray). You want to tape off your wall so that you can paint your 2nd color edge.
Step 3:
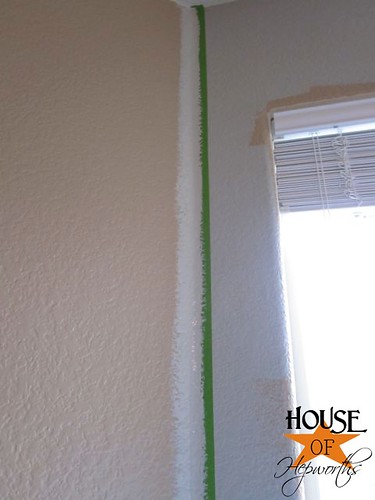
Once you have your wall taped off, you will paint down the edge of the tape with your first color (light gray). This “seals” the tape. Any paint that’s going to bleed under the tape will be this 1st color, which is the same color as your newly painted wall, so when it bleeds, it will blend in. Use my favorite cutting in brush.
Step 4:
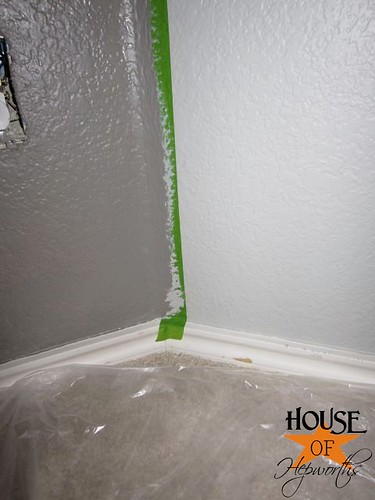
When your 1st color (light gray) on the tape edge dries, it’s time to paint with your 2nd color (I’m using dark gray). Take your paint brush and paint down the same edge over the tape. Allow this coat to dry.
Step 5:
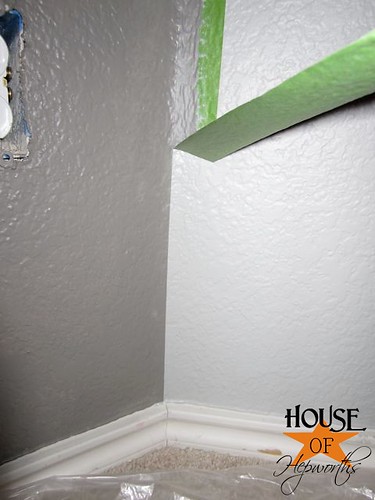
When your 2nd color (dark gray) is mostly dry, it’s time to remove the tape. It should peel up easily, but pull slowly just in case. It’s shocking how crisp that line is, isn’t it!?!
Step 6:
You are now a master at painting perfect lines!
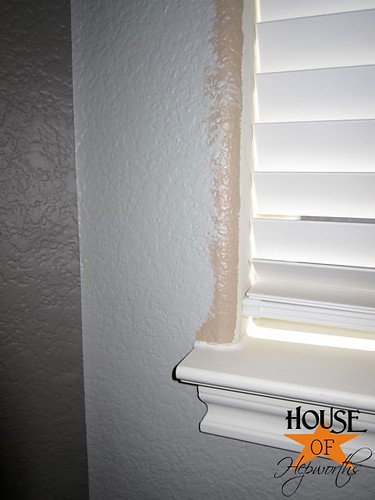
This tutorial is from a wall that is angled only 45 degrees, but this technique works perfectly for stripes on flat walls, corners, angles, and even houses that have walls with rounded corners.
In fact, these lines were painted on rounded corners. This technique works for any wall, and does not discriminate against surface type, corner type, or texture thickness.
Your shopping list:
If you have any rooms (or projects) with lines where you’d painted this way, share your link in my comments section so other readers can check out your post as well!
Here are a few more posts with some great painting tips:
- Stunning brick fireplace makeover – You will not believe the after!
- How to paint a 10-pane glass door black
- My most epically horrendous disaster to date – What NOT to do when painting doors!
- Because you know I’m all about the base – Painting chunky baseboards
- Cutting In tips
- A few random spray painting tips
- What NOT to do when spray painting
- An amazing staircase makeover – from carpet to wood!
Happy painting!

Instagram || Facebook || Pinterest || Youtube
This post contains amazon affiliate links
Thanks for reading! Have a wonderful week!
Wow it is just perfect !!! Amazing how crisp that line is!! Thank you for the tip!
Also, I have a Great New Giveaway from Blydesign! Come and enter!
xoxo
Karena
Art by Karena
You can also do the same technique with the baseboards.
OR you could just put a thin layer of clear caulk over the tape (the thinnest you could possably can)….. Much faster
Just don’t use silicone caulk or you will ruin your paint job as paint does not stick to silicone. And if you have a satin, eggshell, or flat finish, caulk is definitely not the way to go.
Brilliant! I never would have thought to do that. Looks like I am going to have to fix some spots in my house =)
Good luck on finding the owner of this sweet idea. I painted my house using this technique five years ago! I flip-flopped between this and using calking to seal the edge. Using paint for a sealer was better in the end – and cheaper, too!
wow! that is awesome! will keep that in the files for when we paint! thanks for sharing!
I KNOW how to do this, but your tips are dead on! You make it look really easy! Great post!
gail
I saw someone (on HGTV) use matte MODPODGE (SP?). Let it dry and then paint over it. Your idea is WAY better. No need to waste your craft supplies.
That would be good when the wall you are painting is next to a surface like a tub surround, or cabinet, etc.
The sealing part with the first color is brilliant! I wish I knew that when painting my girls’ room’s ceiling. My house is old, and the walls aren’t exactly even, but I bet this would work anyway. Thank you!
I agree and will always remember this for future projects. I remember when I first tried taping a corner or door frame ect, I immediately learned of the paint bleeding under the tape. When I removed tape the line was not straight at all. This technique is smart thinking. Sealing the tape with first color and slightly on to opposite surface of a different. Now the false sense of security I first have in tape alone is now a true security of non bleeding through the paint sealed tape. Fir as the color bleeding is fine as she said because it is the same color bleeding back to itself whick blends. Once dry the next color won’t bleed through the first colored paint when painted over. I’ll teach this sometime to my buddy who is a professional painter, but have not seen him use this technique quite as simply. Similar is his method, but not as simple process of the second color application. He still had to be very meticulously straight in the corner with brush. This method you not need be real precision in second color line and allow some of the second color to go beyond line on to (now) sealed tape and a shield of first color that second color won’t soak or bleed through.
Thats amazing!! I wonder if it will work for my ceiling too?
I’ve never seen that before. It is FANTASTIC! I’m so impressed. Thank you for sharing this!
Very interesting. I have not had a problem with paint bleeding under the tape but prefer your method just to be sure.
May I ask of your method of keeping paint from bleeding or seeping under tape? I found a way after several experimental ways. It is not as simple as the posting method nor as consistant successful perfectly fine and professional look if I didn’t do it just right. Slower also. But hearing your way of preventing bleeding through will be interesting to know and possibly utilize your skill. Thank You
If you paint the original color over the tape, then allow it to dry, then paint your new color, it will not bleed.
When pouring your paint into a smaller container – use a soup-bowl… the ones with a loopy handle on the side, they look like a large coffee mug. Then it’s REALLY easy to carry around with you – only one hand, or 2 fingers, required.
super fab tip girl! tfs! painting this week so i am sure to use it on the accent wall! hugs!
Love it!
Now what is your tip for painting 2 colors on outer corners (is that what they are called? where the corner points out, not in) when 2 colors meet? That is there I have a super hard time.
I’ve used the same method and it works well also. To get a nice straight line, I use a laser level pointed where I want to put my tape line. That way I can tape a straight line.
I’m a painter. You do the same thing when you are painting an outside edge/corner.
Same thing will work for outside corners; don’t let the brush drag in such that it would lift the tape. Just brush across so it smooths DOWN the tape (common sense)
FABULOUS tip! I mean, seriously FABULOUS! I never would have come up with this! Thank so much for posting!
Love it! Thank you for showing how!
i cant say it enough i just love how the two shades of gray accent each other… I just might have to dive in and paint the walls in my dinning/kitchen area that I have been putting off… oh and i checked out baseboards in Home Depot yesterday.. it was casing but still looked good AND was cheaper. I just might get those baseboards up one of these days!
You just changed my life! I just moved into a house that has to be completely repainted (I’m talking every single room!). I love accent walls so this would be perfect! Thank you!!!!
Fantastic! I think I like this idea better than using caulk of spackle to fill the edge, because maybe you don’t have to work as quickly to get the tape peeled?
~Amanda
This is fantastic! Thanks for sharing. I’m linking it to my blog so I’ll be able to remember this next time I’m painting a wall. 🙂
What a FABULOUS idea!!!! I wish I had known about this when I painted my stripes. I have uneven nonsense that drives me bonkers!
Wow!! That is so cool!! I am going to save this for sure!! Thanks
Hugs
SueAnn
New houses all have that ‘textured’ wall surface…so hard to get a crisp edge!!! That’s so much easier (and faster) than using a 1/4″ brush to ‘touch up’ the seams….saved this post for the future!! Thanks!!
Great tips! Love the colors also. I have just found your blog and have been having fun reading over your posts.Great information, look forward to more!
Awesome! So what are your tips for getting a clean line on the ceiling (when we aren’t painting the ceiling)?! I think I’m ready to tackle the livingroom with this technique – but the ceiling lines are worrying me!
This is fantastic! I love the colors you chose!
OMG!! You did it!! Did you paint the corners this way? I think you said you did… I am totally going to go over my rounded corners and make them have the line down the center.
P.S. I am working on framing out my daughters rounded window “sill.” I will email you pictures once it’s done!
That’s awesome and so simple! Yes! add that to my good idea list!
Thanks for this awesome tutorial! Wish I would have found this before I painted my living room & kitchen a few months back! Would have saved me some major time!!
Much easier than any attempt at a steady hand! I’m loving the grays too, gray is my favorite color! xoxo
You make it look easy to do such work. Thank you for your post. Although I have problems with color combinations.
Hi! Thanks for linking this post to last week Sunday Parade! We hope you will link the parade and link up again this week!
Great tuturial!! Seriously, this is great advice for new homeowners or homeowners who are new at DIY!! You should submit this to ehow!! Great!!
Lindsay @ A Design Story
Thanks for the tutorial! I always struggle to get a nice crisp clean line.
I absolutely love your blog! I discovered it through Thrifty Decor Chick! (Congrats on the awesome review she gave you!) I’m new to this blogging world and am really enjoying sharing and learning! I was so shocked to see your blog on the perfect painted line! I recently published one myself. After reading yours I realize there is so much I have yet to learn!
http://ourhousestory.blogspot.com/2011/03/fine-line.html
Just gave this a try on the bullnose corner of my dining room ceiling that transitions into the vaulted living room. Never in my life have I seen such a perfect line! So glad I read this before attempting to paint and touch-up. Thank you!
Wow! That is amazing!!! It looks beautiful!!
Beautifully paint colors. This is one of the best tutes I’ve seen on how to paint a crisp line. Thank you!
WOW! What a fantastic tutorial and it makes perfect sense, although I never would have thought of it!! I LOVE this and have it bookmarked for future use!!
THANK YOU!!!
Thank you sooooo much! I have nearly the same colors and have been going crazy with the bleed through of dark on to light!! If I could reach through this computer I would kiss you!! Again thank you
Thanks for the instructions! It looks so awesome!
Great technique!! Thank you for explaining this. My new house needs a lot of this done to it and I was scared of those lines. Now, thanks to you, I’ll be able to tackle these walls.
Planning to use the paint trick tomorrow….great idea! I have a Wooster stub handled angled brush that I love. The handle is rubber so it is very comfortable in your hand and feels like you have a lot more control of the brush. Thanks for the tip.
Love it! What brand of paint did you use, I really love the Bedofrd Grey!
Wow !! That’s amazing. Needed that trick quite a few times.. will do next time. Thanks for sharing.
Blimey. I wish I would have known this little trick before I painted my whole bedroom this week! Tomorrow will be a big day of touch-ups and crisp line attempts!
Never occurred to me to do it this way!–but I love it! Thanks for the tutorial.
Ok, I love this, but if my tape sits too long my paint peels off like how dried glue peels off a kid’s hands. So, is there a tip to avoid that?
That is freaking AWESOME! I am pretty dang good at painting the line freestyle, but heavy texture kicks my A$$! Can’t wait to try this out. It makes PERFECT sense though! Thanks!
This is like so way fantastic! Now, PLEASE tell me how to get a clean line on the ceiling (when you’re not painting the ceiling – just the wall. I need help with that! My ceiling lines look like a 3 year old painted them.
This is so helpful! Thanks!!! 🙂
http://munchtalk.blogspot.com/
This is BRILLIANT!!!! I have never had my edges turn out so perfectly wonderful! Thanks so much! Ran across you on Pintrest again. 🙂
I just bought paint for my living room and am SO excited to put this technique into practice. Can you offer any suggestions in a sharp line if I’m only painting the walls and not the ceiling or woodwork? I’ve tried those special pads and also sharp angled brushes but still can’t get a sharp line without it looking like I was a little tipsy while painting!
This is brilliant! The first floor of our house is almost completely without wood frames around the doors, which I assume is why all the rooms were painted ivory by the prior owner. We’re planning to paint all our rooms different colors this summer and I was dreading the transition from room to room–not anymore! This is also a great help to decorative painters.
Thank you thank you!!! I thought that my problem was that I just wasn’t good enough at the taping or something. I’m so glad to know that I’m not incompetent, I was just doing it wrong! 😀
Thank you so much! The last time I painted the nursery, I tried getting crisp lines with tape, and I was bummed that it bled. Now I need to repaint the nursery and I know exactly how to do it! 🙂
Now if you’ll need to let us know if you ever find any tips about not getting paint on the woodwork. I tape off my baseboards and windowsills, but my paint still likes to bleed through onto them. 🙁
Thank you!!! Found the link on Pinterest and studied it before we painted one wall in our house deep crimson. I used your trick on the edges with the other walls (camel), the baseboards and window trim (white) and ceiling (also white). Never had such fabulous lines ever!
🙂
I did believe what you wrote because it makes sense but …. still a little doubt …
It sounded so easy, so logical, so, so … that i thought, come on, how come everyone doesn’t know about that ??
I have experienced the trick today while painting my daughter’s bedroom. Youhouuuuuuuuuuu !!! The line is perfect !
Thank you so much !
This is brilliant, I am definetely going to try this next time I paint.
Thank you
I always have trouble with lines. This technique worked perfectly. The results were very professional. Thank you!
Do you ever have a problem with your paint “ripping” when you pull off the tape? Maybe I am a “special” painter, but that always seems to happen to me know matter how I do it. Any idea what I am doing wrong?
I have this problem too. If i let the paint dry when I remove the tape it rips the paint. Thus when I paint along an edge (such as molding) I use a flat sharp edge to divide what I’m painting and what I’m not. I then I have to keep wiping that off on my painting shirt.
@Nicole: You have to REALLY let it dry. There’s one “catch” to this method…you really, really have to wait. I even went on a camping trip in between steps just to make sure I wouldn’t be tempted to rip the tape off. It has to be TOTALLY dry. I let it go for four days. But what’s four days when you have perfection!
this is awesome tutorial.
i used your tips in painting my bathroom today.
i hope you don’t mind if i borrowed one of your photos.
i linked back to your blog.
thanks so much!!!!
Can I just say…WHERE WERE YOU…when I was painting a ton of walls in my upstairs (mind you I have a lot more to do)…the head ache of painting stripes in my daughter’s room, and masking off separate rooms?? I spent so many strenuous hours of touch ups to get the “perfect” line…
Thank you, thank you…for this tutorial!!
I had gotten close to figuring this out on my own– what I was missing was to start with the other paint color when sealing the painters tape. Won’t ever forget it now!
This is my problem too. I used the blue tape, maybe I should use the green frog tape. I pulled the tape and part of my paint either from the wall or the ceiling came along in places. Otherwise the paint line was nice and clean. I guess I should have made the effort using a small knife to cut the paint from the tape like I’ve seen in places.
My paint says to wait 3 hours before appling a second coat. If I wait that long will it still give me that nice line?
If you are cutting in at the corner with a brush just make sure it covers well enough in one coat. When they say “…wait three hours before applying second coat..” they are talking about rolling the major area enclosed by the cut corners, trim, NOT the cut portions with a brush.
I posted this on pinterest a while ago and finally got to use it yesterday. It was amazing! The lines were so perfect. I have lots of colors on the walls in my house and I just counted… there are 19 corners that have two different colors. And, both of my kids at one time or another have had stripes in their rooms. I really really wish I would have known about this trick before I did all those corners free-hand or with tape.
I just shared your blog on facebook too!
Thanks!
Oh, this technique is really amazing. Why did I not think of that? When I finished painting our living room, I thought I did a great job but after I saw this, I am thinking of doing it again. Good thing there were a lot of excess paints. Thank you for this post. This is really wonderful.
Just finished painting my son’s accent wall in his room. It looks incredible!!! Thank you for the tip!!!
I saw this years ago but could not remember exactly how to do it. Thanks for posting so I too can have perfect lines!
What a crazy, crazy good tip! I have a 14 room house to paint; this falls right on the spot!! Thanks a million!
Many have textured, not smooth, walls to deal with. This is really the only way to get a straight line. Great tutorial, thanks for putting it out there in such detail!
also, if you are not painting 2 colors, or just painting one wall and dont have the other color, you can use a clear paint – does the same sealing trick, That also works for stenciling, too.
This is a great tip! I hope you don’t mind that I linked back to you from my blog. I wanted to make sure you got credit for something I would never have thought of on my own. 🙂
Thank you thank you!!! AND, this is the first how-to for painting walls that had TEXTURED walls!! ( These bumpy walls have been my undoing…) You are a genius, and I credit YOU for saving my sanity!)
So glad you liked the post and that I can help.
Thanks!! I’ve done lots of painting in my time but just experimenting with different colored walls and stripes! This is great help!!
This is great! I used clear paintable calk when I did mine. It worked well, but this looks much easier.
OMG!!! This is as someone else said…BRILLIANT! I can’t wait to try it on my new house I just moved into! I was dreading having to do it, but now I’m psyched! Thanks for sharing..!
ModPodge also works great for sealing off painter’s tape and creating perfect lines. It’s perfect if you are only adding designs or stripes to the existing color.
This blog is nice. Giving tips to the people. This is great.
So clever!
I am pinning 😉
I got to hand it to you, this is pretty genius. So simple, yet such a big difference. Have you tried this when painting trim & walls? I think this might be the answer I’ve been looking for! Thanks!
Confusing
I am curious as to how you managed to paint on textured walls so well. Are there particular brushes or rollers that you prefer to use because I have had a difficult time with my textured walls?!
When you buy your rollers just buy the ones that have a thicker nap that say “for textured walls” on them. Also, the better quality paint you use, the easier it goes on the wall.
You are a wonderful person. II wish I had thought of this. My chocolate brown/turquoise lines are gorgeous and I have you to thank, since I tried it three times and got the ugly “wave,” even though I’m a very steady hand.
Bless you!!! One thing I would say–it makes more sense to do Step 1 (overlap painting) with the LIGHTER of the two colors. That way, when you come up later, it’s easier to cover. I thought of that. But THANK YOU for your wonderful tip and instructions. I do not believe that I’ve been doing it wrong all these years.
Hooray for you!
Good tip! Try to use the lighter color first. It’s easier to cover a lighter color with dark paint than vice versa.
The painting consideration in this blog was nice and I really like reading this post, keep it up.
Thank you so much for this tip! I just painted two dark stripes on either side of my mantle and it looks great! Even the professionals who are here doing work were impressed!
I am so thrilled to find this tip! I’m getting ready to paint red meeting white. I can’t wait to see the results.
Confused. What if I am only painting one wall?
I am amazed at the amount of people that didn’t know that they can use tape to mask an area for painting. It’s a good thing you posted this tip.
Step by step this technique works perfectly ! …. I’m running into one problem though. How do we maintain this to mulitple coats? Its ideal to remove the tape once the first coat of the new color dries… after which , the second coat , of the new color, cannot be applied in the same sequence?
I was wondering how you maintain this technique while doing multiple coats? Once the tape is removed while the paint is almost dry, what do you do for the next coats considering that you can’t use the first color to overlap the second color in order to seal the tape?
Do ALL your coats on color #1 first. When it’s dry, add the tape, paint your color #1 over the edge and let dry, then do all your coats of color #2. After all your coats are done, then take the tape off.
Well I just found what I was looking for here and I am so glad that info helped us.Thnks.
You can also use a gel medium over the tape for a good seal. Your way, of course, is better as you don’t need to buy the medium if you don’t have it.
Thank you so much for the information! I did a search for tips on this and it led me to your site. I had never heard of doing this. It worked beautifully! And I did stand back and revel in my masterpiece!!!
Thanks again!
I tried this just now in my master bath which has a 1980’s plant ledge running along 2 walls. The walls are a light tan, and I wanted sage green on the out-facing surface of the ledges. This trick worked about 95% better than trying to tape, paint, and touch-up the edges and corners. I had a couple of spots to dab at with a make-up wedge, but that was it! I prefer Frog Tape to the blue stuff, but it looks like there’s been a run on it everyplace around here, so I made do with blue tape. I think that and the fact that my walls are textured, makes it difficult to get a perfect seal along the edge of the tape. But my paint job looks like a million bucks!
This tip is confusing me, I think the changes in color mixes me up, but I am going to try it going step by step, I will post a link to before and after pics, thanks, love your blog!
I am going to paint my living room and this advice with the lines is amazing! Thank you so much for sharing! Regards! Bethnal Green Carpet Cleaners Ltd.
Thank you for sharing. I’m definitely going to give this a try.
I have a problem- we painted the two adjacent walls with two different colors but the problem is that the corner is totally uneven, there is no straight crisp line in the wall itself. What can we do at this point to hide this wall imperfection? Should we color little bit on tje lighter wall with the darker color to hide the corner by covering it with the same color? Or what else could we do? Please advise! Thank you!
Great technique – I’ve been having trouble with bleeding under tape. But this post would be so much easier to understand if you’d use the same area for each photo. You keep switching back/forth between left and right for which is the old and which is the new.
So thankful for your shared information. I have been hesitant to painting an accent wall simply because the disastrous results from my first try. Now I’m excited to see how my living room will turn out!
Great tips (once I got my head around the pictures). Any tips for painting a clean edge up to the coving? I have a dark grey feature wall and white coving at the ceiling level.
I have been doing my own painting for literally years and have done everything from stripes to colour blocks and you had me totally confused when looking at the instructions at first so am glad that you explained that the photos are not necessarily of the same space. Otherwise …. great tutorial and right on!
I want to congratulate the tips are great addition to help us in our residential and commercial painting services.
Thank you so much for this excellent reference page!
Genius!
What do I do if wall needs multiple coats of colour ? Renew the tape for each coat of leave it on ?
Tried it, but it didn’t work. Used different tapes but the second color bled through. A lot of time for nothing. This does not work with textured walls and ceilings.
Thanks for sharing these tips, a very helpful one.
Thank you so much, tried this today, worked perfectly.
You have just saved my sanity. I have been losing my mind with my laundry room. My baseboards are bright white and the colored paint on the walls kept bleeding on to the white baseboard.. As soon as I saw your post, I tried it and TA-DA it worked. THANK YOU!
I want to make sure I understand correctly, because I have an entire house to paint, including the ceilings and trim, and I think I confused myself because of the flipped pictures, and I’m a visual learner. lol. So…
1- Paint all the things that will be white (trim and ceilings). When I paint those, purposely extend the paint onto the walls (that will later be gray.) So I don’t have to be careful at all, right?
Let it dry.
2- Tape the edges of the walls, sticking the tape over the white trim.
3- Paint the side of the tape white, also painting about an inch of white paint on the walls. Let it dry. This is the sealing step that makes this so amazing, right?
4-Paint the walls gray, all the way to the edge, including over part of the tape. Let it dry.
5- Remove the tape.
If there’s any places I don’t want any paint, like the cabinets, skip step 1, put tape on the edge of the cabinet and seal the edge with clear paint or modge podge. Then paint with the gray.
Did I get it right? This is the first house I’ve had to renovate. Just a little nervous!
It was a pleasure to read these tips and I appreciate the effort you’ve put into it. I’m looking forward to reading more of your excellent blog posts in the future.
Thanks so much for taking the time to write all your knowledge down for the rest of us.